UNITY UI REMOTE INPUT

Written by Pierce McBride
Throughout many VR (virtual reality) games and experiences, it’s sometimes necessary to have the player interact with a UI (user interface). In Unity, these are commonly world-space canvases where the player usually has some type of laser pointer, or they can directly touch the UI with their virtual hands. Like me, you may have in the past wanted to implement a system and ran into the problem of how can we determine what UI elements the player is pointing at, and how can they interact with those elements? This article will be a bit technical and assumes some intermediate knowledge of C#. I’ll also say now that the code in this article is heavily based on the XR Interaction Toolkit provided by Unity. I’ll point out where I took code from that package as it comes up, but the intent is for this code to work entirely independently from any specific hardware. If you want to interact with world-space UI with a world-space pointer and you know a little C#, read on.
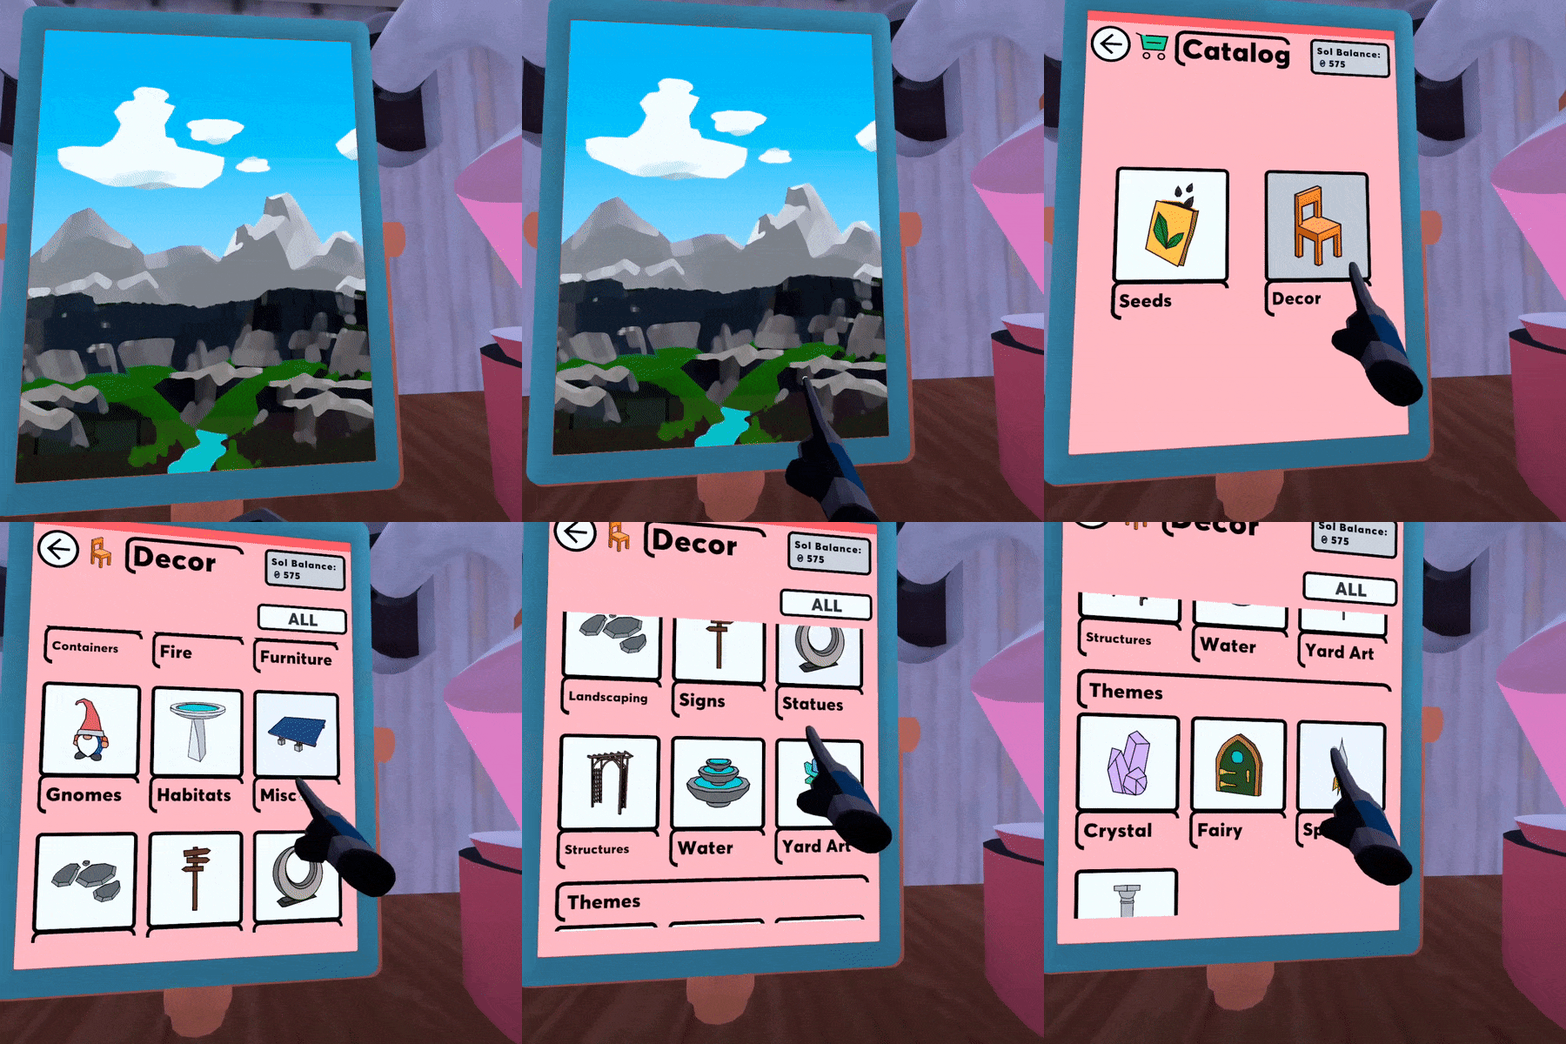
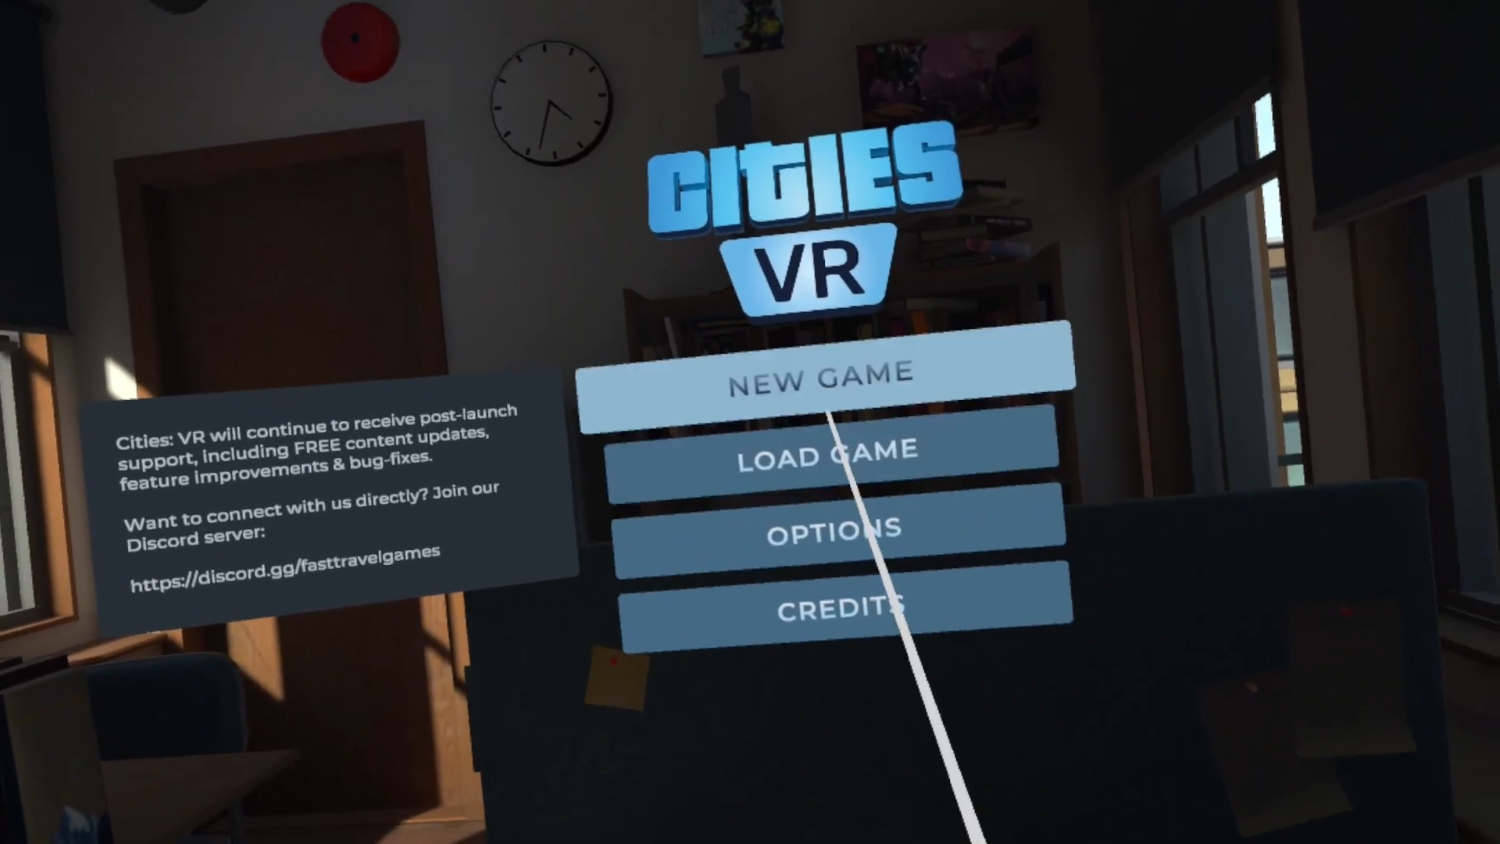
Figure 1 – Cities VR (Fast Travel Games, 2022)
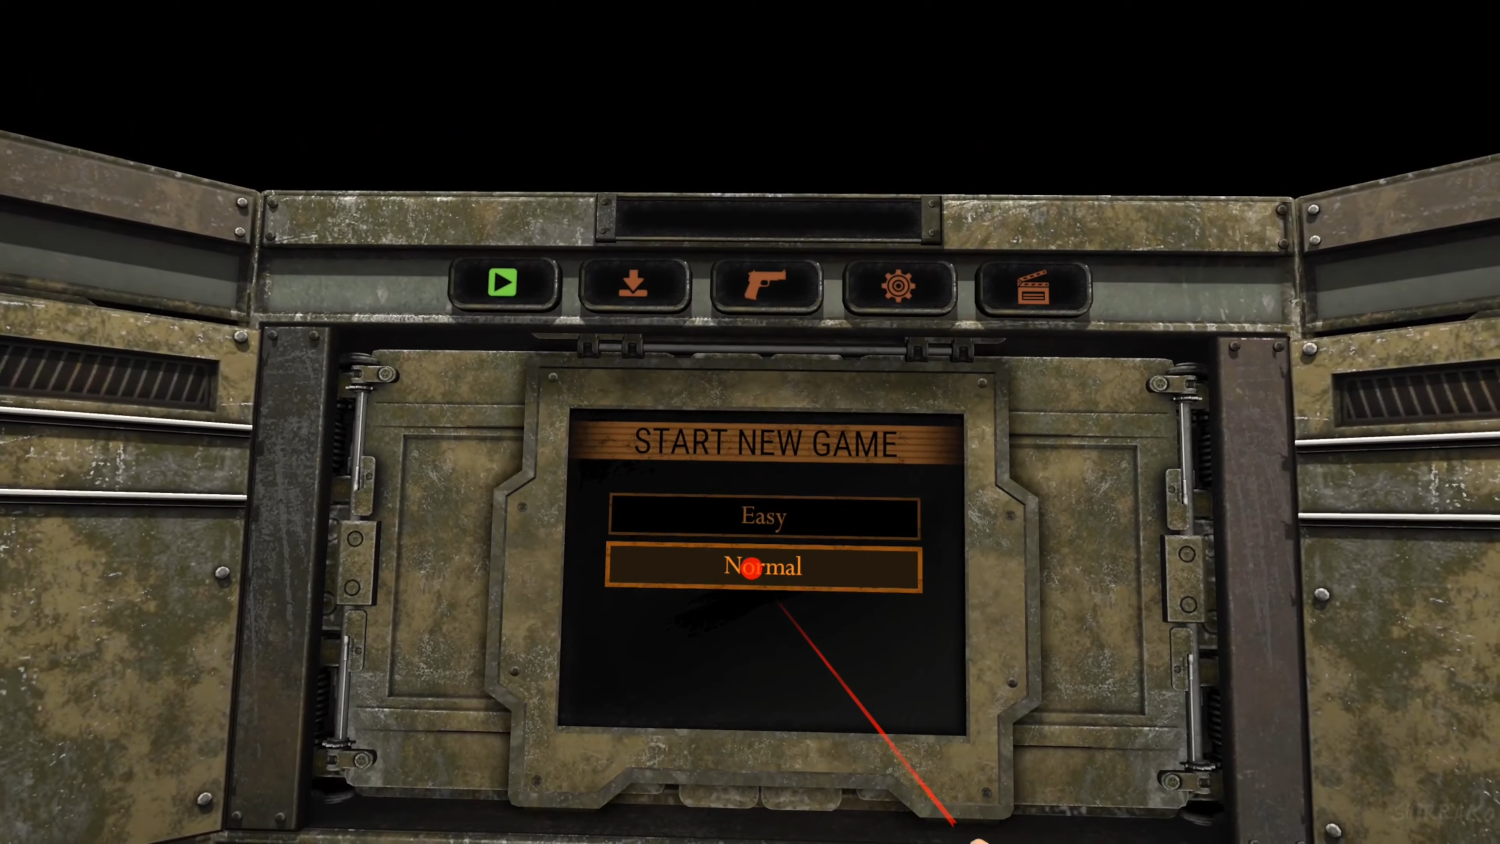
Figure 2 – Resident Evil 4 VR (Armature Studio, 2021)
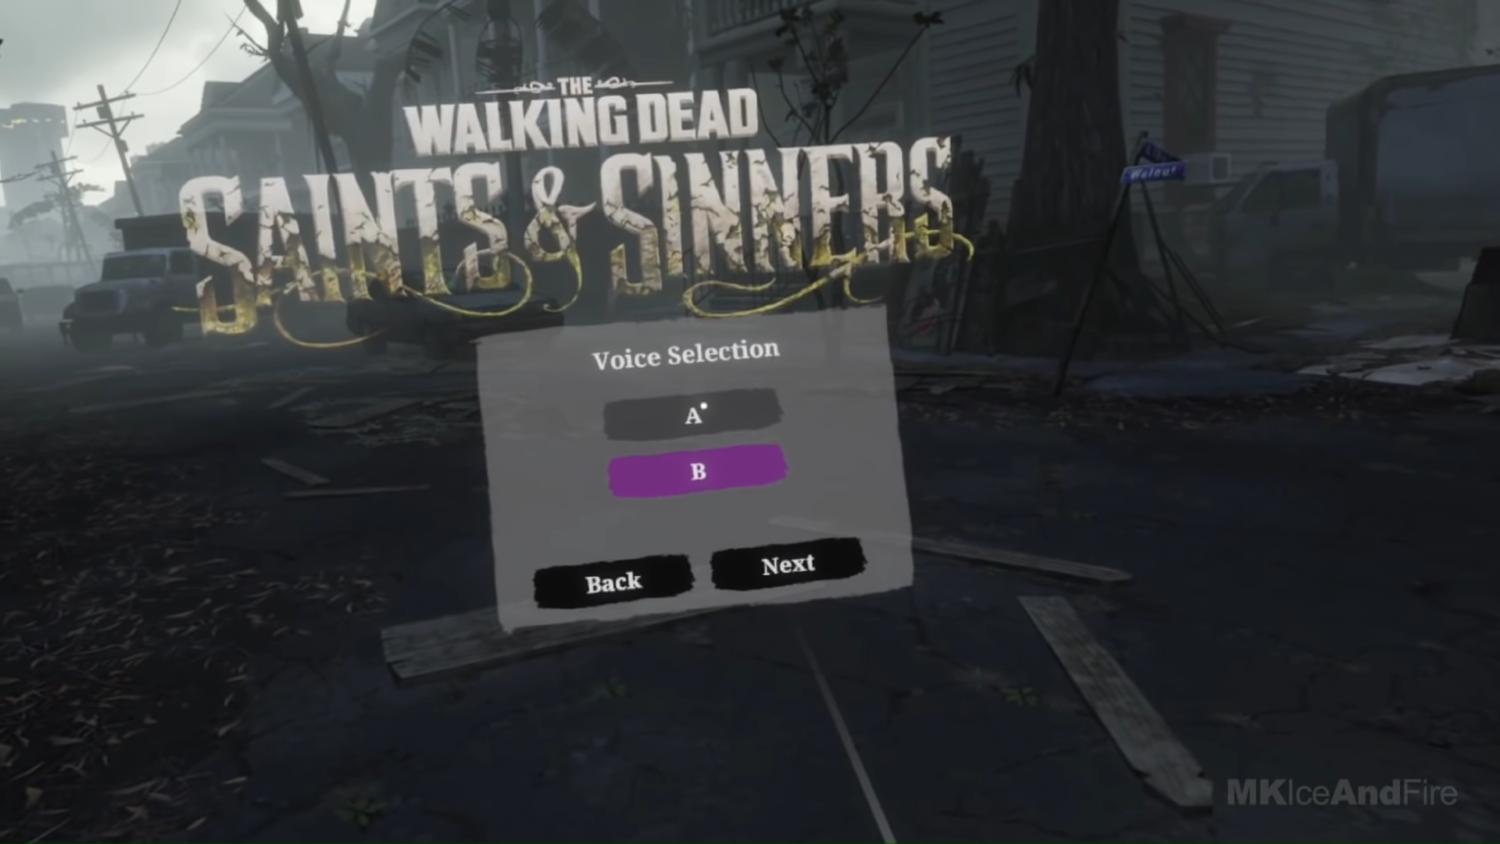
Figure 3 – The Walking Dead: Saints and Sinners (Skydance Interactive, 2020)
Physics.Raycast to find out what the player is pointing at,” and unfortunately, you would be wrong like I was. That’s a little glib, but in essence, there are two problems with that approach:
- Unity uses a combination of the EventSystem, GraphicsRaycasters, and screen positions to determine UI input, so by default,
Physics.Raycastswould entirely miss the UI with its default configuration.
- Even if you attach colliders and find the GameObject hit with a UI component, you’d need to replicate a lot of code that Unity provides for free. Pointers don’t just click whatever component they’re over; they can also drag and scroll.
In order to explain the former problem, it’s best to make sure we both understand how the existing EventSystem works. By default, when a player moves a pointer (like a mouse) around or presses some input that we have mapped to UI input, like select or move, Unity picks up this input from an InputModule component attached to the same GameObject as the EventSystem. This is, by default, either the Standalone Input Module or the Input System UI Input Module. Both work the same way, but they use different input APIs.
Each frame, the EventSystem calls a method in the input module named Process(). In the standard implementations, the input module gets a reference to all enabled BaseRaycaster components from a RaycasterManager static class. By default, these are GraphicsRaycastersfor most games. For each of those raycasters, the input module called Raycast(PointerEventData eventData, List<RaycastResult> resultAppendList) takes a PointerEventData object and a list to append new graphics to. The raycaster sorts all the graphic’s objects on its canvas by a hierarchy that lines up with a raycast from the pointer screen position to the canvas and appends those graphics objects to the list. The input module then takes that list and processes any events like selecting, dragging, etc.
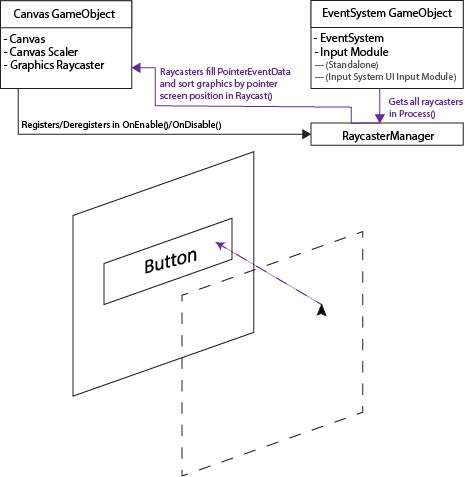
Figure 4 Event System Explanation Diagram
So how will these objects fit together? Instead of the process described above, we’ll replace the input module with a RemoteInputModule, each raycaster with a RemoteInputRaycaster, create a new kind of pointer data called RemoteInputPointerData, and finally make an interface for an IRemoteInputProvider. You’ll construct the interface yourself to fit the needs of your project, and its job will be to register itself with the input module, update a cached copy of RemoteInputPointerData each frame with its current transform position rotation, and set the Select state which we’ll use to actually select UI elements.
Each time the EventSystem calls Process() on our RemoteInputModule we’ll refer to a collection of registered IRemoteInputProvider and retrieve the corresponding RemoteInputEventData. InputProviderSet is a Hashset for fast lookup and no duplicate items. Lookup is a Dictionary so we can easily associate the providers with a cached event data. We cache event data so we can properly process UI interactions that take place over multiple frames, like drags. We also presume that each event data has already been updated with a new position, rotation, and selections state. Again, this is your job as a developer to define how that happens, but the RemoteInput package will come with one out of the box and a sample implementation that uses keyboard input that you can review.
Next, we need all the RemoteInputRaycaster. We could use Unity’s RaycastManager, iterate over it, and call Raycast() on all BaseRaycaster that we can cast to our inherited type, but to me, this sounds slightly less efficient than we want. We aren’t implementing any code that could support normal pointer events from a mouse or touch, so there’s not really any point in iterating over a list that could contain many elements we have to skip. Instead, I added a static HashSet to RemoteInputRaycaster that it registers to on Enable/Disable, just like the normal RaycastManager. But in this case, we can be sure each item is the right type, and we only iterate over items that we can use. We call Raycast(), which creates a new ray from the provider’s given position, rotation, and max length. It sorts all its canvas graphics components just like the regular raycaster.
Last, we take the list that all RemoteInputRaycaster have appended and process UI events. SelectDelta is more critical than SelectDown. Technically our input module only needs to know the delta state because most events are driven when select is pressed or released only. In fact, RemoteInputModule will set the value of SelectDelta to NoChange after it’s processed each event data. That way, it’s only ever pressed or released for exactly one provider.
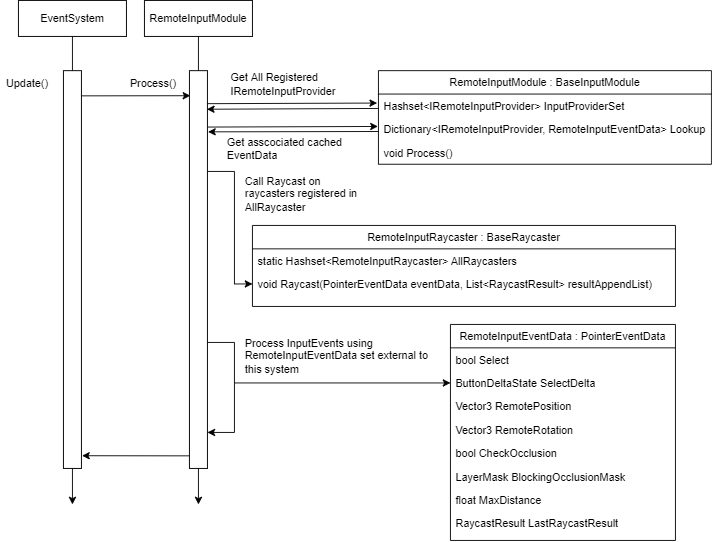
Figure 5 Remote Input Process Event Diagram
For you, the most important code to review would be our RemoteInputSender because you should only need to replace your input module and all GraphicsRaycasters for this to work. Thankfully, beyond implementing the required properties on the interface, the minimum setup is quite simple.
void OnEnable()
{
    ValidateProvider();
    ValidatePresentation();
}
void OnDisable()
{
     _cachedRemoteInputModule?.Deregister(this);
}
void Update()
{
     if (!ValidateProvider())
         return;
     _cachedEventData = _cachedRemoteInputModule.GetRemoteInputEventData(this);
     UpdateLine(_cachedEventData.LastRaycastResult);
     _cachedEventData.UpdateFromRemote();
     SelectDelta = ButtonDeltaState.NoChange;
     if (ValidatePresentation())
        UpdatePresentation();
}RemoteInputModule through the singleton reference EventSystem.current and registering ourselves with SetRegistration(this, true). Because we store registered providers in a Hashset, you can call this each time, and no duplicate entries will be added. Validating our presentation means updating the properties on our LineRenderer if it’s been set in the inspector.bool ValidatePresentation()
{
_lineRenderer = (_lineRenderer != null) ? _lineRenderer : GetComponent <linerenderer>();
if (_lineRenderer == null)
return false;
_lineRenderer.widthMultiplier = _lineWidth;
_lineRenderer.widthCurve = _widthCurve;
_lineRenderer.colorGradient = _gradient;
_lineRenderer.positionCount = _points.Length;
if (_cursorSprite != null &amp;&amp; _cursorMat == null)
{
_cursorMat = new Material(Shader.Find("Sprites/Default"));
_cursorMat.SetTexture("_MainTex", _cursorSprite.texture);
_cursorMat.renderQueue = 4000; // Set renderqueue so it renders above existing UI
// There's a known issue here where this cursor does NOT render above dropdown components.
// it's due to something in how dropdowns create a new canvas and manipulate its sorting order,
// and since we draw our cursor directly to the Graphics API we can't use CPU-based sorting layers
// if you have this issue, I recommend drawing the cursor as an unlit mesh instead
if (_cursorMesh == null)
_cursorMesh = Resources.GetBuiltinResource&lt;Mesh&gt;("Quad.fbx");
}
return true;
}RemoteInputSender will still work if no LineRenderer is added, but if you add one it’ll update it via the properties on the sender each frame. As an extra treat, I also added a simple “cursor” implementation that creates a cached quad, assigns a sprite material to it that uses a provided sprite and aligns it per-frame to the endpoint of the remote input ray. Take note of Resources.GetBuiltinResource("Quad.fbx") . This line gets the same file that’s used if you hit Create -> 3D Object -> Quad and works at runtime because it’s a part of the Resources API. Refer to this link for more details and other strings you can use to find the other built-in resources.
The two most important lines in Update are _cachedEventdata.UpdateFromRemote() and SelectDelta = ButtonDeltaState.NoChange. The first line will automatically set all properties in the event data object based on the properties implemented from the provider interface. As long as you call this method per frame and you write your properties correctly the provider will work. The second resets the SelectDelta property, which is used to determine if the remote provider just pressed or released select. The UI is built around input down and up events, so we need to mimic that behavior and make sure if SelectDelta changes in a frame, it only remains pressed or released for exactly 1 frame.
void UpdateLine(RaycastResult result)
{
_hasHit = result.isValid;
if (result.isValid)
{
_endpoint = result.worldPosition;
// result.worldNormal doesn't work properly, seems to always have the normal face directly up
// instead, we calculate the normal via the inverse of the forward vector on what we hit. Unity UI elements
// by default face away from the user, so we use that assumption to find the true "normal"
// If you use a curved UI canvas this likely will not work
_endpointNormal = result.gameObject.transform.forward * -1;
}
else
{
_endpoint = transform.position + transform.forward * _maxLength;
_endpointNormal = (transform.position - _endpoint).normalized;
}
_points[0] = transform.position;
_points[_points.Length - 1] = _endpoint;
}
void UpdatePresentation()
{
_lineRenderer.enabled = ValidRaycastHit;
if (!ValidRaycastHit)
return;
_lineRenderer.SetPositions(_points);
if (_cursorMesh != null &amp;amp;&amp;amp; _cursorMat != null)
{
_cursorMat.color = _gradient.Evaluate(1);
var matrix = Matrix4x4.TRS(_points[1], Quaternion.Euler(_endpointNormal), Vector3.one * _cursorScale);
Graphics.DrawMesh(_cursorMesh, matrix, _cursorMat, 0);
}
} RemoteInputSender. Because the LastRaycastResult is cached in the event data, we can use it to update our presentation efficiently. In most cases we likely just want to render a line from the provider to the UI that’s being used, so we use an array of Vector3 that’s of length 2 and update the first and last position with the provider position and raycast endpoint that the raycaster updated. There’s an issue currently where the world normal isn’t set properly, and since we use it with the cursor, we set it ourselves with the start and end point instead. When we update presentation, we set the positions of the line renderer, and we draw the cursor if we can. The cursor is drawn directly using the Graphics API, so if there’s no hit, it won’t be drawn and has no additional GameObject or component overhead.
I would encourage you to read the implementation in the repo, but at a high level, the diagrams and explanations above should be enough to use the system I’ve put together. I acknowledge that portions of the code use methods written for Unity’s XR Interaction Toolkit, but I prefer this implementation because it is more flexible and has no additional dependencies. I would expect most developers who need to solve this problem are working in XR, but if you need to use world space UIs and remotes in a non-XR game, this implementation would work just as well.
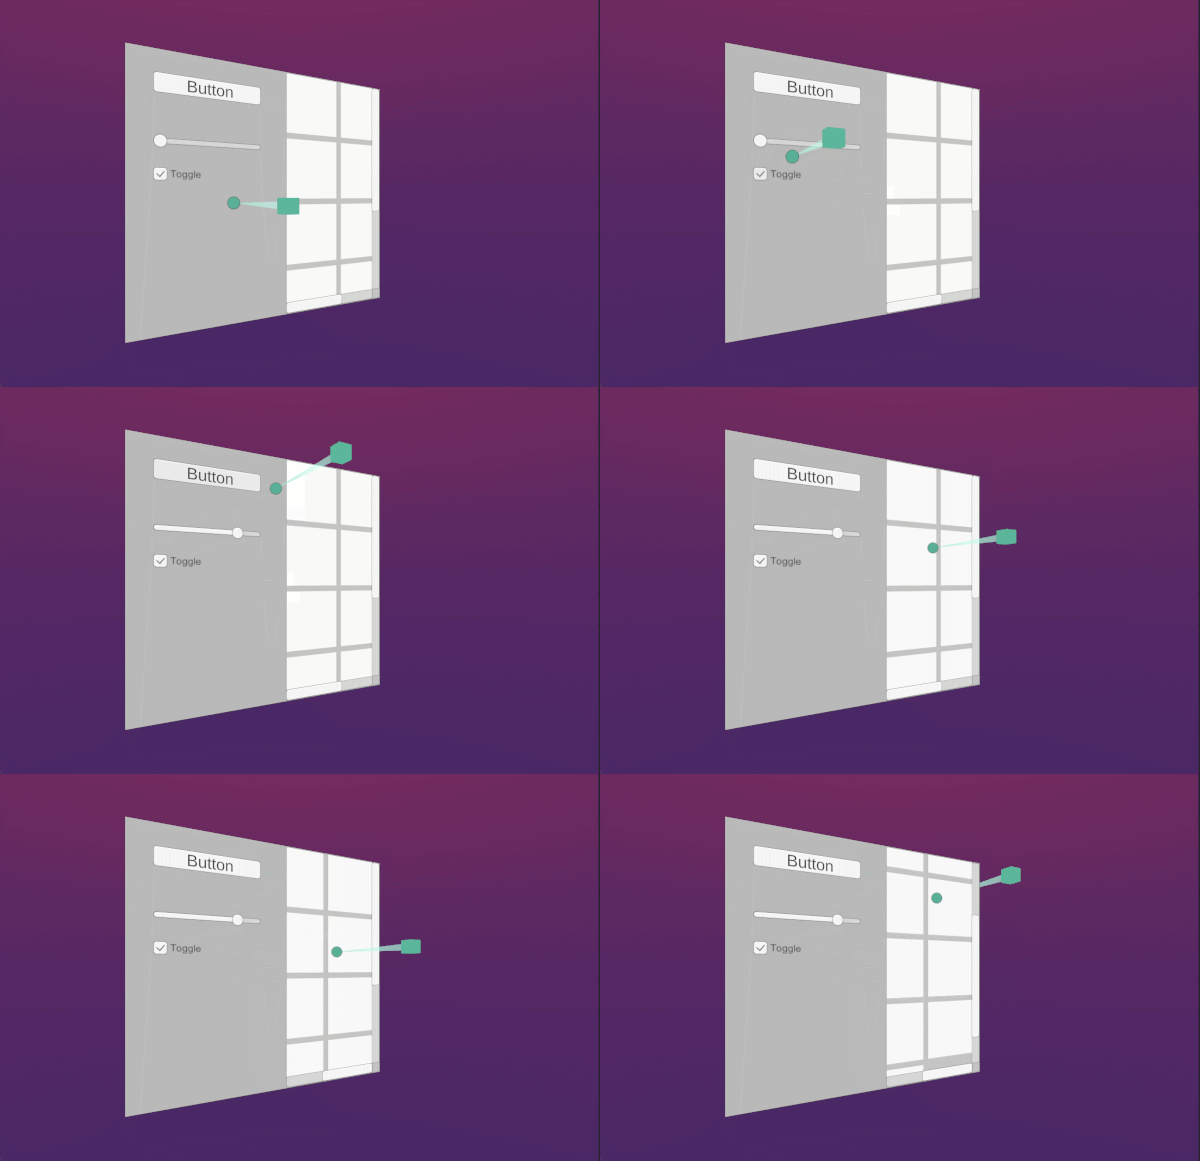
Figure 6 Non-VR Demo
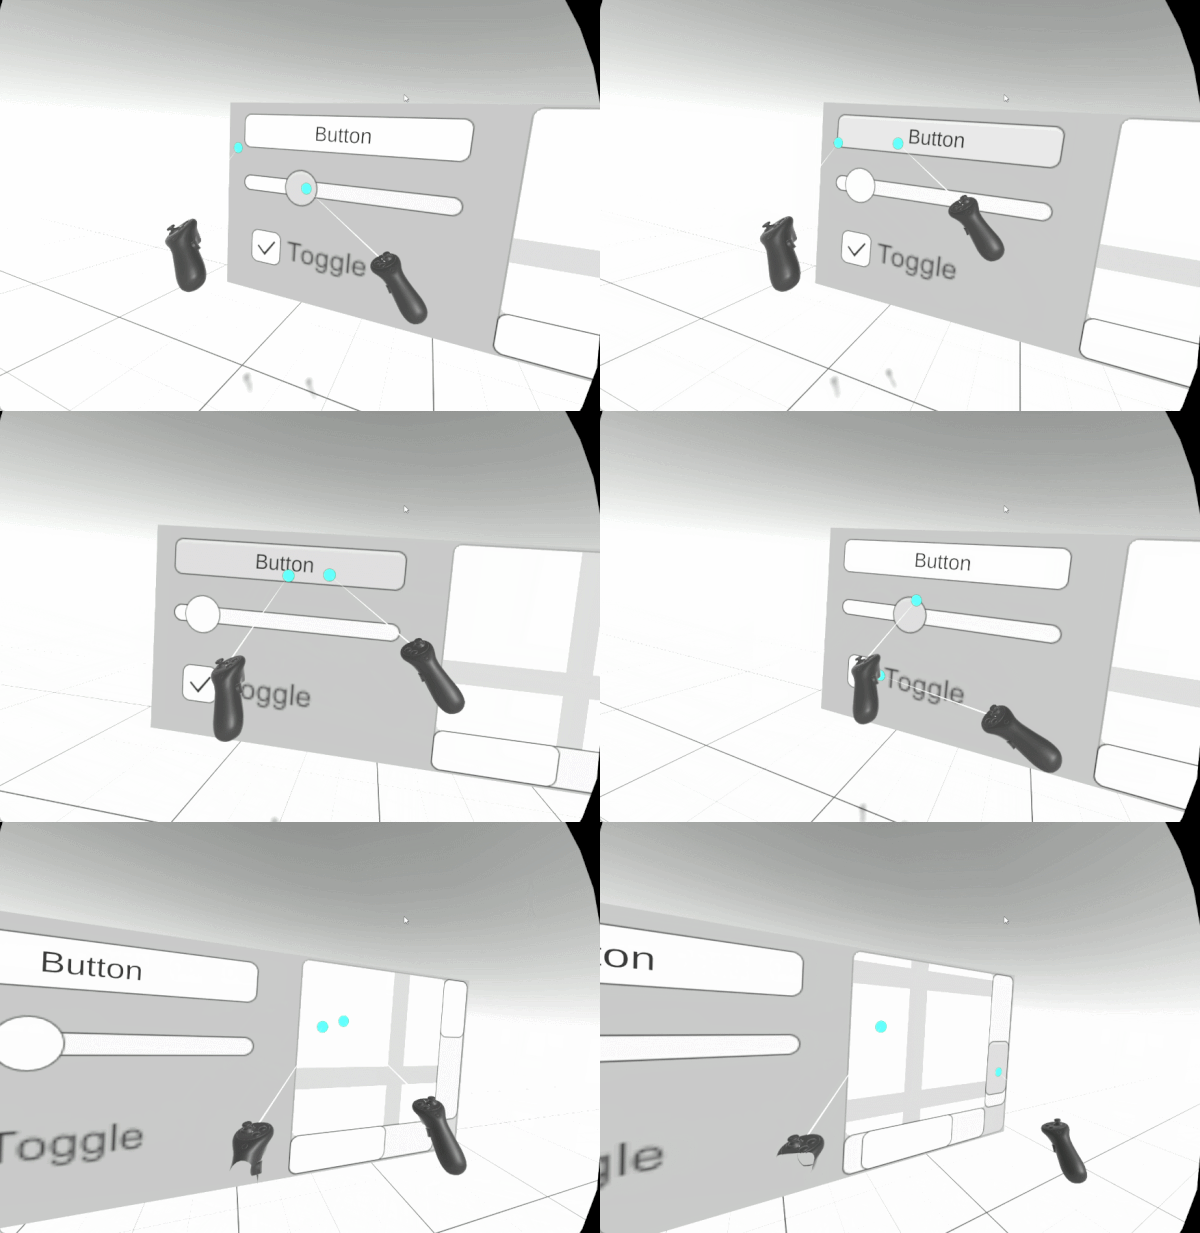
Figure 7 VR Demo
Cheers, and good luck building your game ✌️

Written by Pierce McBride
LOAM SANDBOX POST-LAUNCH ROADMAP

Written by Nick Foster
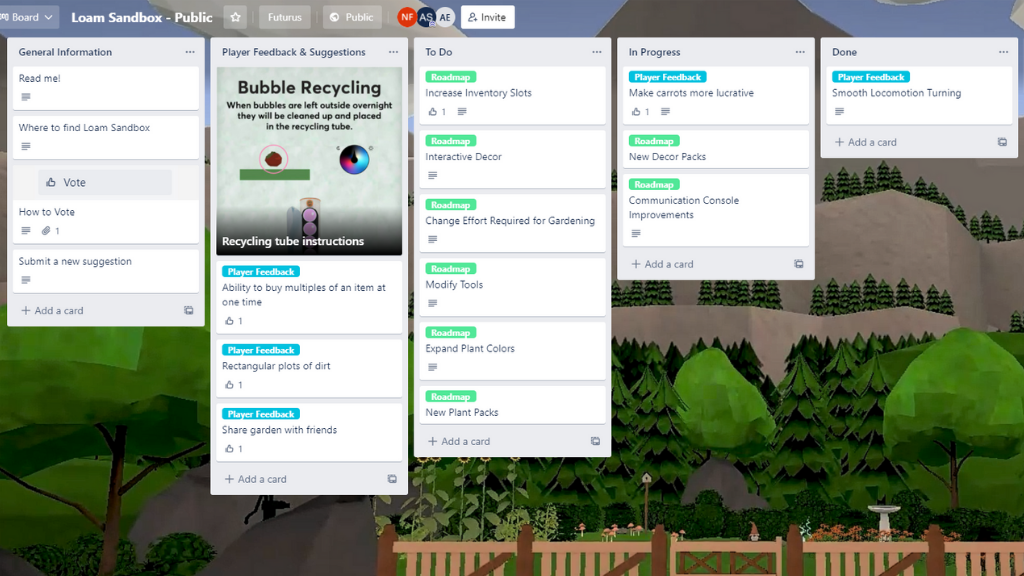


When you share your feedback, suggestions, and bugs with us in Discord, they’ll eventually make their way onto the board’s “Player Feedback & Suggestions” list in the form of a brand-new card. Depending on their priority, these cards will move to the “To Do” list, then to” In Progress,” before finally earning a spot on the board’s “Done” list. As we wrap things up and roll out Loam Sandbox updates, we’ll also share what has changed via our Discord’s #release-updates channel.
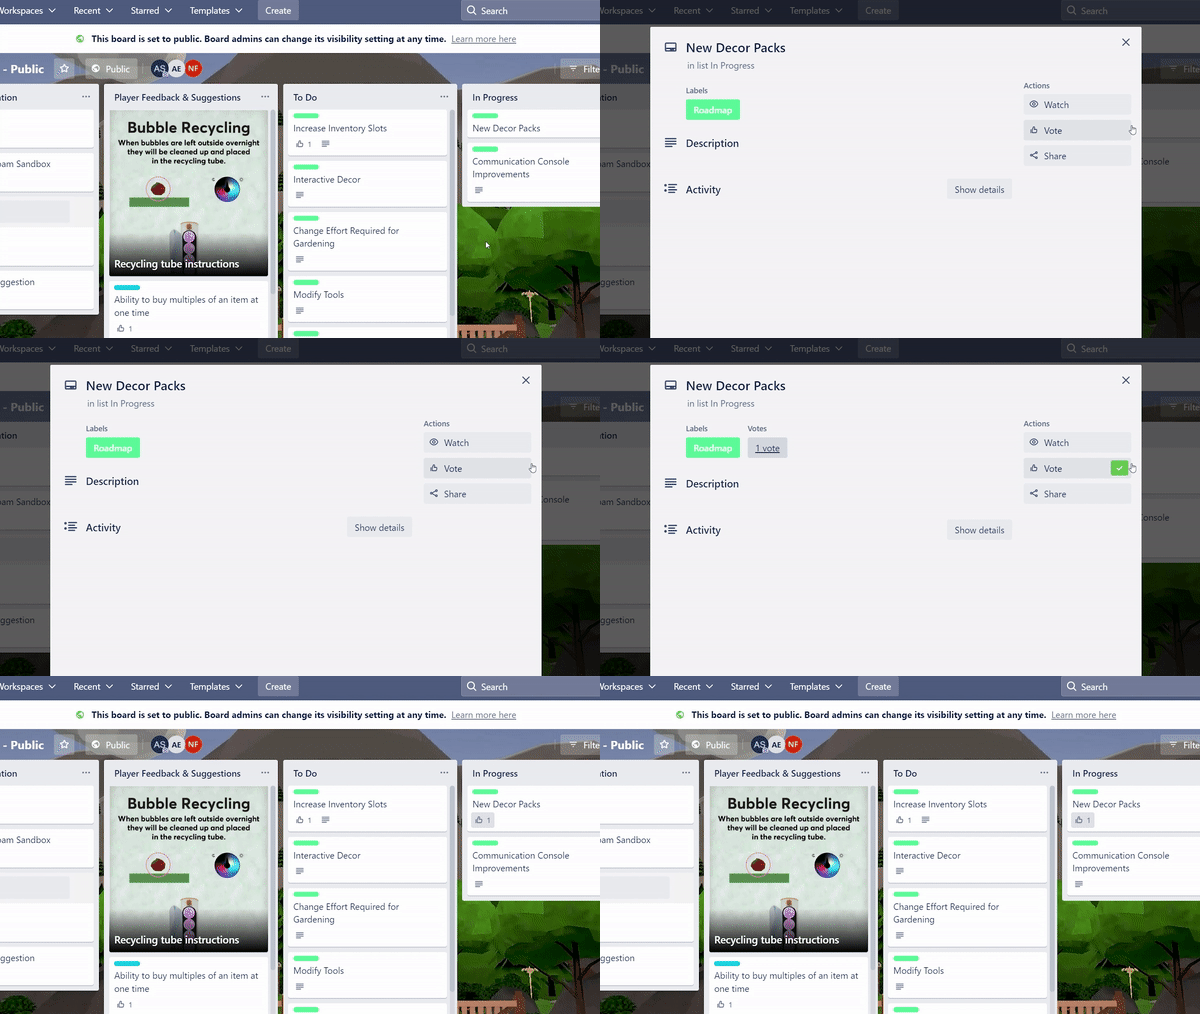
Click here to visit the Trello board and track Loam’s development in real-time.

Written by Nick Foster
LOAM SANDBOX IS OUT NOW ON QUEST APP LAB

Written by Nick Foster
We are proud to officially announce the release of Amebous Labs’ debut title, Loam Sandbox! Our early access garden sim game aims to provide players with a comforting, creative virtual reality experience.
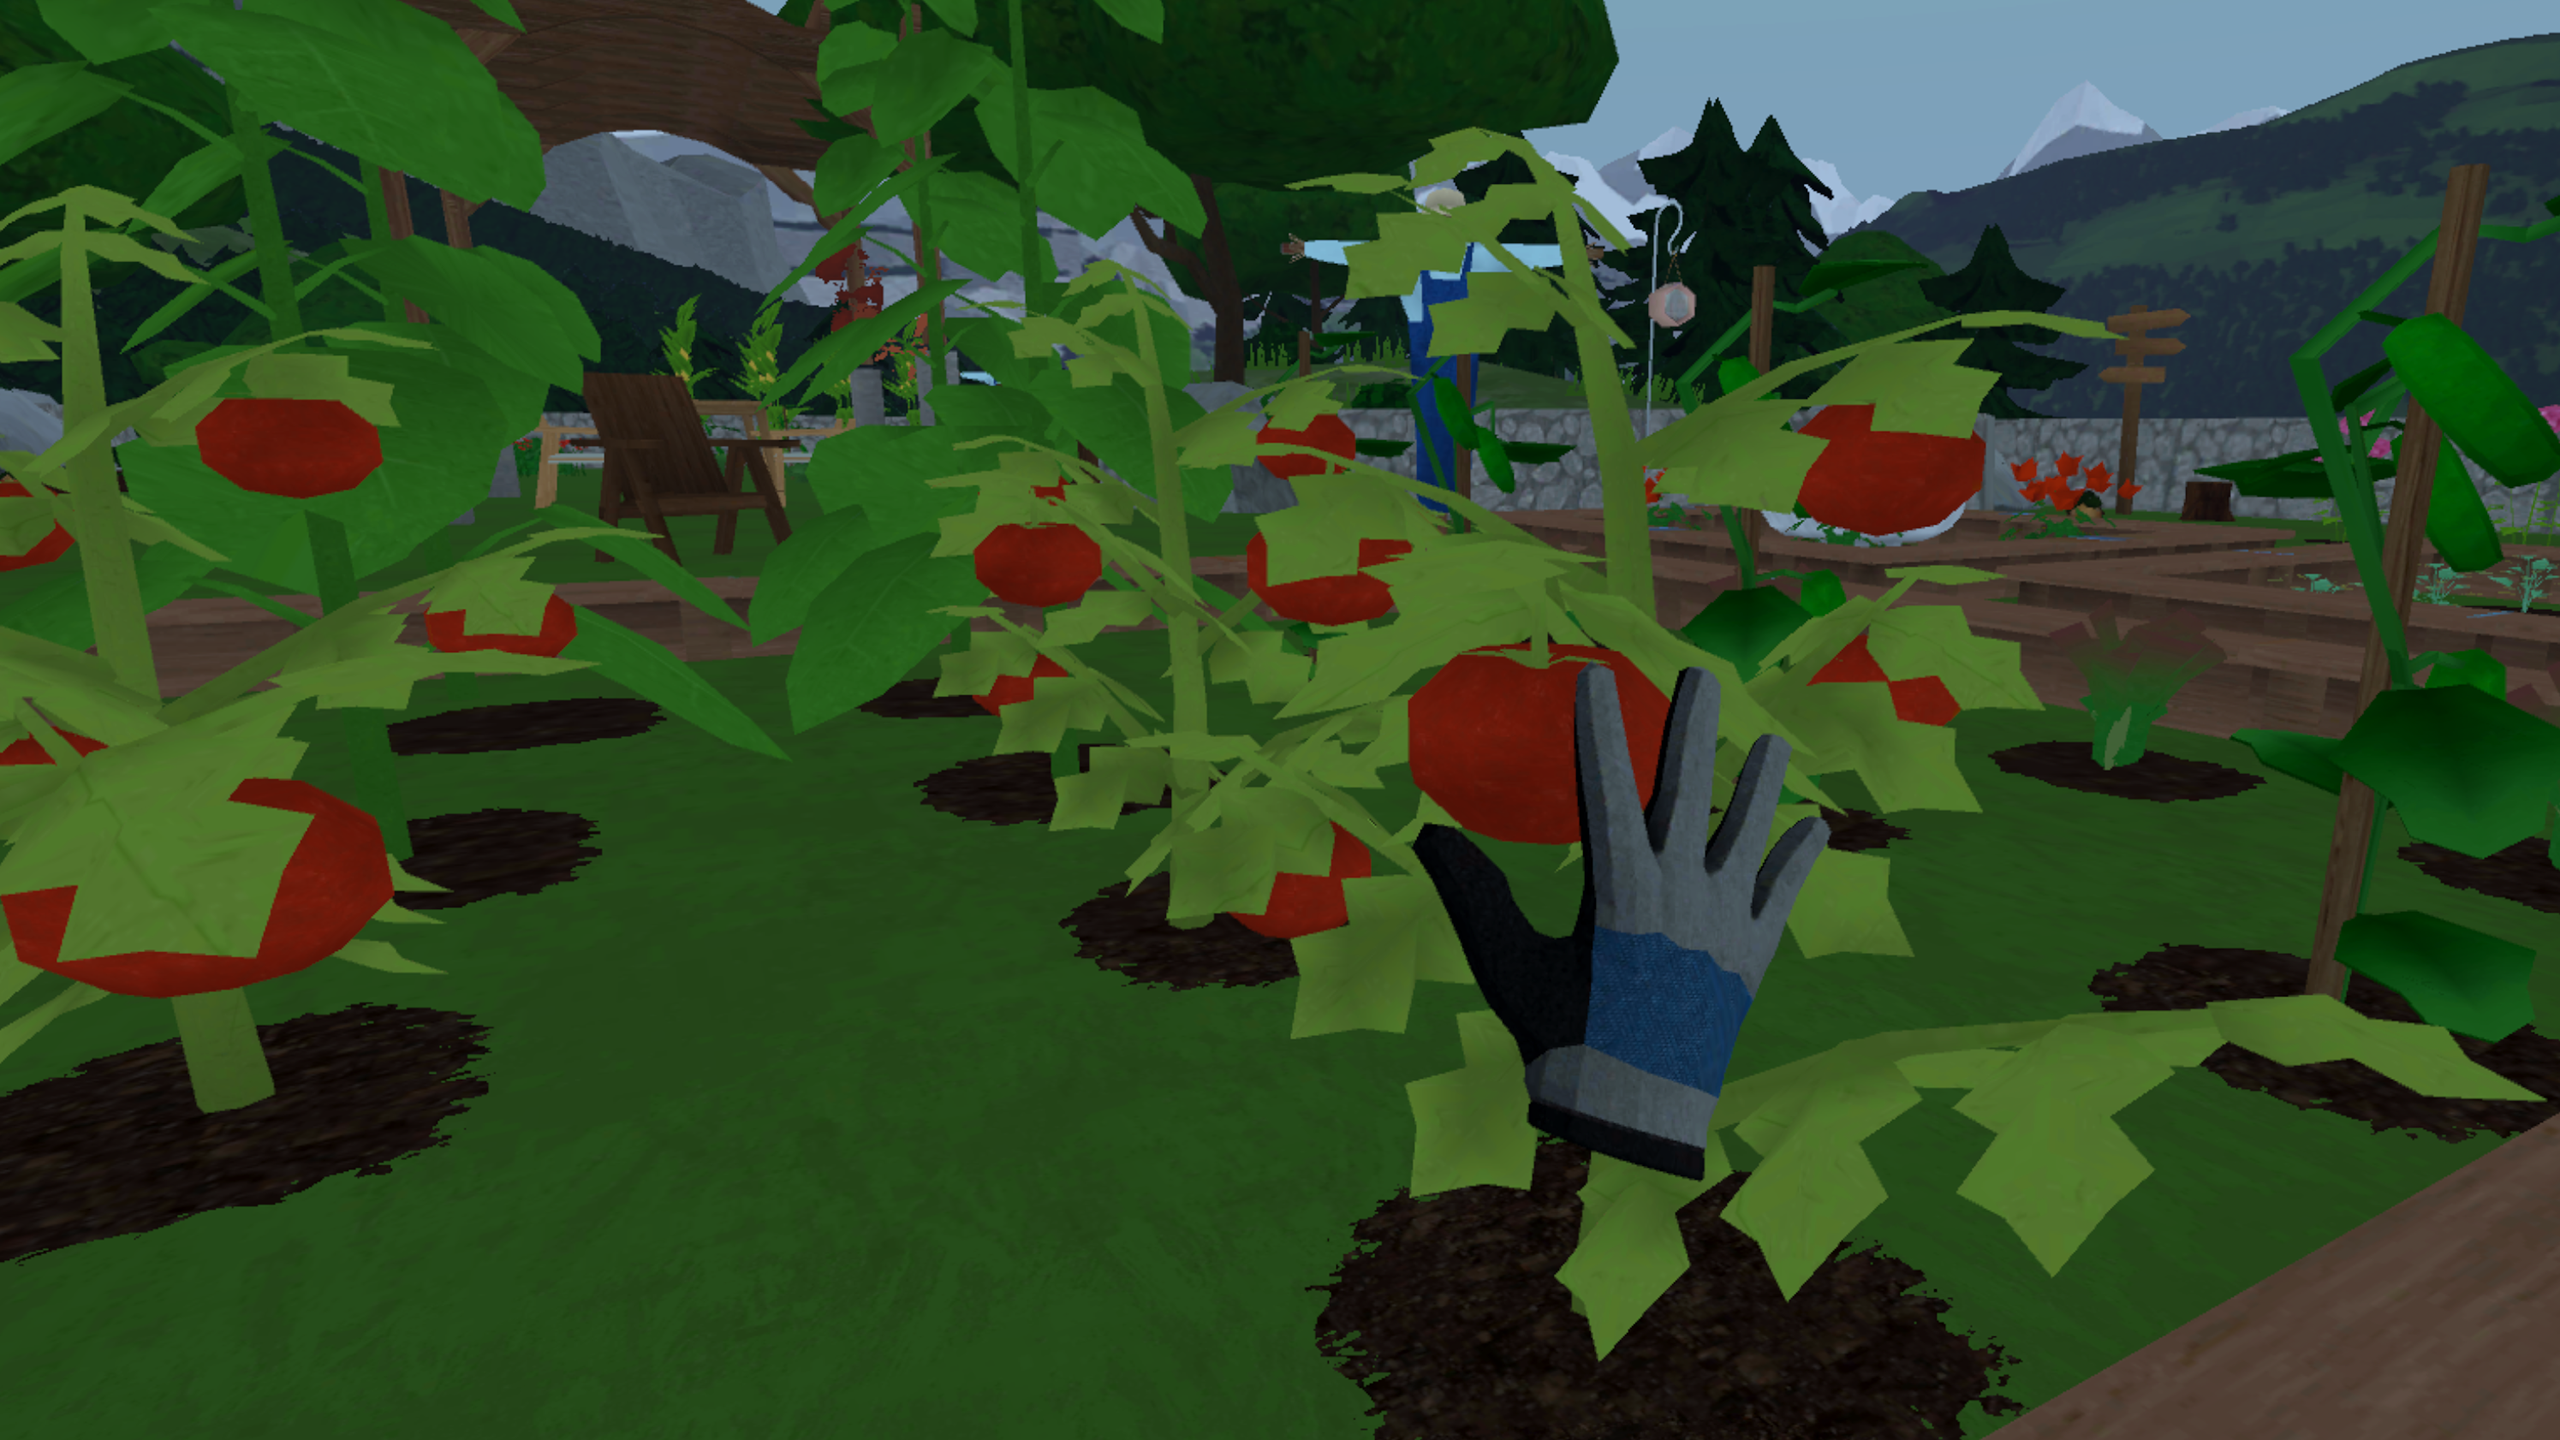

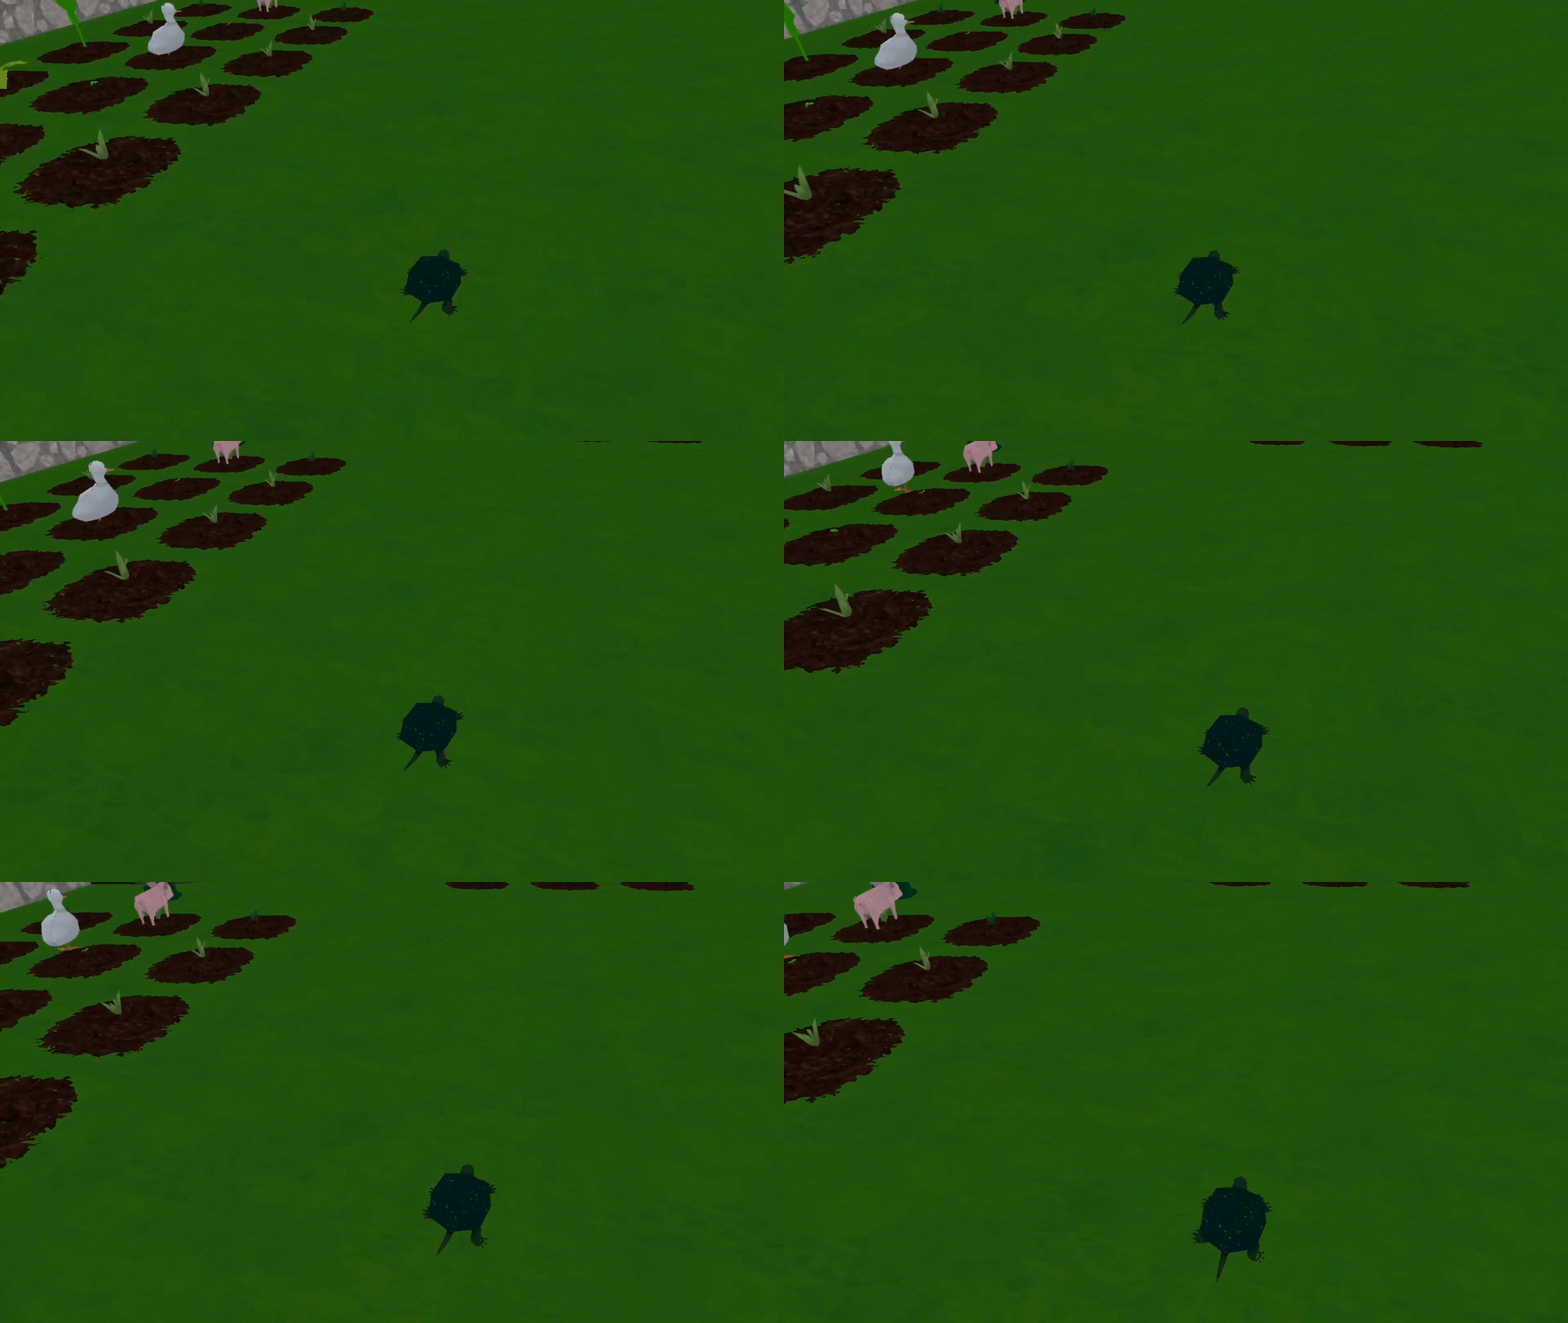
From the start of development in early 2020, Loam’s goal has been to give players the ability to enter a comforting world where they can relax and express their creativity. However, just like the seeds available within the game, Loam is constantly growing; Amebous Labs is requesting player feedback to ensure that all future updates and downloadable content are as positive as possible. Let us know what you want to see more of by commenting in the #feedback channel of our Discord server. And check out our public roadmap to see what features we are working toward adding to Loam Sandbox next.
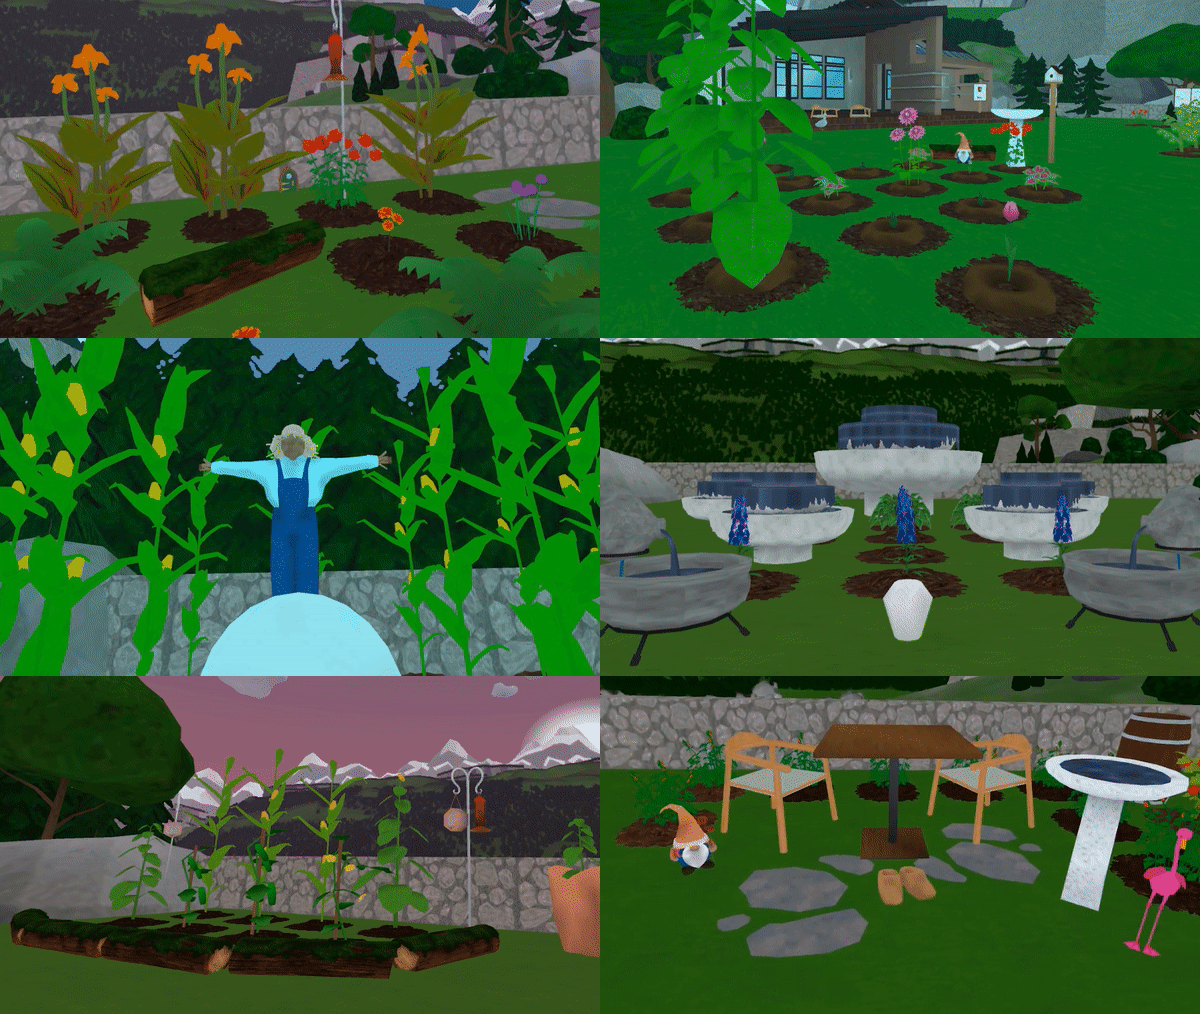
It’s time to dust off your gardening gloves—Loam Sandbox is available now exclusively on the Meta Quest platform for $14.99. Download Loam Sandbox for your Meta Quest or Meta Quest 2 headset!

Written by Nick Foster
3D PRINTING VR HEADSET HOLDERS

Written by Peter Stolmeier
Around this time last year, we posted a blog about our, what we thought would be temporary, work from home setups. My solution was to set up the office equipment over the top of my neglected home office.
I liked the ‘new on top of old’ aesthetic I had going on; it felt like that time Commander Riker had to get the U.S.S. Hathaway running by ripping out fiber optic cables from the ceiling and — [Editor’s Note: Peter talks about Star Trek for a while so we’ve trimmed it.] — this is, of course, after he grew the beard.

This system has managed to surpass my expectations, and it’s even improved my productivity!
Now, a year into “these unprecedented times,” I find myself ready to finally renovate my at-home workspace to something I like to call 2031 compliant. That means the pile of virtual reality (VR) headsets just will not do anymore.
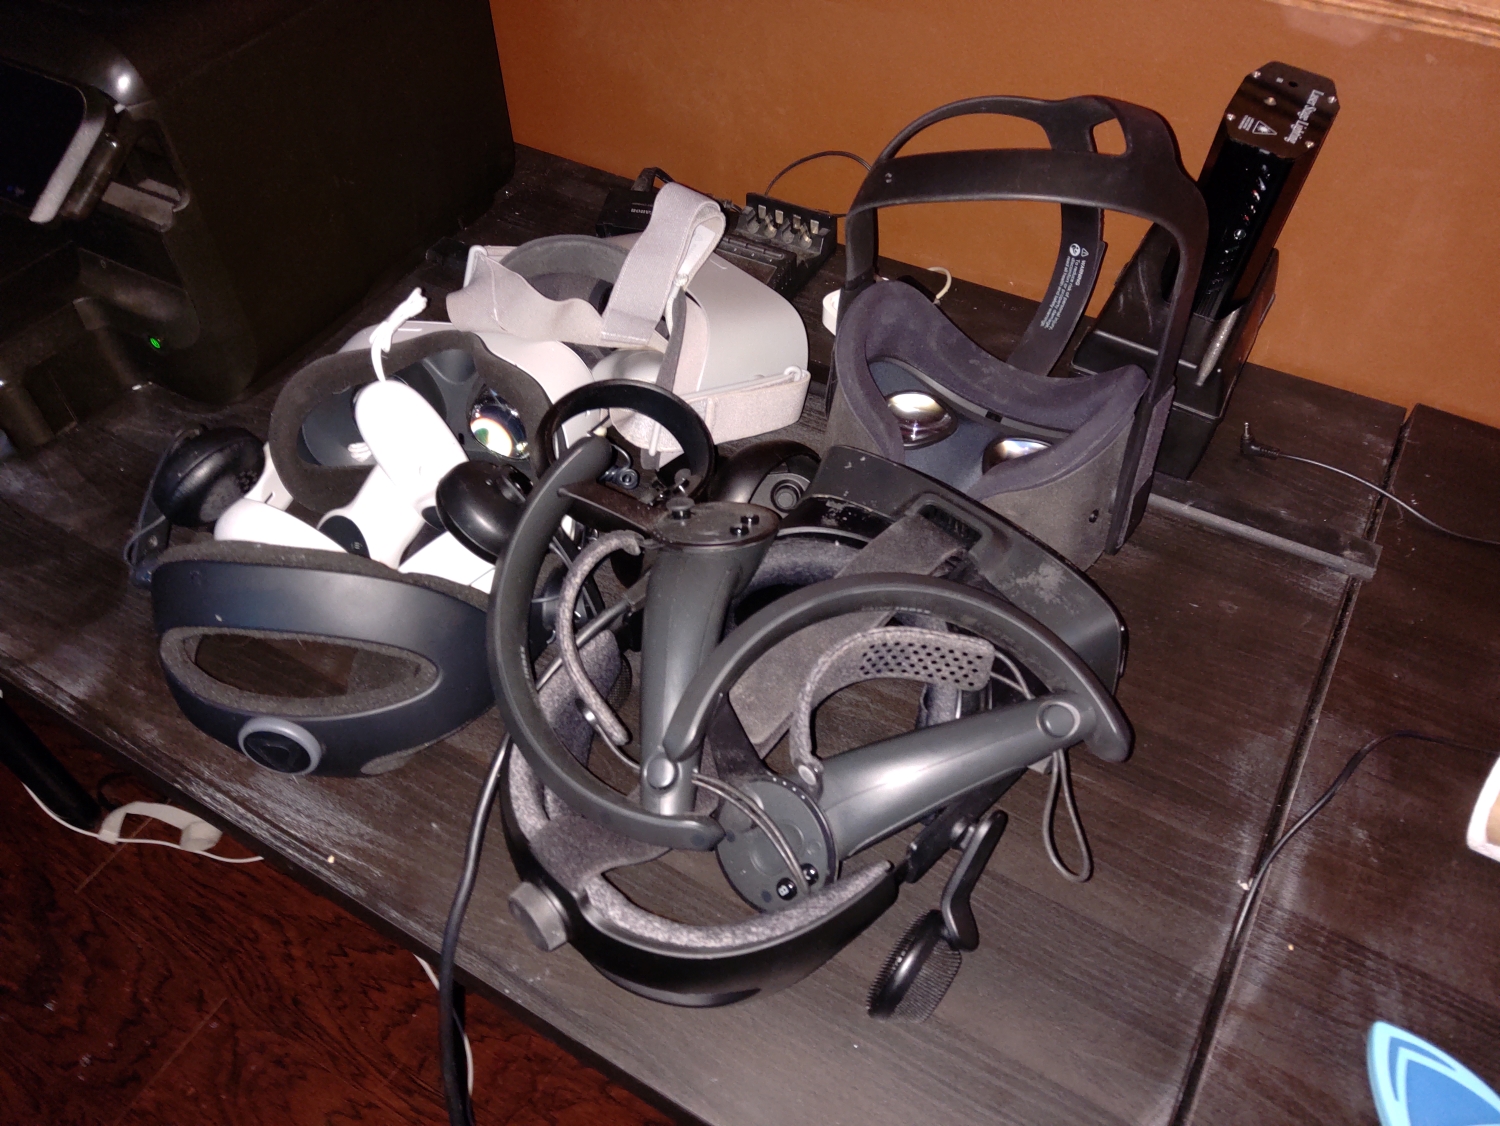
I really do use all these headsets, yes, even the Oculus GO. In rare instances, all five on the same day.
It’s important I keep them close to my desk for easy access, but I clearly have a serious organizational problem. Some of this can be solved in traditional ways. The Valve Index is wired to the PC so it can stay on an already existing hook on the back of the monitor.
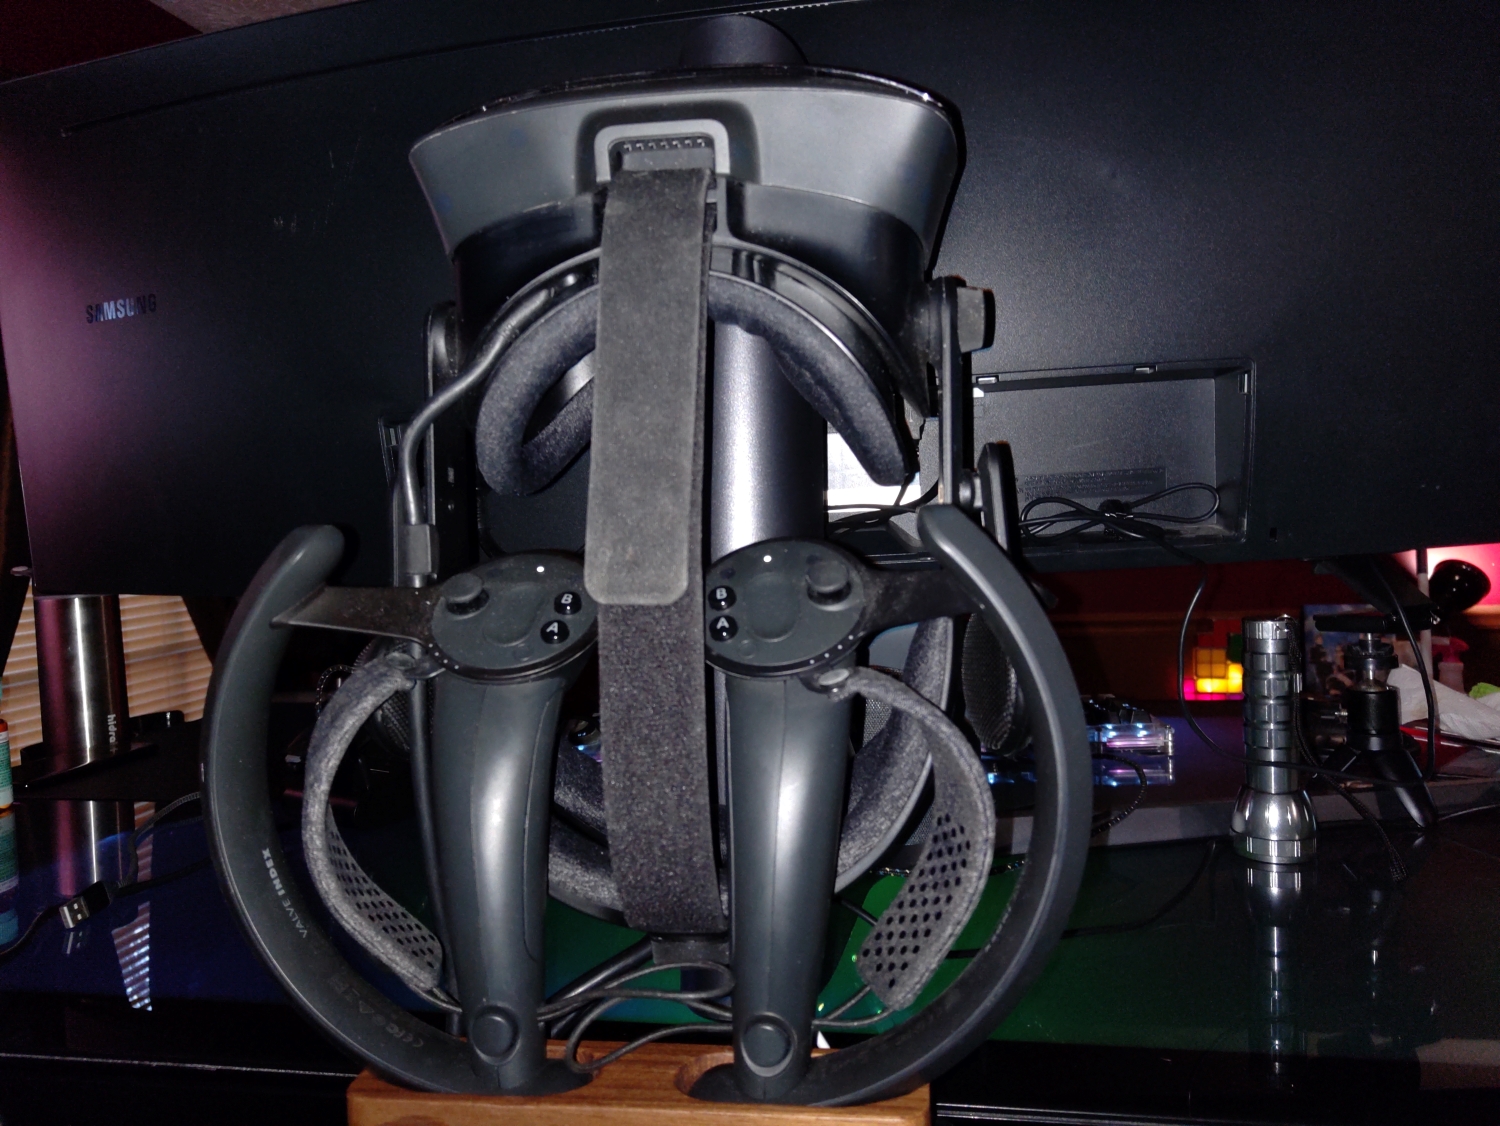
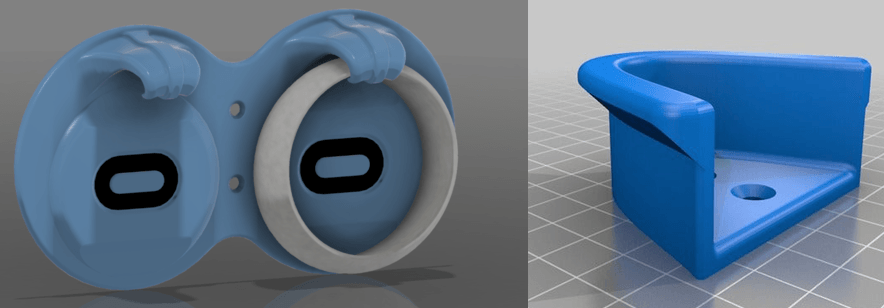
The other headsets are wireless and therefore have more options for placement. Amazon has a great selection of choices, but it wasn’t until I started looking on Thingiverse that I found what I really wanted.
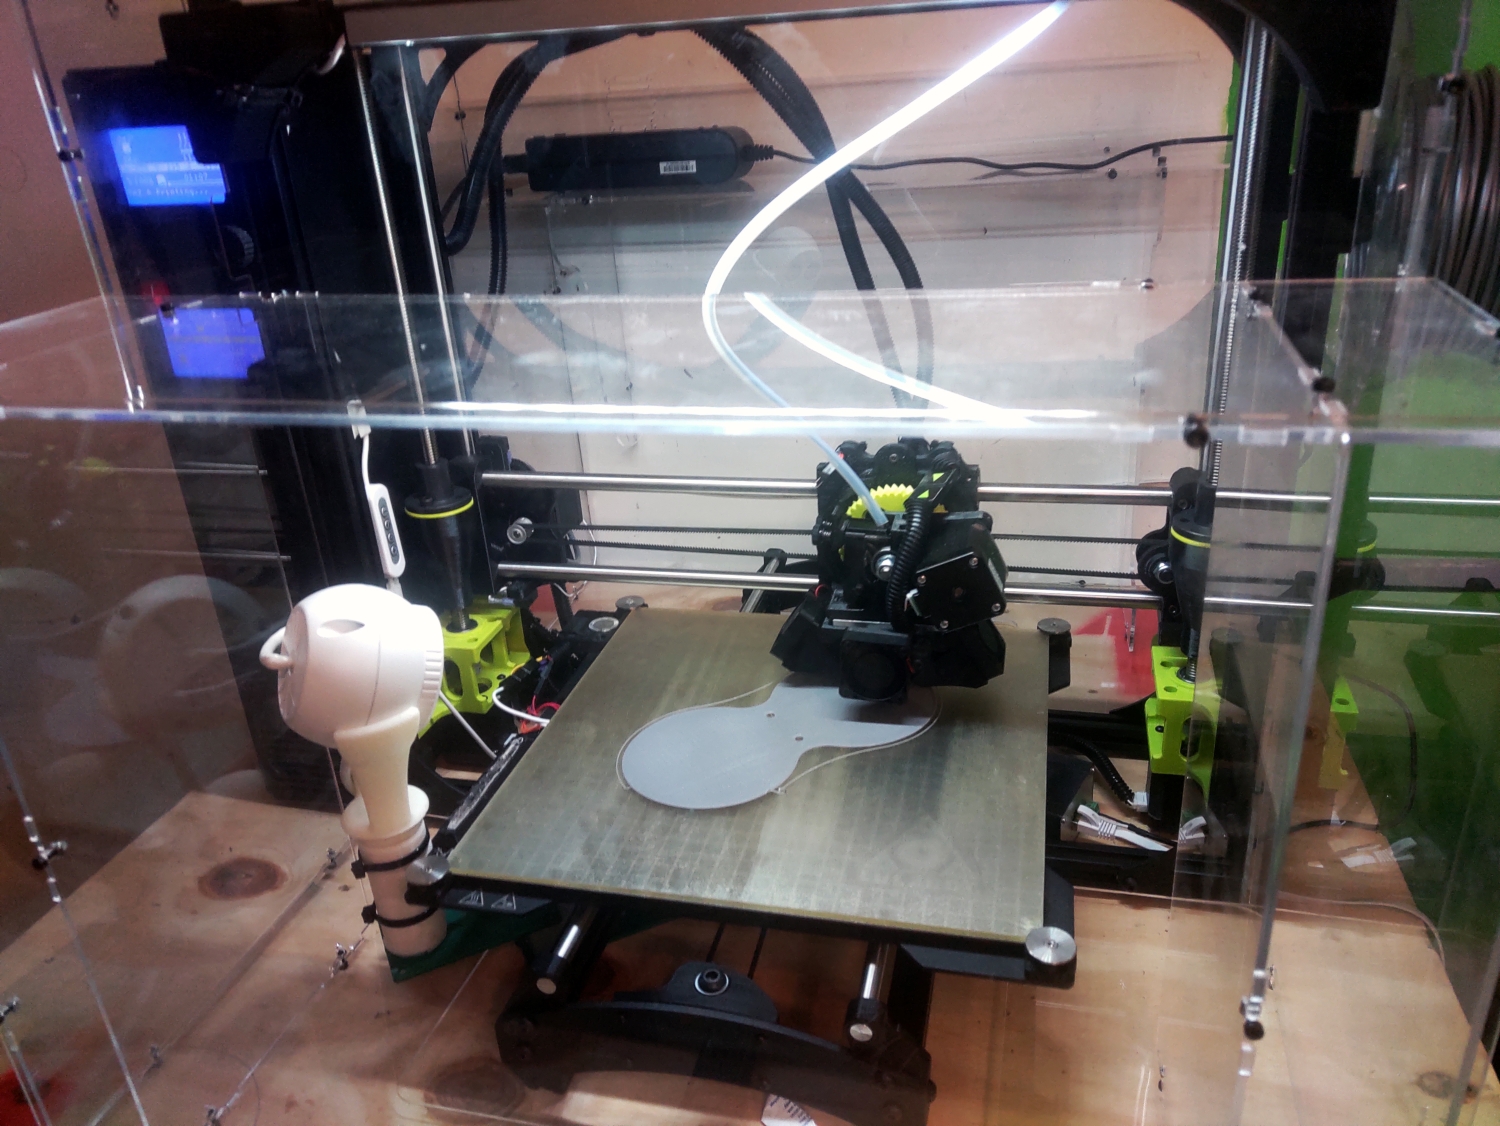
When Annie and I founded, Futurus – the parent company of Amebous Labs – there wasn’t a single consumer-level virtual reality headset, and roomscale tracking was only theoretical. That meant we had to do a lot of prototyping and create bespoke products for clients. Our Lulzbot Taz 6 was a huge help with that and it’s still going strong.

I’ve made many upgrades to it over the years, swapping out the heads, replacing the bed, and even adding a plexiglass shield to isolate the prints.
We can use all kinds of filaments, but I prefer PLA over the other thermoplastics. PLA has many advantages; it melts at lower temperatures, sticks to the bed better, is made from renewable materials like sugar and cornstarch, and because of that, is biodegradable and does not fill the room with a toxic odor.
Users Lensfort and CyberCyclist independently developed parts for a system that not only met all my needs but was minimalist in a way that was perfect for my office wall.
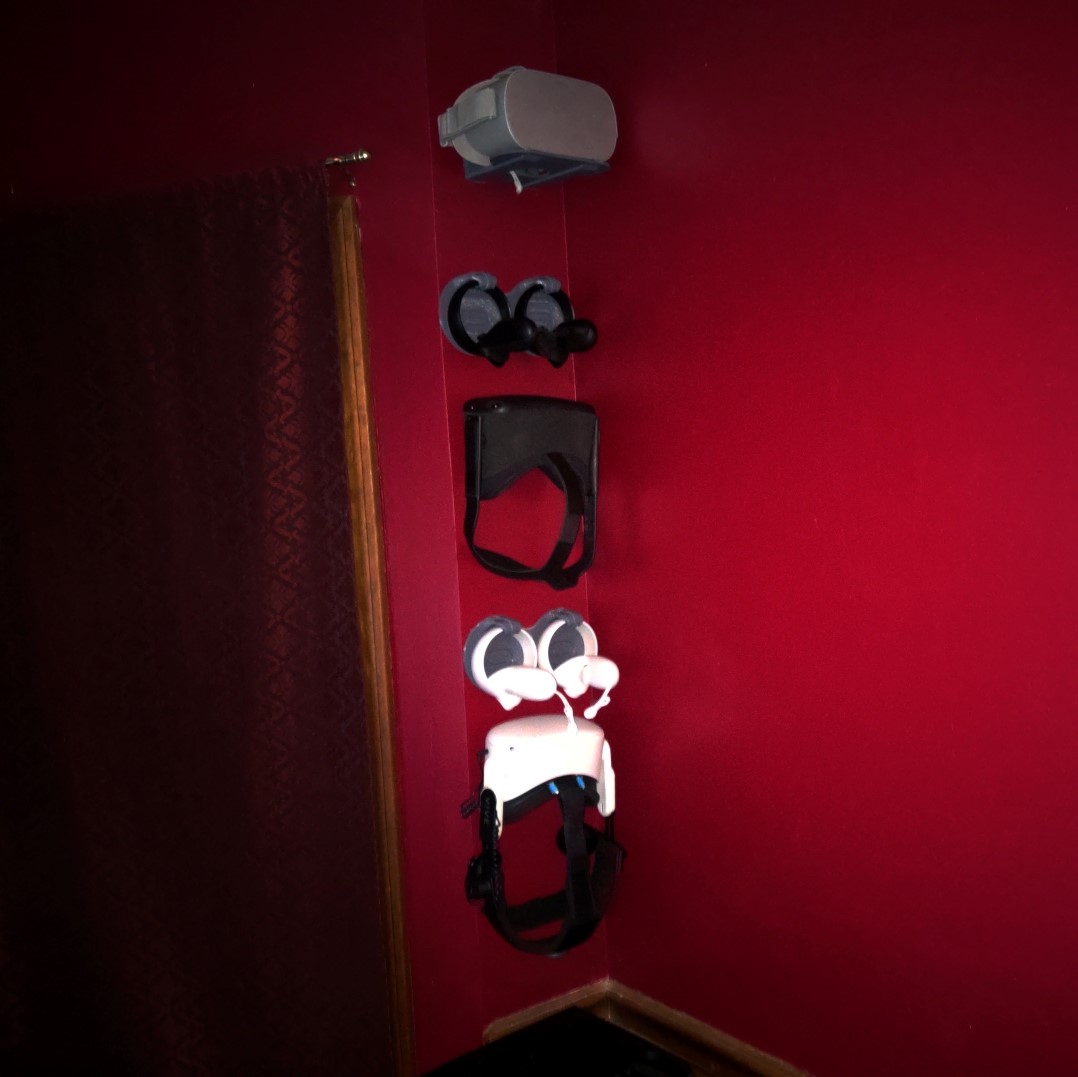
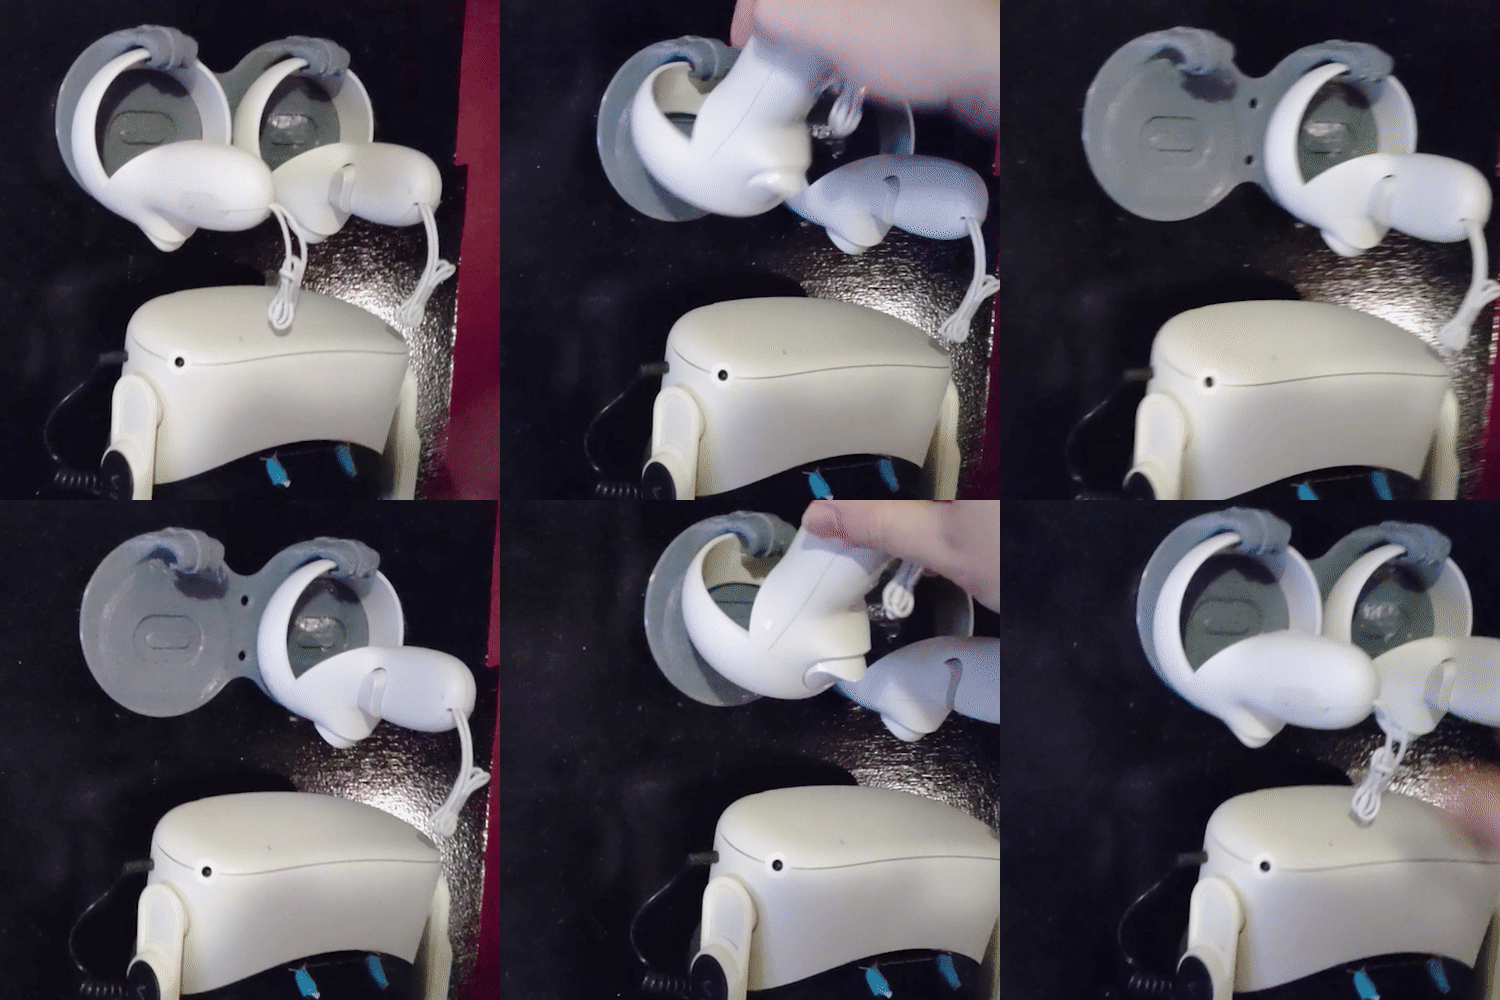
This system has managed to surpass my expectations, and it’s even improved my productivity! It’s gone over so well I’m printing several for the rest of the office crew.
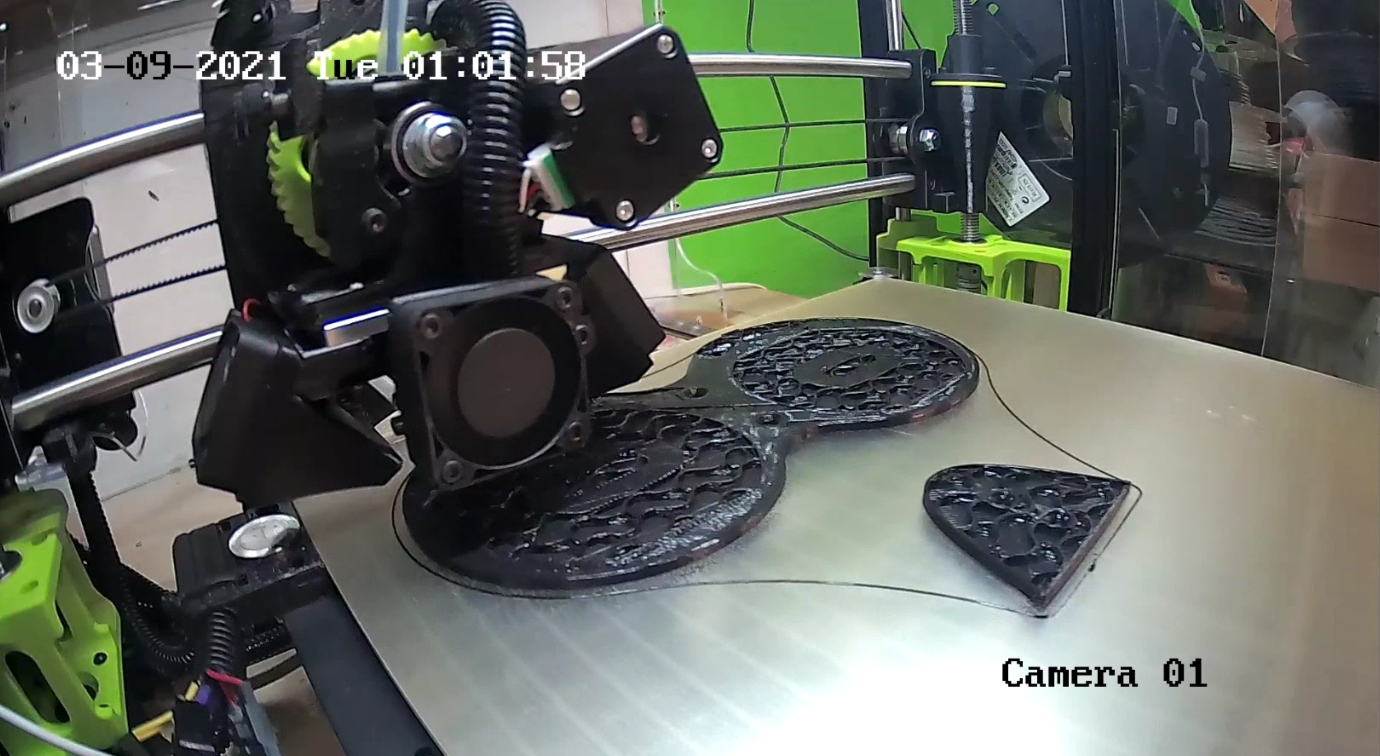
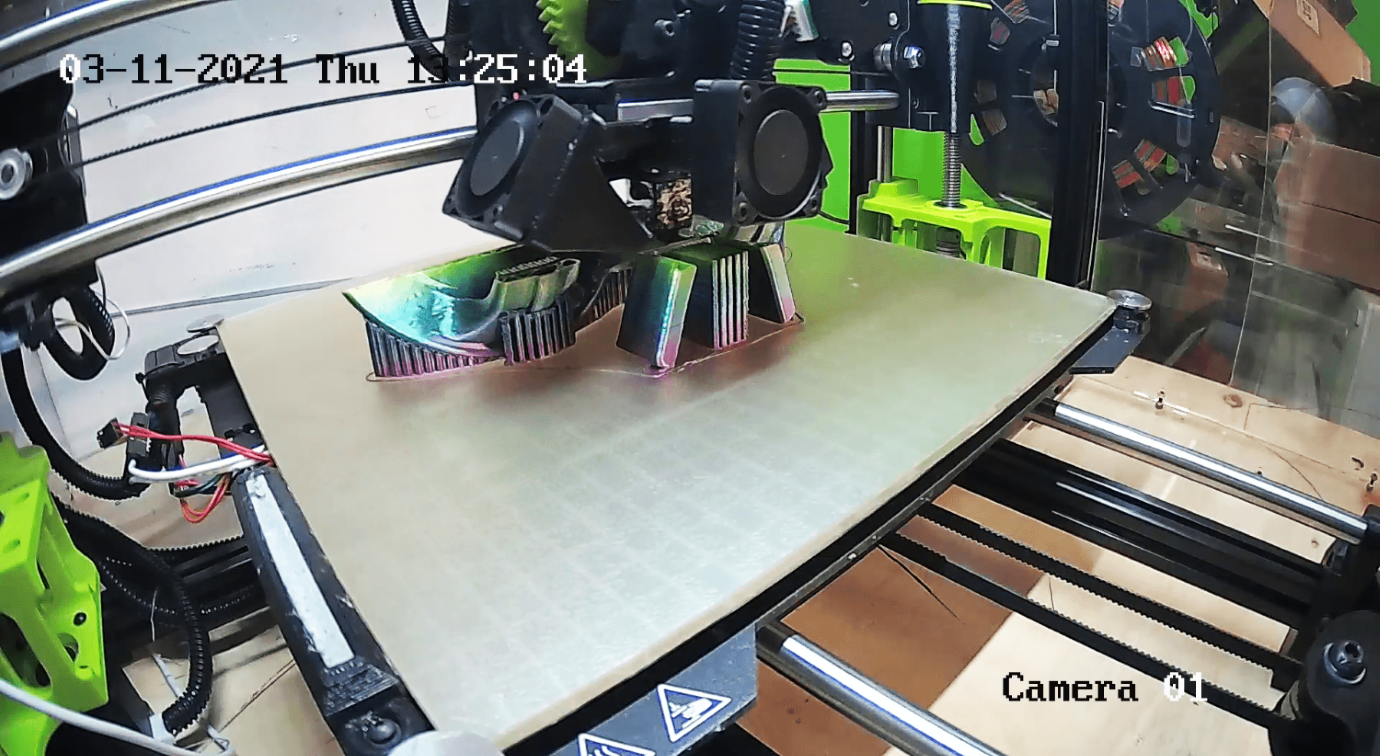
Watch the 3D print in action!
We’re printing a rainbow-colored Oculus Quest headset holder on our Discord server to give to one of our fans! Watch the live video feed in the Loam Zone streaming channel this Friday, March 19, starting at 10 AM Eastern. The print will be running throughout the afternoon. Stop by to see the progress of the 3D print and drop your 3D printing questions in the chat.

Written by Peter Stolmeier
DEVELOPING PHYSICS – BASED VR HANDS IN UNITY

Written by Pierce McBride
At Amebous Labs, I certainly wasn’t the only person who was excited to play Half-Life: Alyx last year. A few of us were eager to try the game when it came out, and I liked it enough to write about it. I liked a lot of things about the game, a few I didn’t, but more importantly for this piece, Alyx exemplifies what excites me about VR. It’s not the headset; surprisingly, it’s the hands.


What excites me about VR sometimes is not the headset, but the hands.
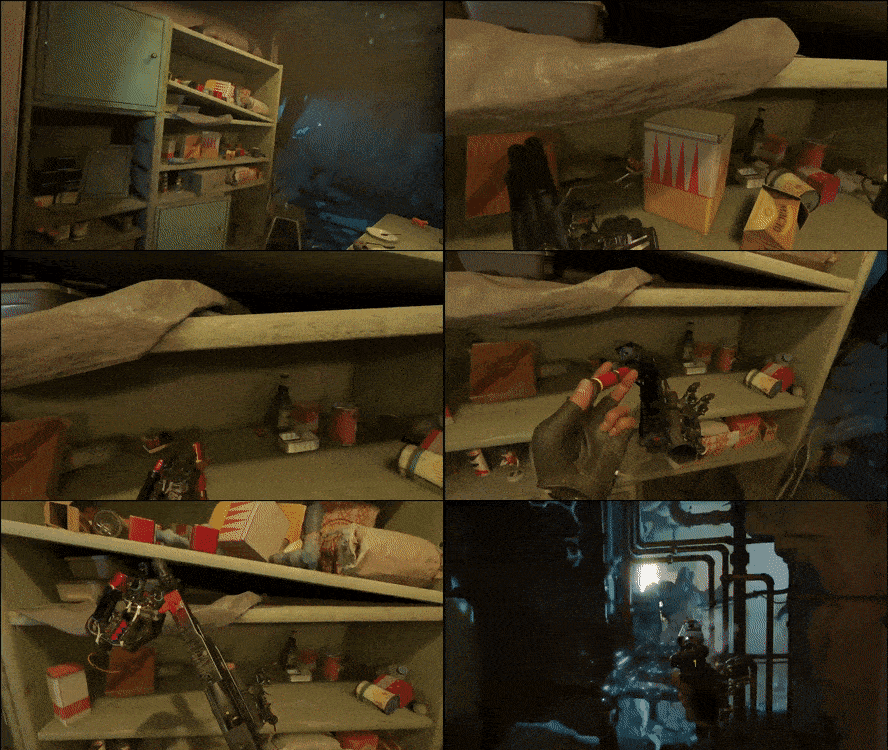
Half-Life: Alyx
More than most other virtual reality (VR) games, Alyx makes me use my hands in a way that feels natural. I can push, pull, grab, and throw objects. Sometimes I’m pulling wooden planks out of the way in a doorframe. Sometimes I’m searching lockers for a few more pieces of ammunition. That feels revelatory, but at least at the time, I wasn’t entirely sure how they did it. I’ve seen the way other games often implement hands, and I had implemented a few myself. Simple implementations usually result in something…a little less exciting.
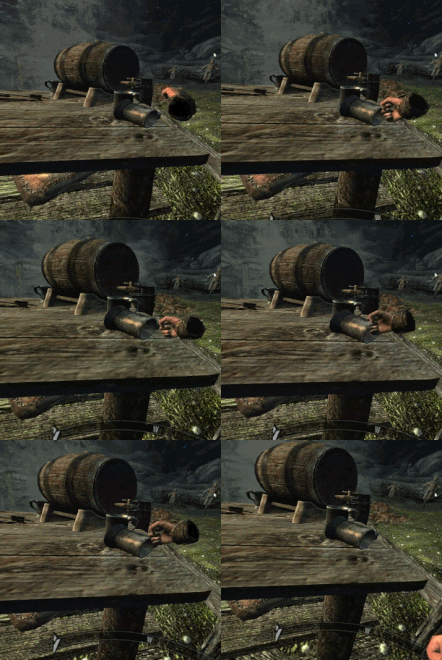
Skyrim VR
Alyx set a new bar for object interaction, but implementing something like it took some experimentation, which I’ll show you below.
For this quick sample, I’ll be using Unity 2020.2.2f1. It’s the most recent version as of the time of writing, but this implementation should work for any version of Unity that supports VR. In addition, I’m using Unity’s XR package and project template as opposed to any hardware-specific SDK. This means it should work with any hardware Unity XR supports automatically, and we’ll have access to some good sample assets for the controllers. However, for this sample implementation, you’ll only need the XR Plugin Management and whichever hardware plugin you intend on using (Oculus XR Plugin / Windows XR plugin / OpenVR XR Plugin). I use Oculus Link, and a Quest, Vive, and Index. Implementation should be the same, but you may need to use a different SDK to track the controllers’ position. The OpenVR XR plugin should eventually fill this gap, but as of now, it appears to be a preliminary release.
To start, prepare a project for XR following Unity’s instructions here, or create a new project using the VR template. If you start from the template, you’ll have a sample scene with an XR Rig already, and you can skip ahead. If not, open a new scene, select GameObject – > XR – > Convert Main Camera to XR Rig. That will give you the Main Camera setup to support VR. Make two-child GameObjects under XR Rig, attach a TrackedPoseDriver component to each. Make sure both TrackedPoseDriver’s Device is set to “Generic XR Controller” and change “Pose Source” on one to “Left Controller,” the other “Right Controller.” Lastly, assign some kind of mesh as a child of each controller GameObject so you can see your hands in the headset. I also created a box to act as a table and a bunch of small boxes with Rigidbody components so that my hands have something to collide with.
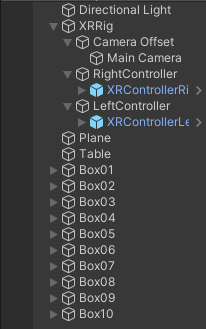
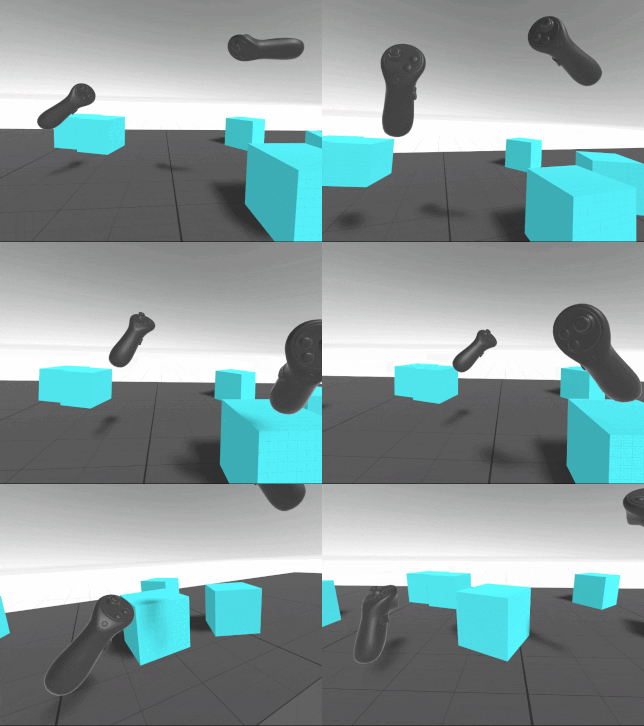
Once you’ve reached that point, what you should see when you hit play are your in-game hands matching the position of your actual hands. However, our virtual hands don’t have colliders and are not set up to properly interact with Physx (Unity’s built-in physics engine). Attach colliders to your hands and attach a Rigidbody to the GameObjects that have the TrackedPoseDriver component. Set “Is Kinematic” on both Rigidbodies to true and press play. You should see something like this.
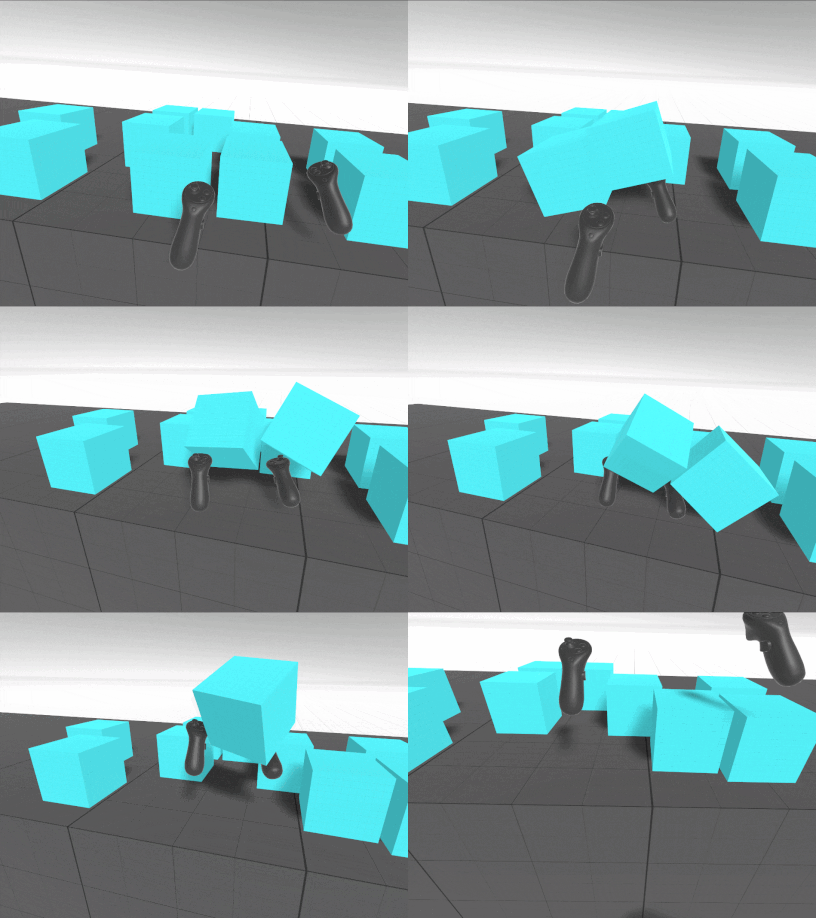
The boxes with Rigidbodies do react to my hands, but the interaction is one-way, and my hands pass right through colliders without a Rigidbody. Everything feels weightless, and my hands feel more like ghost hands than real, physical hands. That’s only the start of the limitations of the approach as well; Kinematic Rigidbody colliders have a lot of limitations that you’d start to uncover once you begin to make objects you want your player to hold, grab, pull or otherwise interact with. Let’s try to fix that.
First, because TrackedPoseDriver works on the Transform it’s attached to, we’ll need to separate the TrackedPoseDriver from the Rigidbody hand. Otherwise, the Rigidbody’s velocity and the TrackedPoseDriver will fight each other for who changes the GameObject’s position. Create two new GameObjects for the TrackedPoseDrivers, remove the TrackedPoseDrivers from the GameObjects with the Rigidbodies, and attach the TrackedPoseDrivers to the newly created GameObjects. I called my new GameObjects Right and Left Controller, and I renamed my hands to Right and Left Hand.
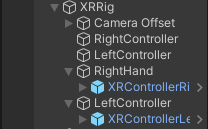
Create a “PhysicsHand” script. The hand script will only do two things, match the velocity and angular velocity of the TrackedPoseDriver to the hand Rigibodies. Let’s start with position. Usually, it’s recommended that you not directly overwrite the velocity of a Rigidbody because it leads to unpredictable behavior. However, we need to do that here because we’re indirectly mapping the velocity of the player’s real hands to the VR Rigidbody hands. Thankfully, just matching velocity is not all that hard.
public class PhysicsHand : MonoBehaviour
{
     public Transform trackedTransform = null;
     public Rigidbody body = null;

     public float positionStrength = 15;

     void FixedUpdate()
     {
          var vel = (trackedTransform.position - body.position).normalized * positionStrength * Vector3.Distance(trackedTransform.position, body.position);
          body.velocity = vel;
     }
}
Attach this component to the same one as the Rigidbodies, assign the appropriate Rigidbody to each, and assign the Right and Left Controller Transform reference to each as well. Make sure you turn off “Is Kinematic” on the Rigidbodies hit play. You should see something like this.
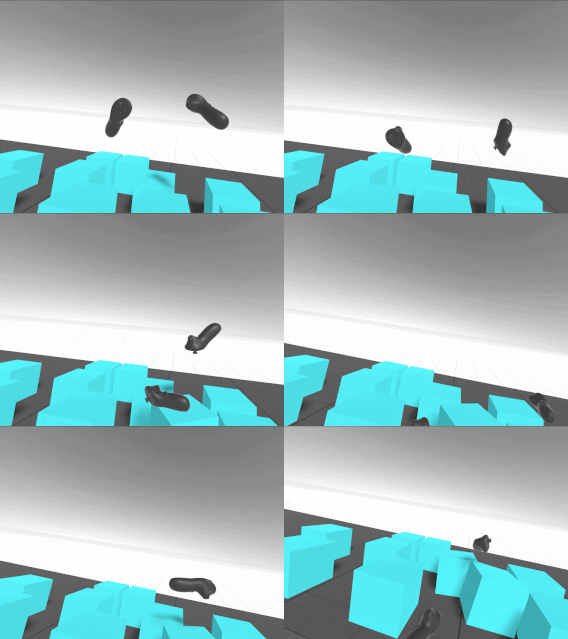
With this, we have movement! The hands track the controllers’ position but not the rotation, so it kind of feels like they’re floating in space. But they do respond to all collisions, and they cannot go into static colliders. What we’re doing here is getting the normalized Vector towards the tracked position by subtracting it from the Rigibody position. We’re adding a little bit of extra oomph to the tracking with position strength, and we’re weighing the velocity by the distance from the tracked position. One extra note, position strength works well at 15 if the hand’s mass is set to 1; if you make heavier or lighter hands, you’ll likely need to tune that number a little. Lastly, we could try other methods, like attempting to calculate the hands’ actual velocity from their current and previous positions. We could even use a joint between the Transform track and the controllers, but I personally find custom code easier to work with.
Next, we’ll do rotation, and unfortunately, the best solution I’ve found is more complex. In real-world engineering, one common way to iteratively change one value to match another is an algorithm called a PD controller or proportional derivative controller. Through some trial and error and following along with the implementations shown in this blog post, we can write another block of code that calculates how much torque to apply to the Rigidbodies to iteratively move them towards the hand’s rotation.
public class PhysicsHand : MonoBehaviour { public Transform trackedTransform = null; public Rigidbody body = null;public float positionStrength = 20; public float rotationStrength = 30;
void FixedUpdate()
{
var vel = (trackedTransform.position - body.position).normalized * positionStrength * Vector3.Distance(trackedTransform.position, body.position);
body.velocity = vel;float kp = (6f * rotationStrength) * (6f * rotationStrength) * 0.25f;
float kd = 4.5f * rotationStrength;
Vector3 x;
float xMag;
Quaternion q = trackedTransform.rotation * Quaternion.Inverse(transform.rotation);
q.ToAngleAxis(out xMag, out x);
x.Normalize();
x *= Mathf.Deg2Rad;
Vector3 pidv = kp * x * xMag - kd * body.angularVelocity;
Quaternion rotInertia2World = body.inertiaTensorRotation * transform.rotation;
pidv = Quaternion.Inverse(rotInertia2World) * pidv;
pidv.Scale(body.inertiaTensor);
pidv = rotInertia2World * pidv;
body.AddTorque(pidv);
}
}
With the exception of the KP and KD values, which I simplified the calculation for, this code is largely the same as the original author wrote it. The author also has implementations for using a PD controller to track position, but I had trouble fine-tuning their implementation. At Amebous Labs, we use the simpler method shown here, but using a PD controller is likely possible with more work.
Now, if you run this code, you’ll find that it mostly works, but the Rigidbody vibrates at certain angles. This problem plagues PD controllers: without good tuning, they oscillate around their target value. We could spend time fine-tuning our PD controller, but I find it easier to simply assign Transform values once they’re below a certain threshold. In fact, I’d recommend doing that for both position and rotation, partially because you’ll eventually realize you’ll need to snap the Rigidbody back in case it gets stuck somewhere. Let’s just resolve all three cases at once.
public class PhysicsHand : MonoBehaviour
{
     public Transform trackedTransform = null;
     public Rigidbody body = null;

     public float positionStrength = 20;
     public float positionThreshold = 0.005f;
     public float maxDistance = 1f;
     public float rotationStrength = 30;
     public float rotationThreshold = 10f;

     void FixedUpdate()
     {
          var distance = Vector3.Distance(trackedTransform.position, body.position);
          if (distance > maxDistance || distance < positionThreshold)
          {
               body.MovePosition(trackedTransform.position);
          }
          else
          {
               var vel = (trackedTransform.position - body.position).normalized * positionStrength * distance;
               body.velocity = vel;
          }

          float angleDistance = Quaternion.Angle(body.rotation, trackedTransform.rotation);
          if (angleDistance < rotationThreshold)
          {
               body.MoveRotation(trackedTransform.rotation);
          }
          else
          {
               float kp = (6f * rotationStrength) * (6f * rotationStrength) * 0.25f;
               float kd = 4.5f * rotationStrength;
               Vector3 x;
               float xMag;
               Quaternion q = trackedTransform.rotation * Quaternion.Inverse(transform.rotation);
               q.ToAngleAxis(out xMag, out x);
               x.Normalize();
               x *= Mathf.Deg2Rad;
               Vector3 pidv = kp * x * xMag - kd * body.angularVelocity;
               Quaternion rotInertia2World = body.inertiaTensorRotation * transform.rotation;
               pidv = Quaternion.Inverse(rotInertia2World) * pidv;
               pidv.Scale(body.inertiaTensor);
               pidv = rotInertia2World * pidv;
               body.AddTorque(pidv);
          }
     }
}
With that, our PhysicsHand is complete! Clearly, a lot more could go into this implementation, and this is only the first step when creating physics-based hands in VR. However, it’s the portion that I had a lot of trouble working out, and I hope it helps your VR development.

Written by Pierce McBride
If you found this blog helpful, please feel free to share and to follow us @LoamGame on Twitter!
TAKES ON MULTIPLAYER IN VR

Written by Chan Grant
The current gaming landscape has been increasingly defined by multiplayer games, with the single-player experience taking a bit of a backseat. The most popular game genre (or at least the highest profile) in America has the shooter, and all its variations in the last two decades. From Halo to Fortnite, a large part of what has drawn people is the multiplayer aspect. The rise of esports into a billion-dollar industry pushed a further emphasis on multiplayer games. Several games use multiplayer as an incentive to continue paying money into the system, i.e., games as a service. Yet, in the virtual reality (VR) space, multiplayer games have not been a big focus.


I suspect that we will see a boom in multiplayer VR experiences.
There are several games with multiplayer that are fun, exciting, and all-around good, but the industry seems to be focusing more on developing a single–player experience for now. There is a couple of reasons for this that I can figure out. Running a multiplayer game requires a lot of legwork, both before and after the game is released. Server maintenance, anti-cheat policies, and practices, net code, handling lag times, dealing with differences in terms of hardware (such as crossplay), etc., is a lot of work. VR systems are also solitary devices. Unlike consoles or even computers, two players cannot interact with the same headset simultaneously. While an Oculus Quest 2 is, as when this was written, $300-400, it is a lot to ask a parent to buy more than one if they want all their kids to play together. Despite these setbacks and limitations, there are several ways and examples of VR multiplayer working that others can examine and work with. I will be dividing these takes into two strands of thought, symmetrical and asymmetrical multiplayer.
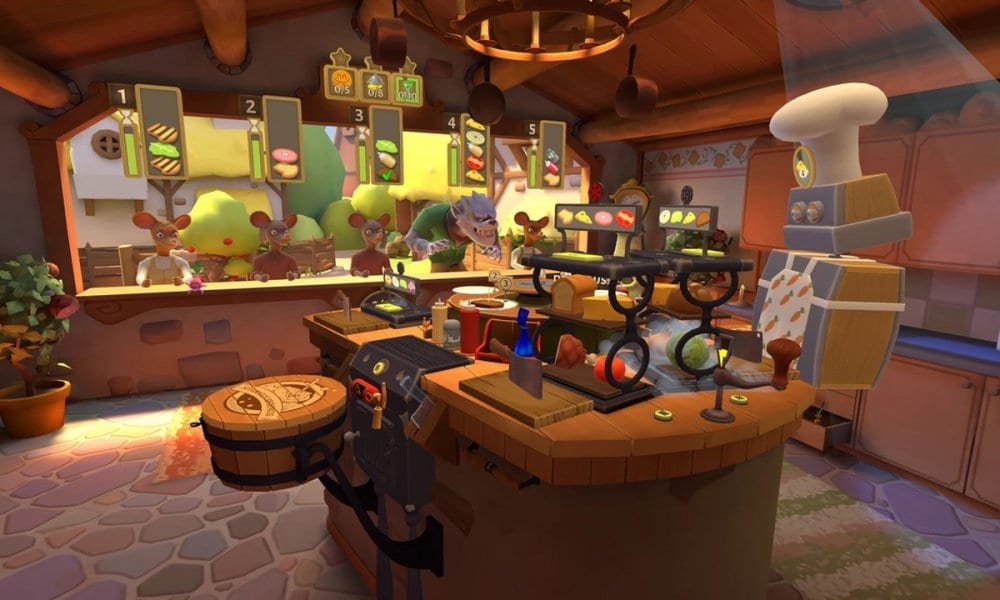
Cook-Out: A Sandwich Tale
The traditional take on multiplayer in general is what I would call symmetrical multiplayer. Both players are engaged with the game in the same way (for the most part). Whether that be a local co-op where two or more players are playing on the same system or an online co-op where players connect to a server, they are still interacting with the same game locally. Even if the players have distinct roles in the game, they can switch between them without stopping using the system.
Cook-Out: A Sandwich Tale in VR, available on Oculus Quest, where the player must focus on making meals to deliver to hungry customers. Each customer has specific preferences, and they want a sandwich that fits what they want. It is a fast and frantic game, even in single–player, but the intensity increases when playing with a group. Suddenly, you must coordinate with other people and try not to get in each other’s way. If you are cutting the bread, you need to make sure that everyone else knows and can focus on something else, like, oh, I don’t know, prepping the freaking meat for the sandwich?!
Another game that interestingly plays with the symmetrical multiplayer is Star Trek: Bridge Crew. In this game, each player takes over a crew member’s role on a Star Trek starship and has various encounters with the Star Trek universe’s aliens and circumstances. This game does not necessarily require strict or fast reflex but an ability to perform your task well.
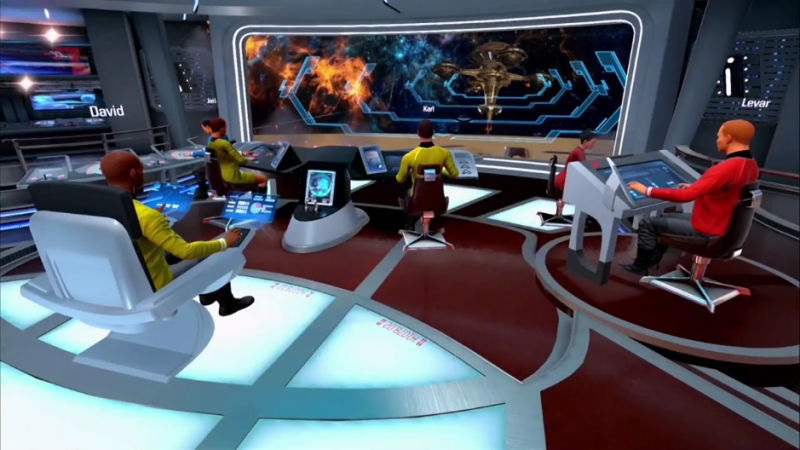
Star Trek: Bridge Crew
Asymmetrical multiplayer is a game where two or more players do not engage the system in the same way while still playing. Please note this is not crossplay. In crossplay, two or more users are playing the same game while on a different gaming system. Functionally, the two users are playing the game in an identical way outside a difference of hardware. Asymmetrical multiplayer is where the users play the same game but do not use the same hardware and are not playing with the same rules.
One example of this is Keep Talking and Nobody Explodes. In this game, one player is tasked with defusing a bomb while others feed that player instructions. The player who defuses the bomb doesn’t have access to the instructions that other players have. The defuser relies entirely on the instructors to give the correct instructions. The instructors cannot see the bomb and thus need the defuser to describe it to be able to provide proper information. Both sides have an important yet distinct role, and the game’s success relies entirely on both sides being able to do their job well. Importantly, this game doesn’t require both players to own a headset. The instructions for defusing the bomb are available online, and as long as one person owns a headset, the game can be played.
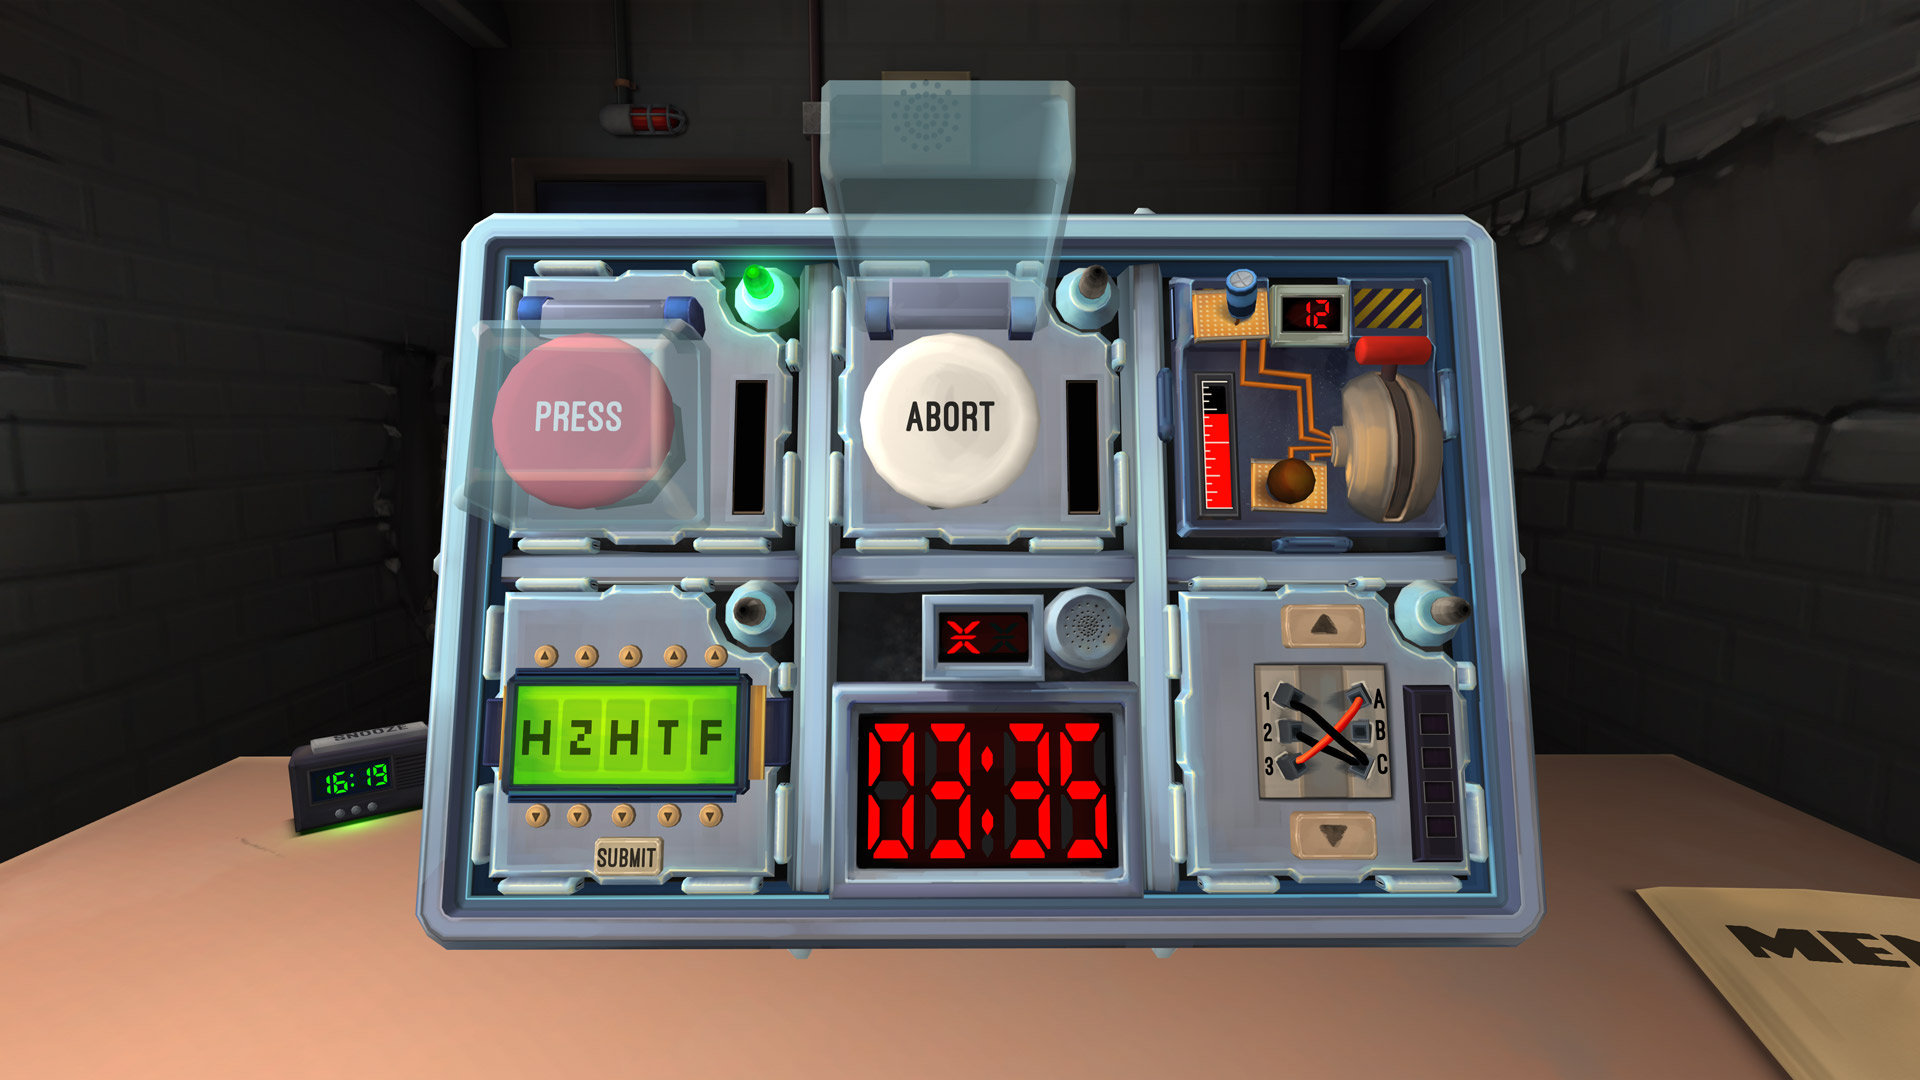
Keep Talking and Nobody Explodes
I feel that some of the interesting and memorable multiplayer games that will be released in the future will follow this asymmetrical approach. It certainly will act as an effective gateway for new players to get involved. Those who are too young, too old, or unfamiliar can still play the game without being in the headset. The other game system can be anything from a phone app to a board game to an entirely different video game. Imagine two people playing what are supposedly two different games to turn out for the games to influence one another?
With the release of the Oculus Quest 2, the barrier to entry for high-quality VR experiences has never been lower. More people own VR systems now than ever, and all industry forecasts indicate that the number will only increase. More of these new players are going to want to play games with their friends and family. As a result, I suspect that we will see a boom in multiplayer experiences. It will be interesting to see the various takes that developers would consider.

Written by Chan Grant
LIGHTING FOR MOBILE

Written by Peter Stolmeier
Working on a video game can be challenging in the best of times, but it gets significantly harder in virtual reality (VR) or when using the mobile platform’s limited power. So, when we decided to make a video game in VR on a mobile platform, we had many challenges to overcome.
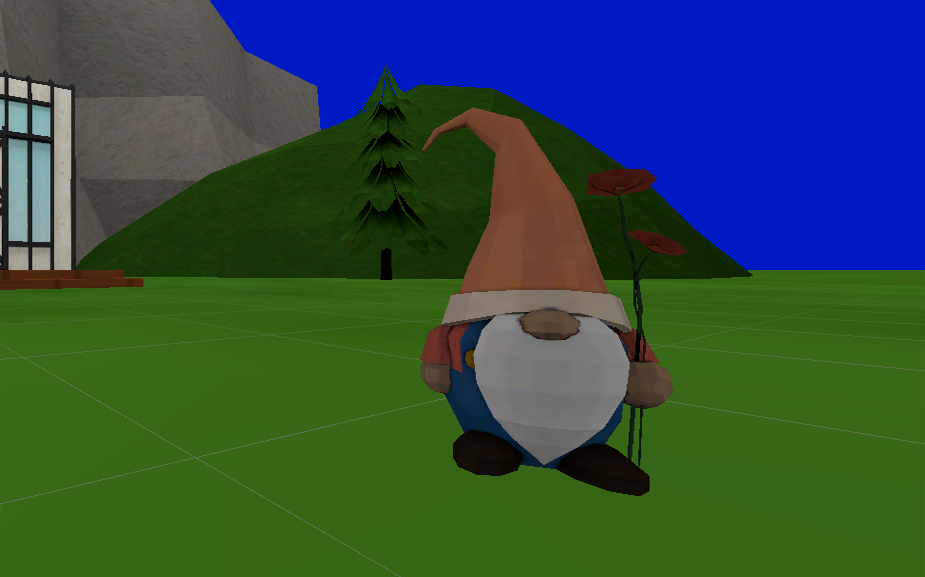

It’s important to mention that these are only temporary textures and effects as a proof of concept, but already we see promise.
An important part of our game’s immersion is the passing of time while outdoors enjoying cultivated nature. That means we would have to find a way to do a broader lighting effect for sunlight than the limited real-time lighting the mobile chipset would allow.
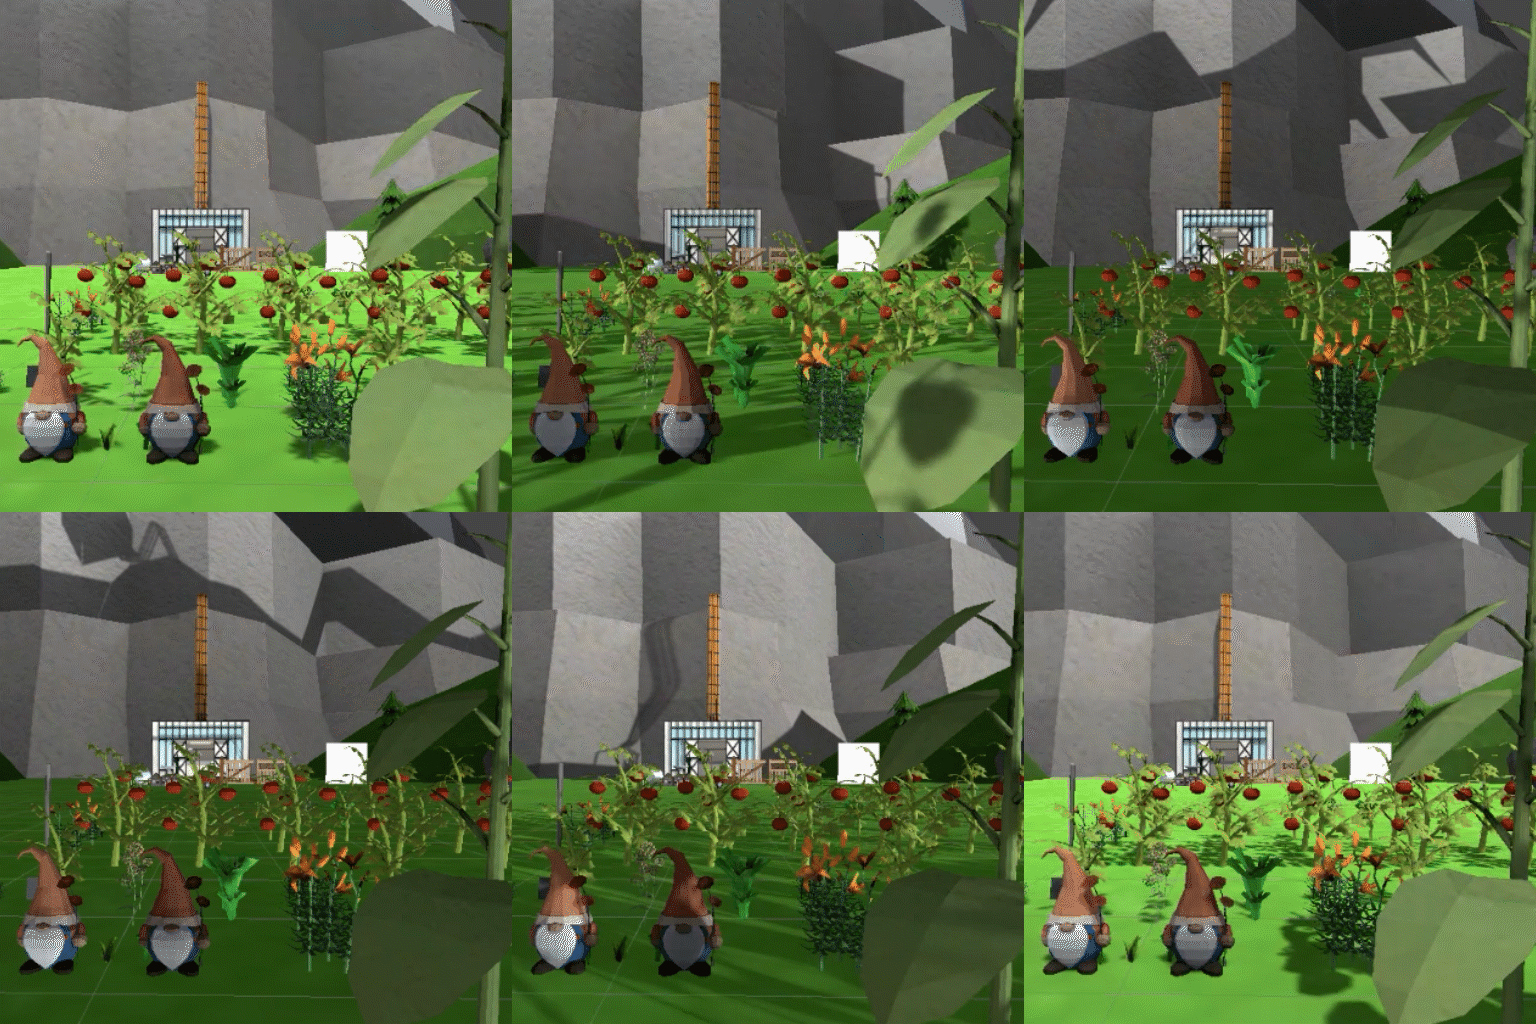
It is difficult for the Oculus Quest to render this many real-time lights.
In 3D engine terms, lighting is only relevant to the changing of an object’s color. With that in mind, at least in the beta process, our solution is to change the color of textures ourselves outside of the game engine by prebaking and then inside the engine programmatically.
Prebaking a texture allows us to have some shadow information that is not needed to be calculated by the game engine freeing up resources for other things. The only problem is that they will not react to the sun, so we still need to help it along with some color.
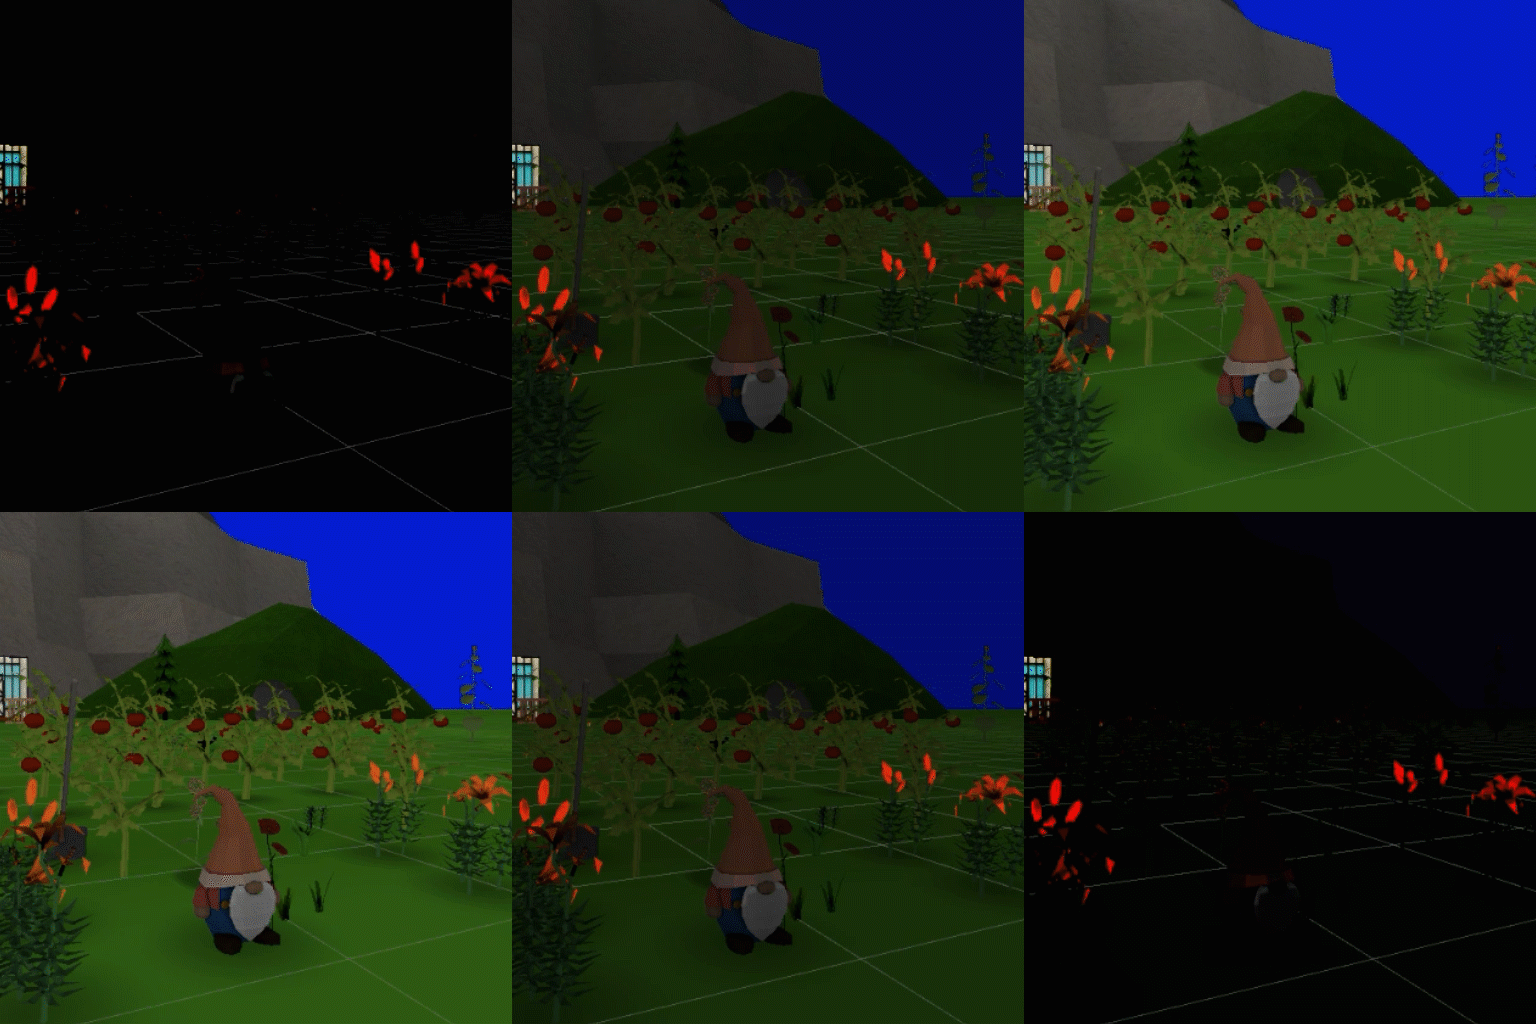
Shader Graph is a built-in system in Unity that lets us have detailed control of our objects’ look. In it, we can blend in different effects to get the look we want. Since this is a dynamic process, it’s possible to blend multiple textures in real-time to make it easier on system resources but effective across the entire world.
It’s important to mention that these are only temporary textures and effects as a proof of concept, but already we see promise.
We’ll try to revisit this once we have more permanent looks to see if they are as useful to our game as we suspect.

Written by Peter Stolmeier
OCULUS QUEST 2 REVIEW

Written by Jane Nguyen
The biggest news to come out of this year’s Facebook Connect event was the release of the Oculus Quest 2. Like the original Oculus Quest, it’s a standalone, inside-out, 6-degrees-of-freedom virtual reality headset that runs on a fast-growing platform with a vast library of popular games and experiences. I’ve had the pleasure to unbox and share my initial thoughts of the device and how it compares to the previous model. Read on.
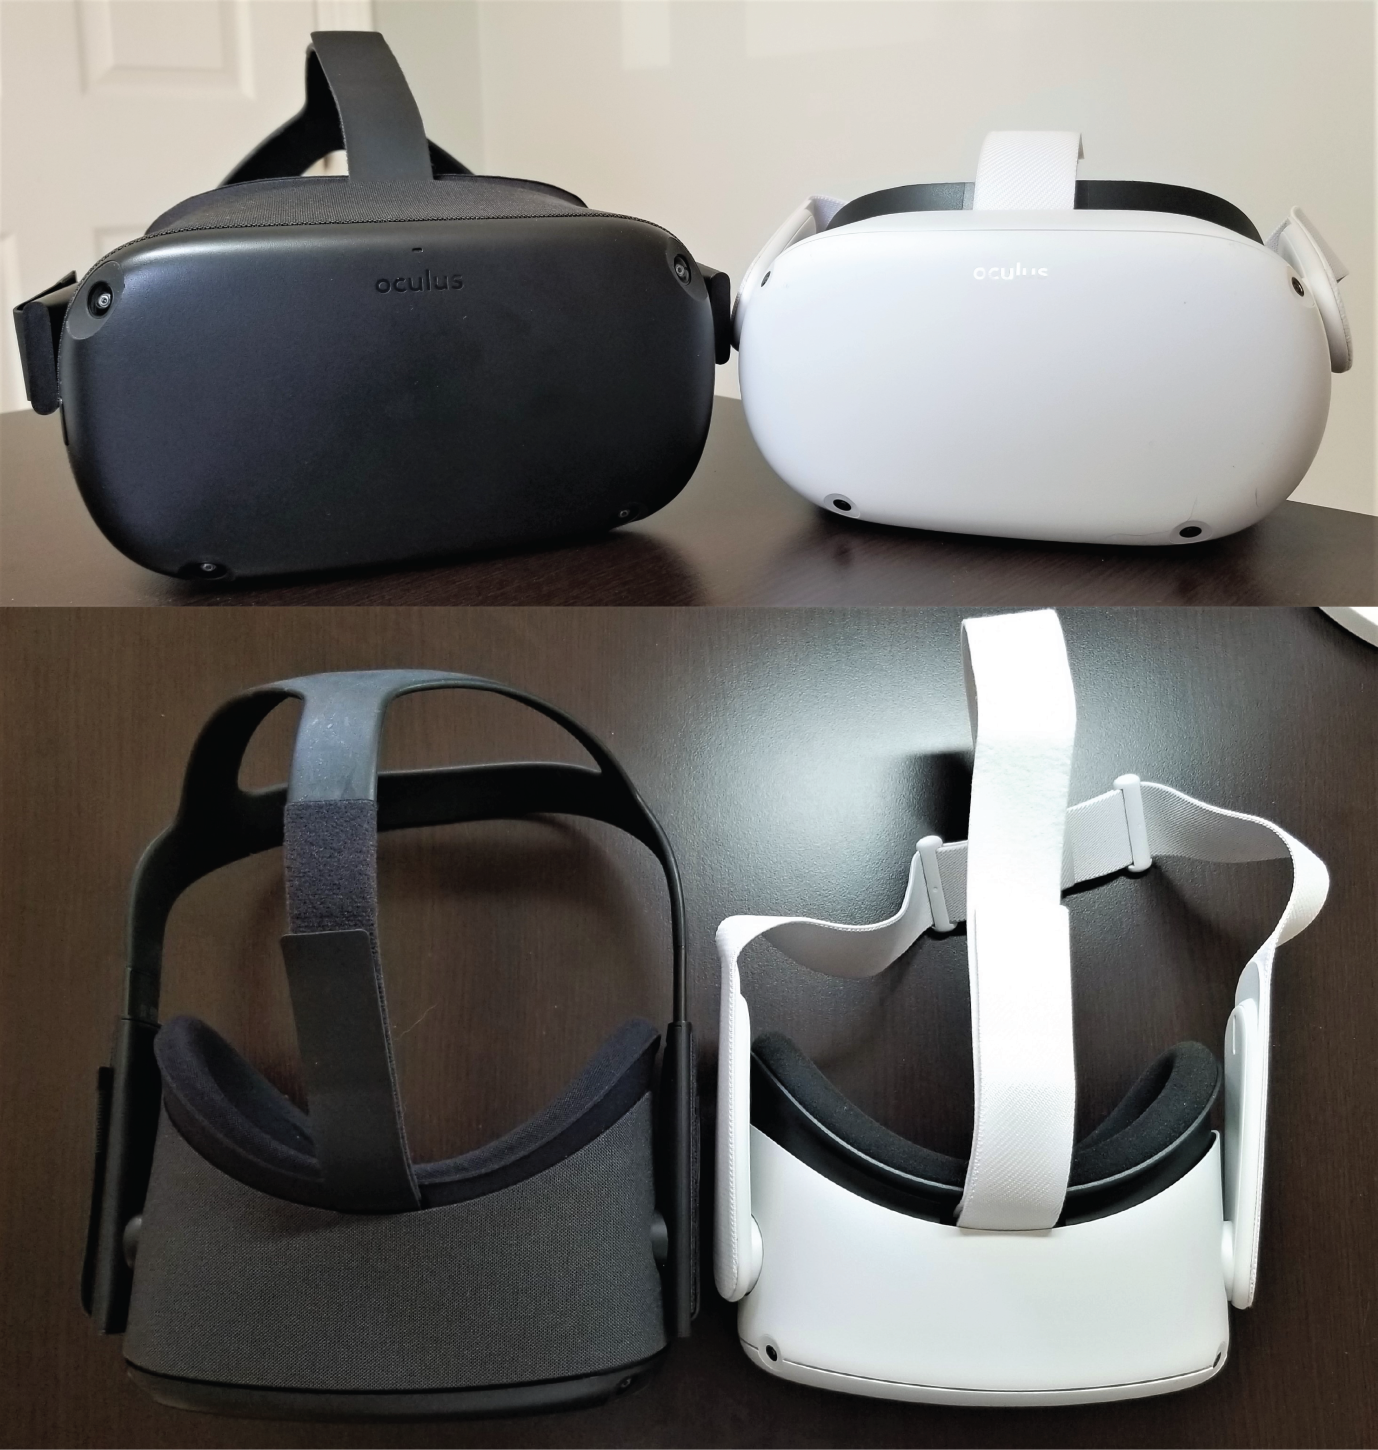

The best-selling point of the Quest 2 is the price, while giving you all the best technology and a plethora of popular content a standalone headset can offer on the current market.
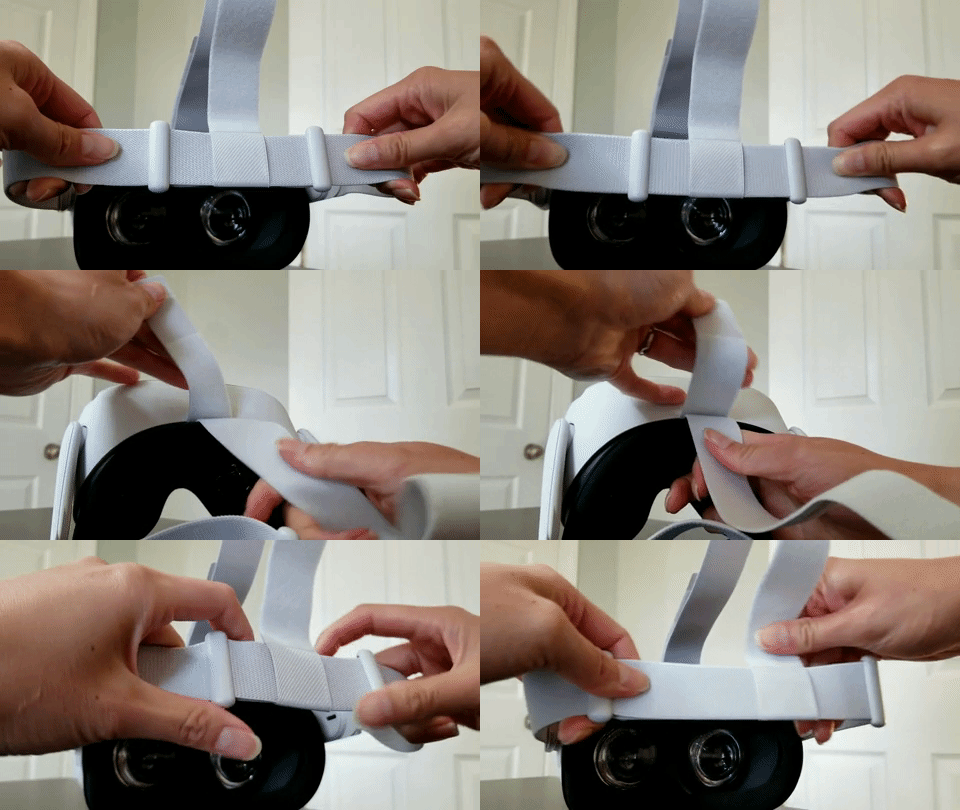
The Quest 2 headset is smaller in build, but it feels just as heavy as the Quest. Other reviewers are clocking in the Quest 2 being 72 grams lighter than the first, but I’m finding it negligible to notice a difference. The straps are made of all elastic, and it has a different adjusting system than the Quest. It takes some fidgeting to get used to, but I find these new straps makes it slightly easier to slip on and off your head.
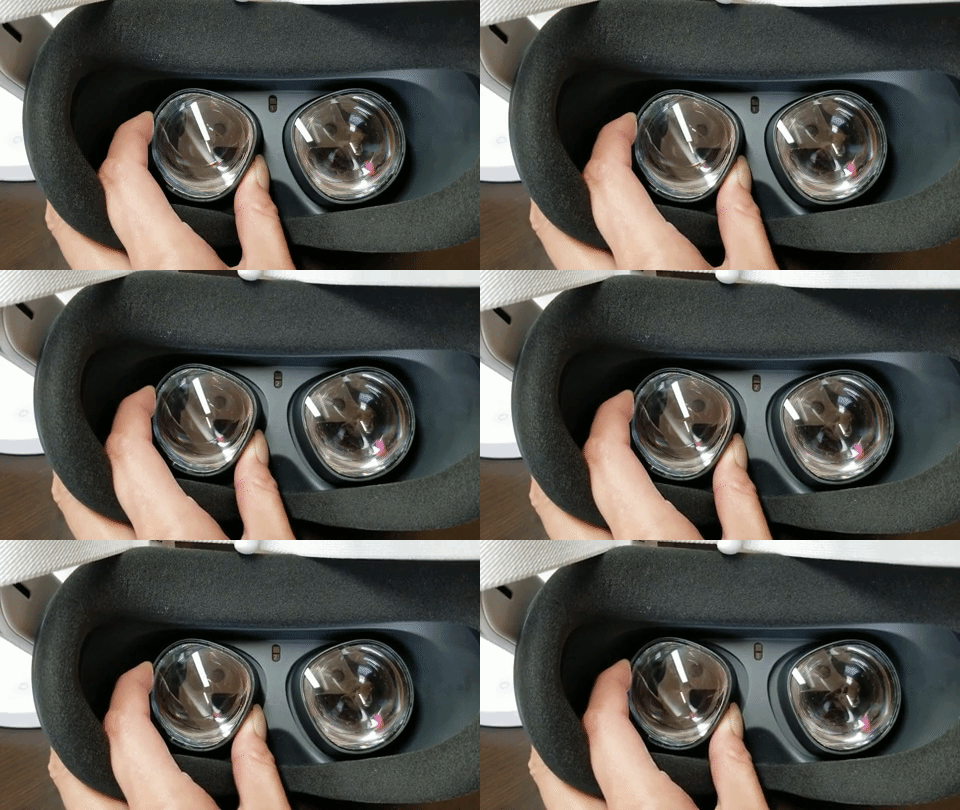
The lens spacing is manually adjustable by spreading the lenses with your fingers on multiple ridges, which is not as fine of an adjustment as on the Quest. This is not a big downside as I was able to find a perfect setting on the simpler, less fine adjustment on the Quest 2 without issue. In fact, it is easier to remember the number “2” to place my lens, so no matter which of my family members use it, I can move it back to “2” without trying to fine-tune it on the Quest. You can find that number between the lenses. However, one initial inconvenience of this new system is that you cannot adjust the lens with the device on your head. If your vision is blurry, it is suggested that you take it off to select one of three positions. Do that a couple more times until it’s clear, and you may have grown a bit frustrated. But that’s a one-time action if you remember your number.
The LCD panel of the Quest 2 offers a higher resolution than the Quest OLED panel. At 1832×1920 resolution per eye, it gives you 50% more pixels resulting in more clarity and reduces the appearance of the screen door effect.
The foam that touches your face is grippier on the Quest 2 to reduce sliding and the need to reposition the headset. However, I have yet to get sweaty enough to judge if the foam stays just as grippy. Luckily, if you’re a clean freak like me, the foam faceplate is removable for the ability to rinse it, just like the original easily.
If you already have an Oculus account, your avatar and entire content library are transferred over automatically once you connect to Wi-Fi and pair your headset to the Oculus app on your smartphone. Although you have to re-install games that you have previously purchased, this is simply a matter of installing them, not paying twice.
Speaking of games, not all of them support this new device, but we’re promised that updates are coming from various game studios.
The controllers are the same with all the same buttons, joystick, grip, trigger buttons, and positioning. Two things that are different are the home and menu buttons, which are placed in slightly more convenient locations for your thumb to reach, and now there is a trackpad located next to the AB and XY buttons towards the inside of the controls. Of the games I’ve tested so far, none have integrated the trackpad. Additionally, after a couple of gameplay hours, I’ve found that the controller’s AA batteries are lasting longer than the 1. That cuts down on your battery inventory and keeps game interruption down to a minimum. The battery status on the menu screen is more prominently displayed so that you can keep a better eye on it too.
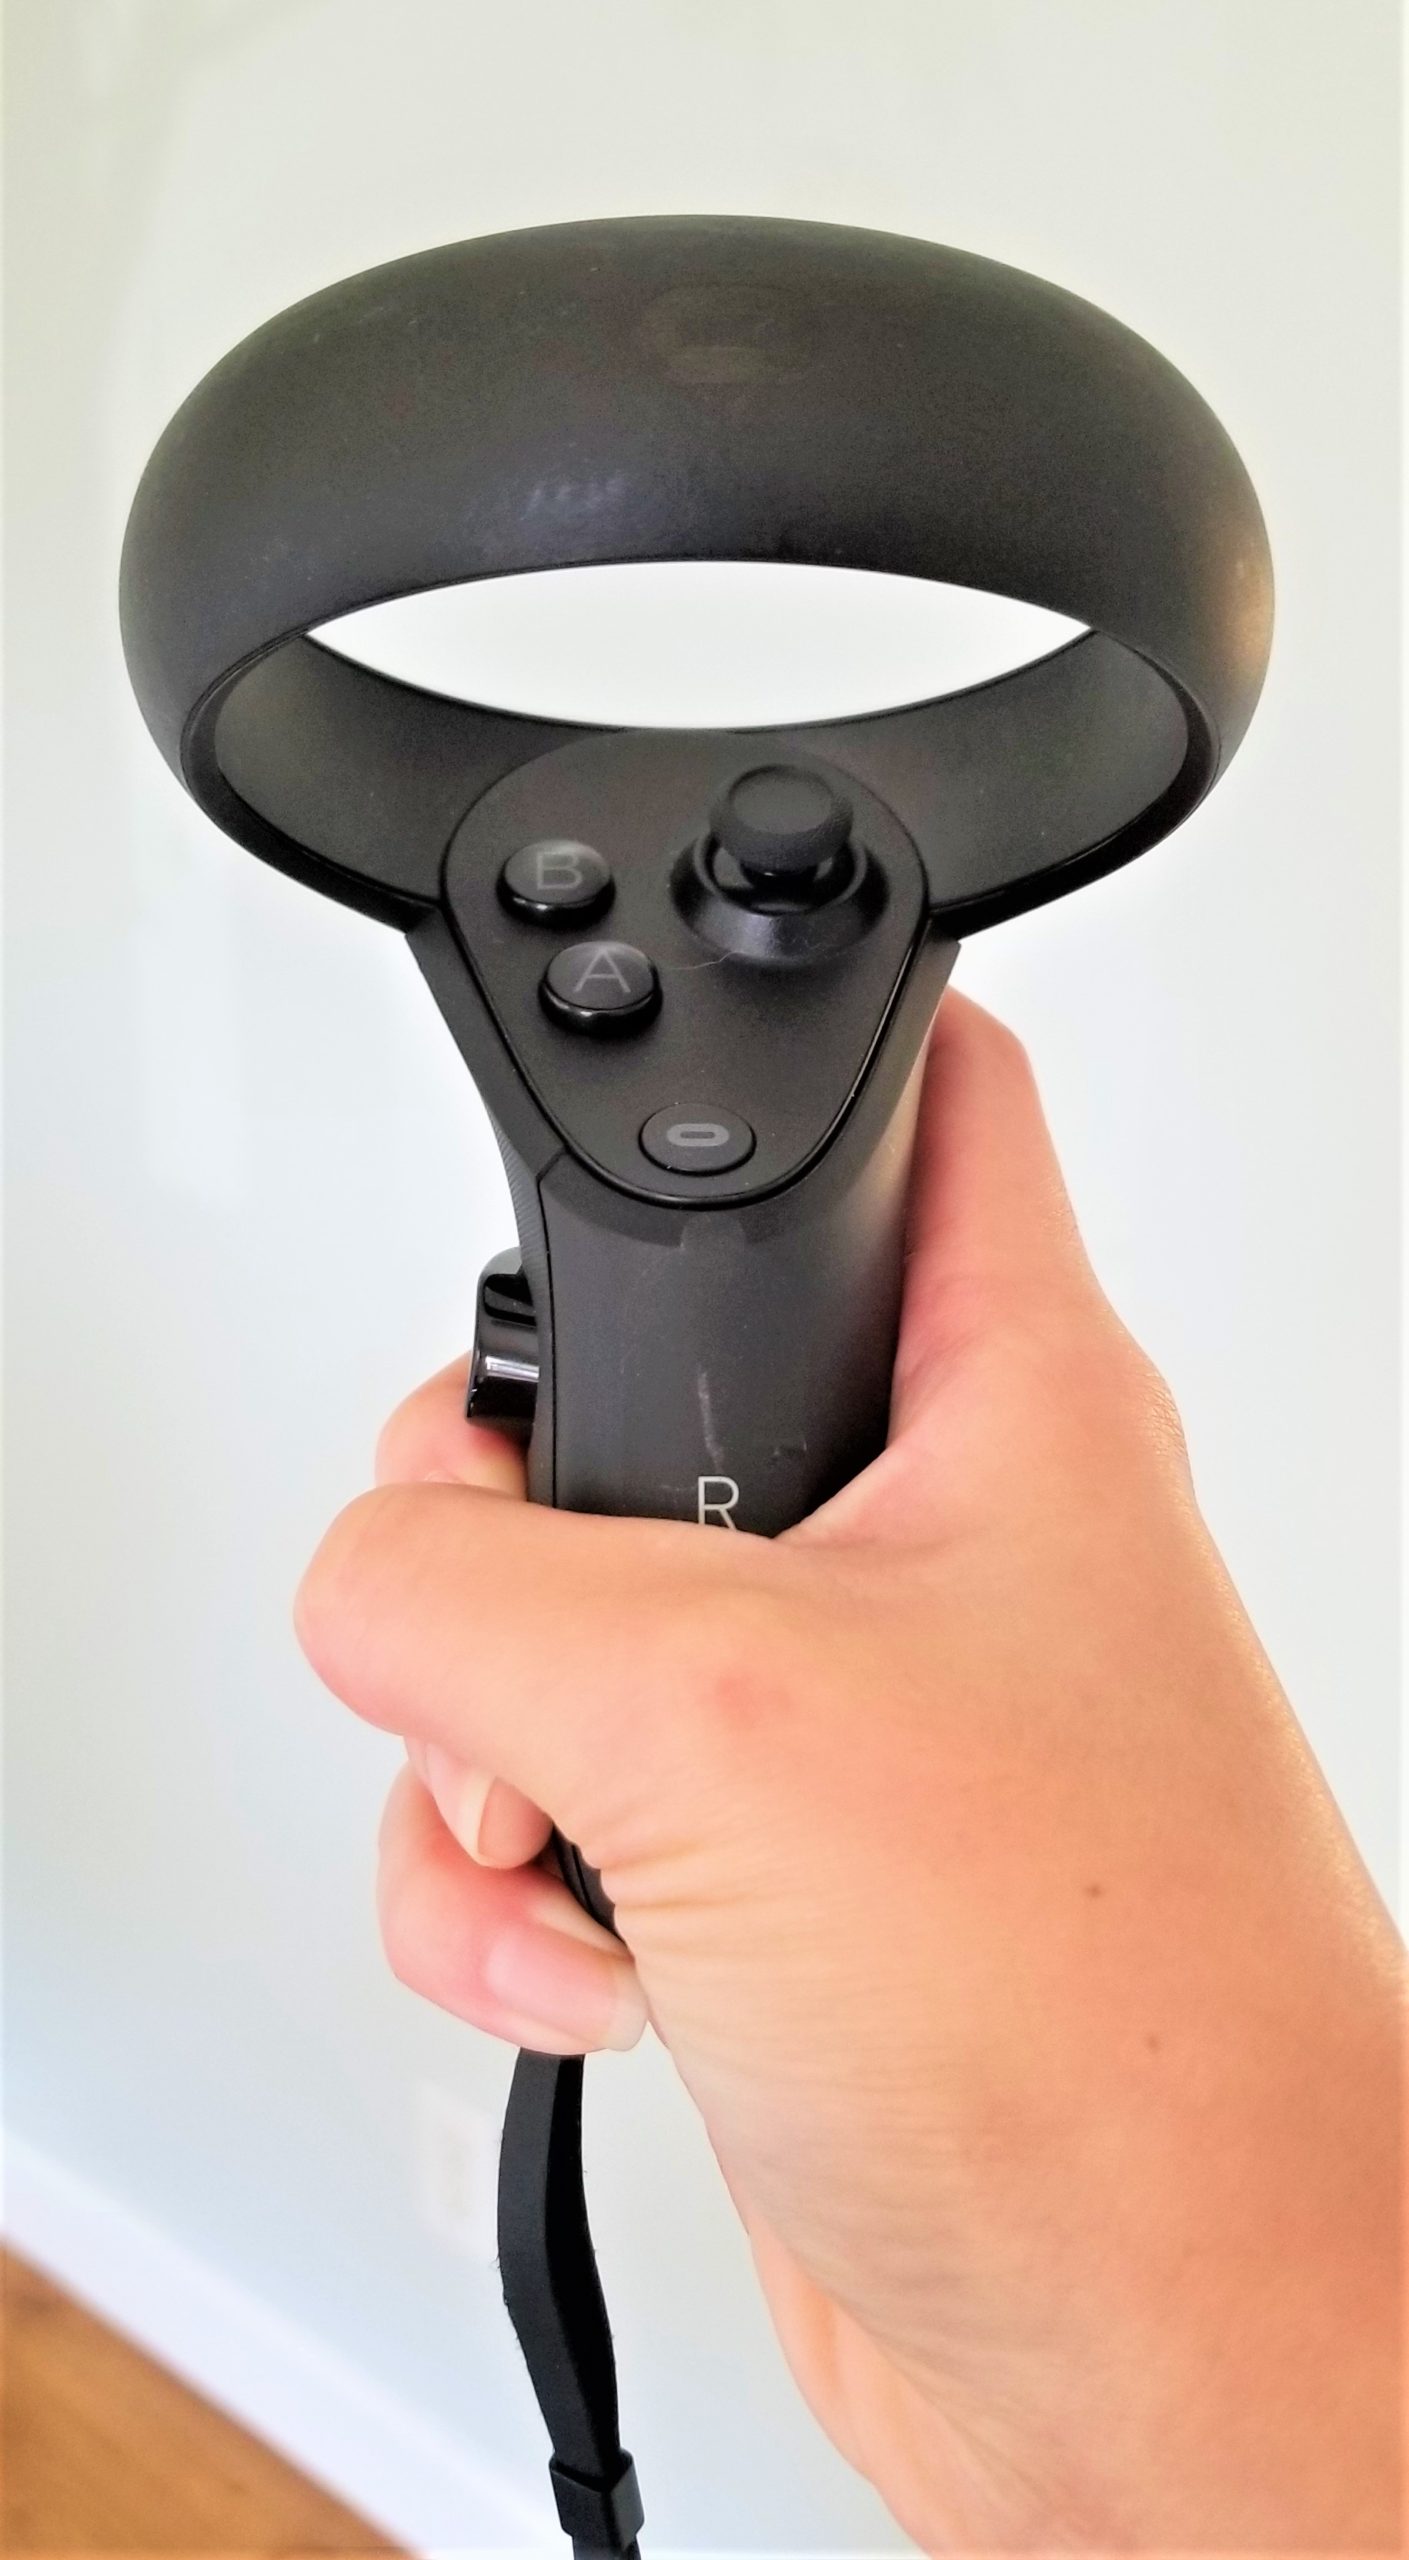
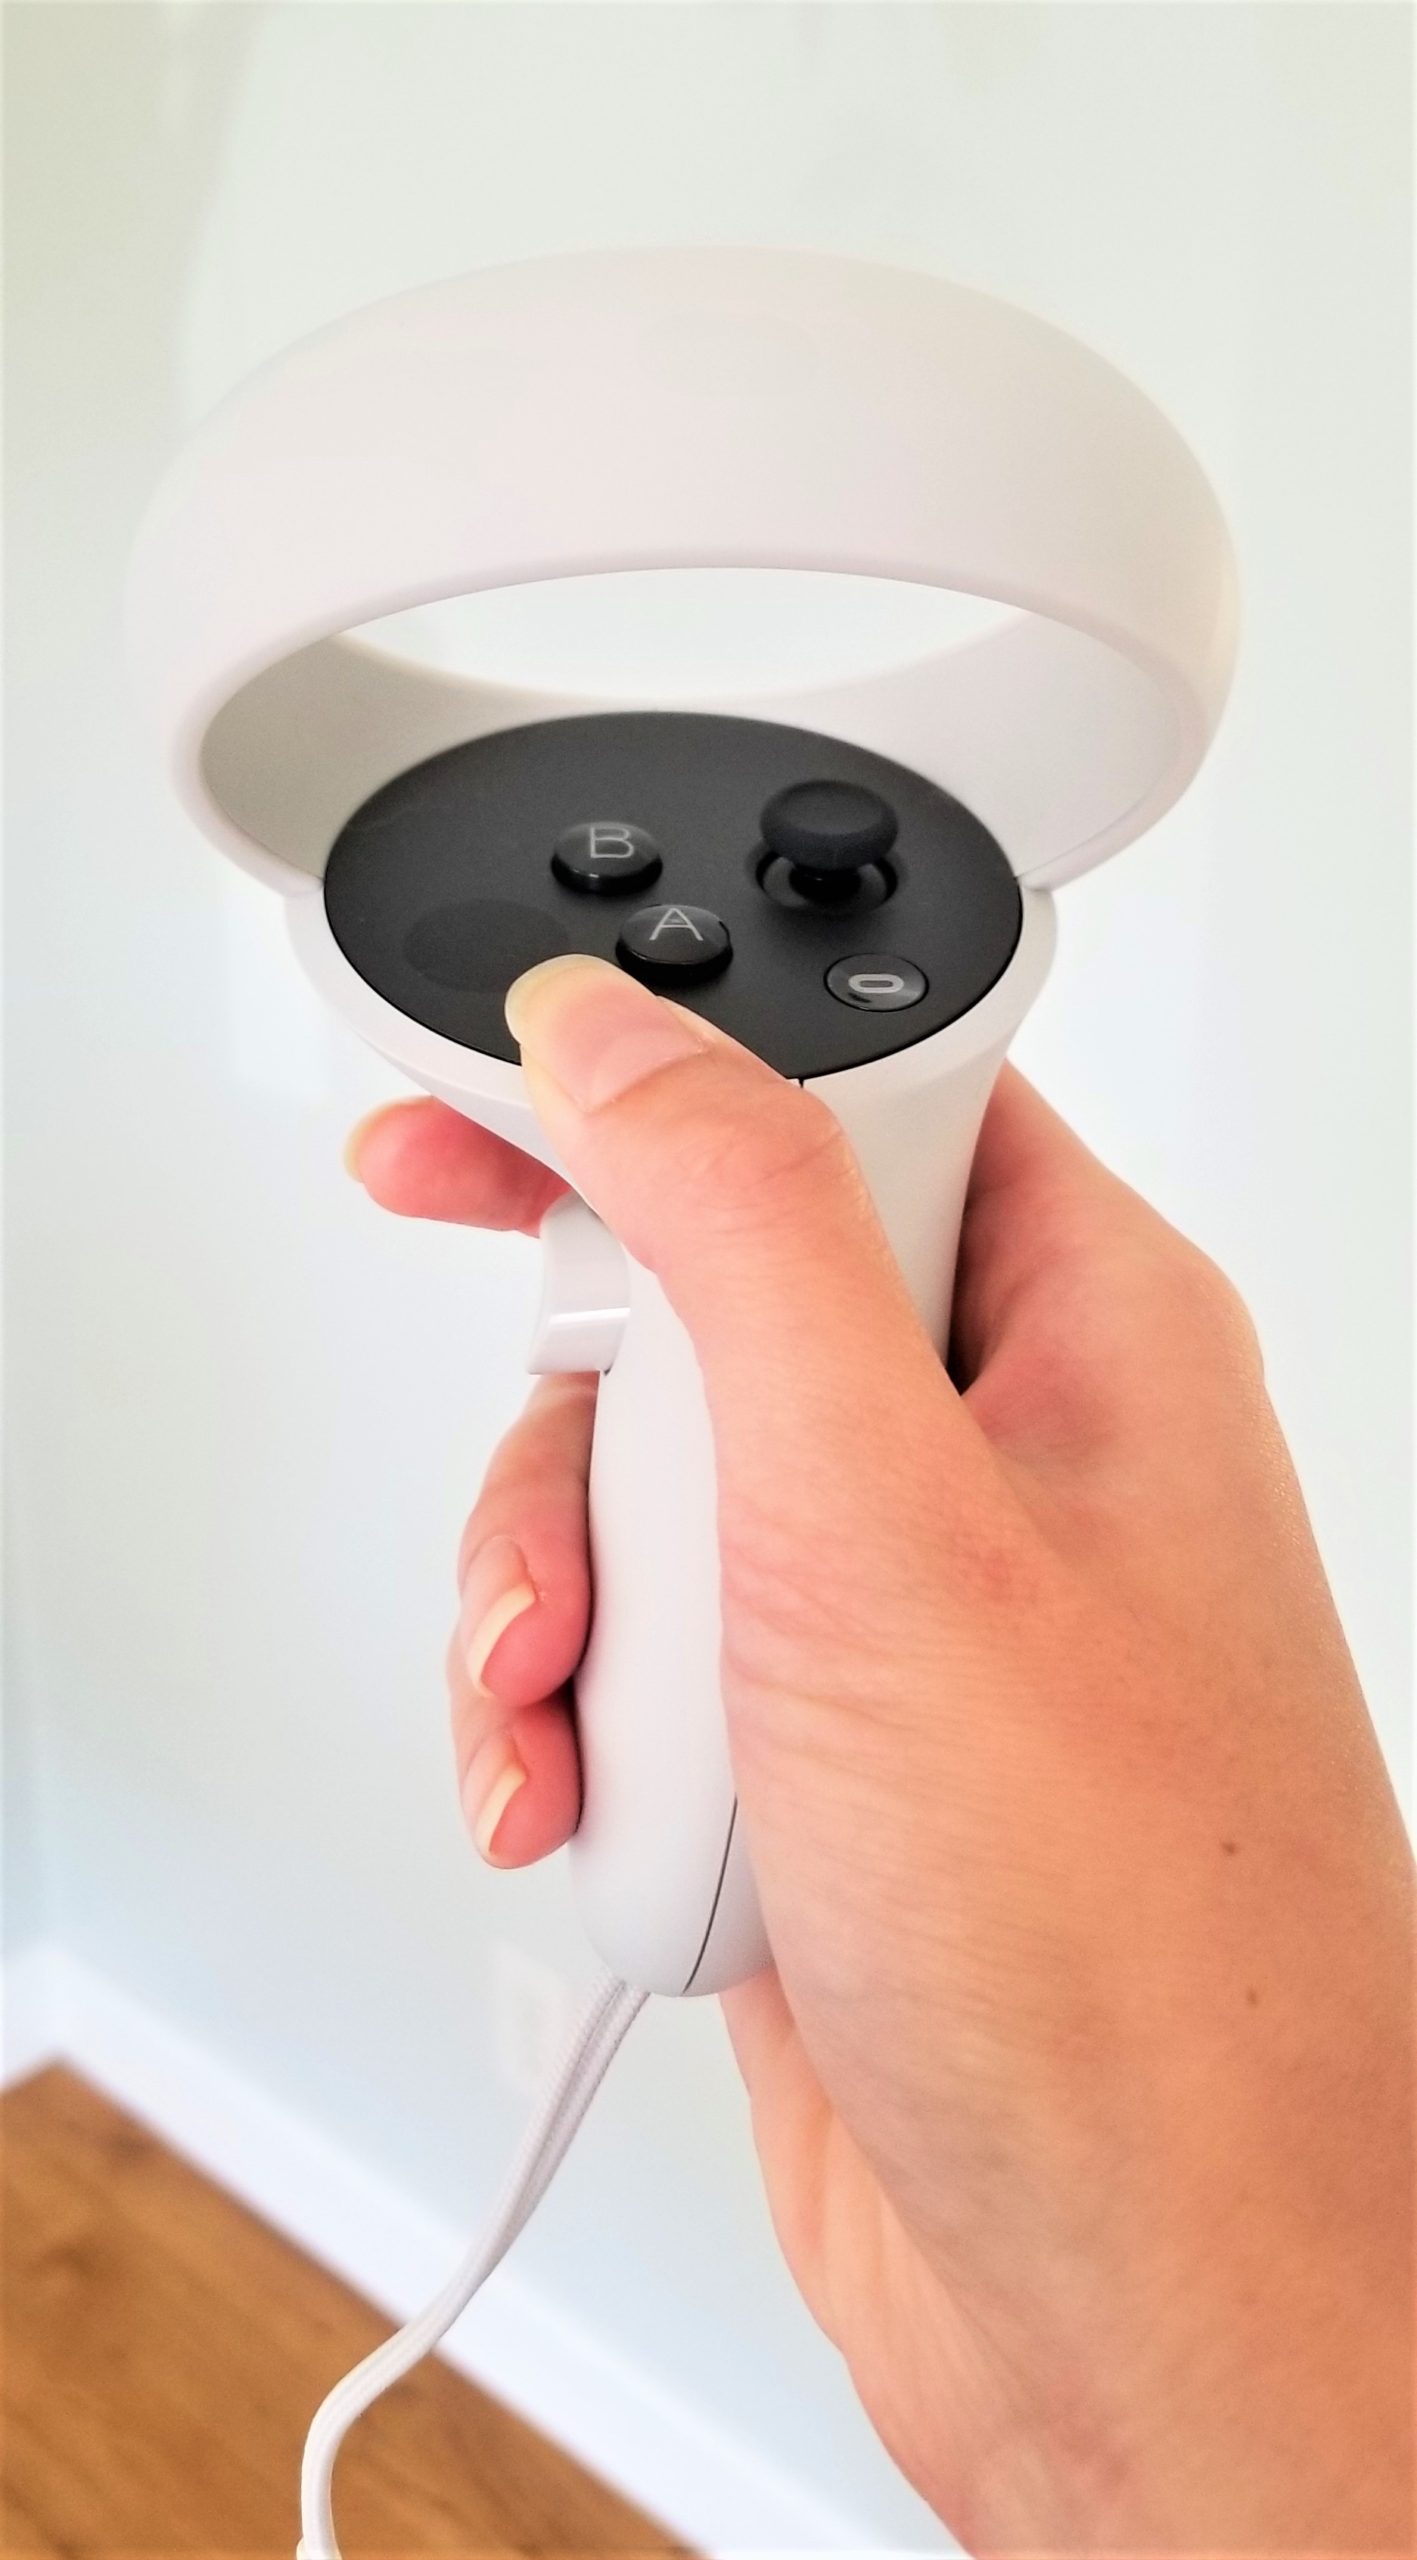
Pictured: Oculus Quest Original Controller (left); Oculus Quest 2 Controller (right)
Carried over from its predecessor, hand tracking is a relatively new feature that hasn’t changed in the Quest 2. Good lighting is required, just like for the Oculus controllers, and the gestures are simple – move and pinch with either palms up or down. Not all games support hand tracking, and honestly, most can’t be improved by hand tracking. Thus, I’ve only used my hands to navigate the Oculus Menu screens for now. But the option is there as it makes putting on your headset and getting right into a game a very convenient feature if you don’t have a permanent space for VR.
An excellent and thoughtful perk that Oculus has provided with this headset is the accessory kits sold separately for enhanced comfort or efficiency. If you’ve read previous reviews of mine on the Quest 1 or the Valve Index, you know that head comfort is important to me. Naturally, I gravitated to the Quest 2 Elite Strap. There is even an Elite Strap with an integrated battery for long-lasting play. I have yet to try it out, but I’m singing their praise already for adopting the wheel tightening system for better balance and support. I would recommend adding the Elite Strap to your order if you’re already an avid VR player or plan to be. Your cheeks, forehead, and neck will thank you. Another item of interest would be the carrying case specific to the Quest 2. If a headset is going to be portable, it needs to be protected, secure, and good-looking if you’re going to bring it anywhere with you.
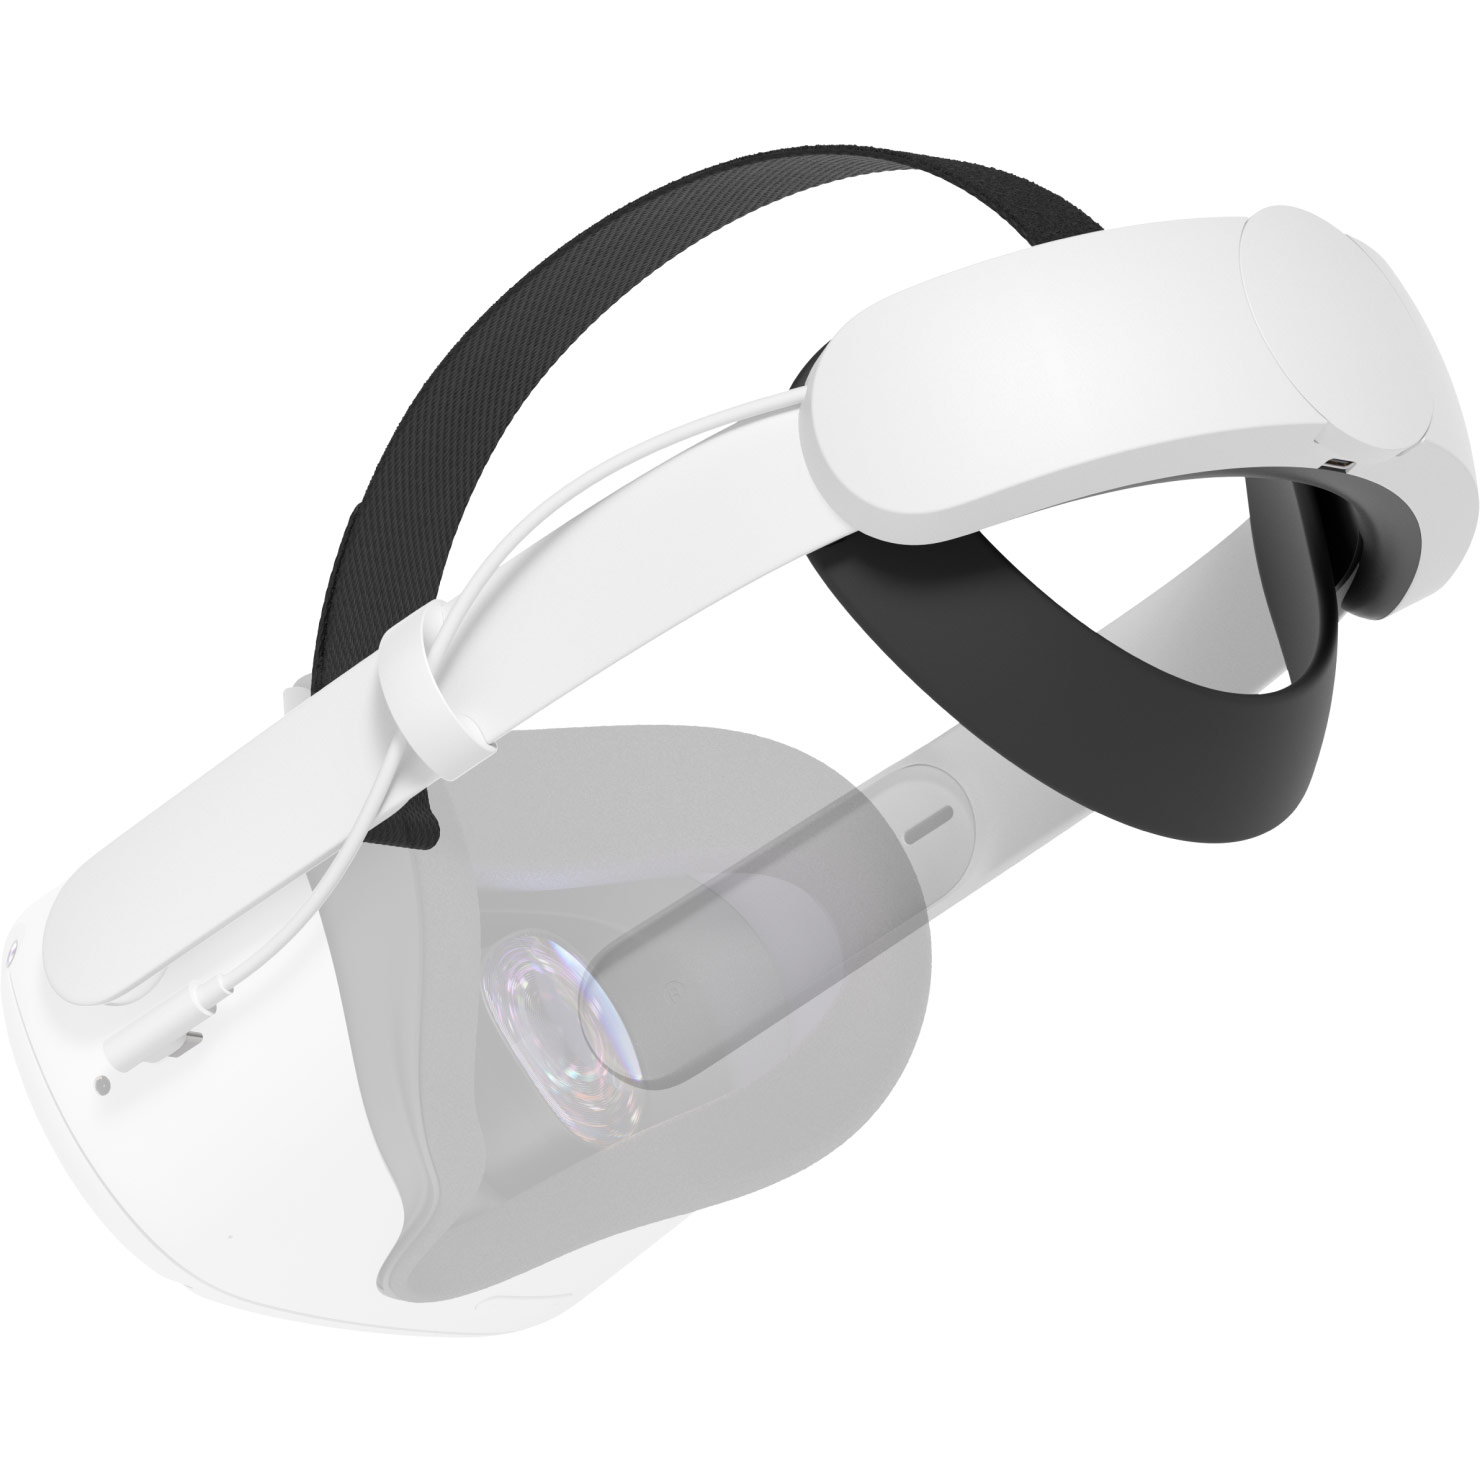
Photo Credit: oculus.com
Finally, the best-selling point of the Quest 2 is the price, while giving you all the best technology and a plethora of popular content a standalone headset can offer on the current market. It is $100 cheaper than the Quest when it was first released, and still hundreds of dollars less expensive than PC-driven headsets, making its accessibility hard to compete with. The Oculus team at Facebook knows that price will be the driving force to get VR to go mainstream, so if you can get past the mandatory Facebook account conundrum for logging in and playing, which can be a can of worms to open depending on your opinion of it, it is worth jumping on the VR train as a beginner here or continuing your Oculus gameplay with an upgrade. If you’re not a fan of Facebook, there are comparable alternatives, of course, but none as inexpensive and portable as the Quest 2.

Written by Jane Nguyen
COOK-OUT REVIEW

Written by Jane Nguyen
Amebous Labs Community Manager, Jane Nguyen serves up some reviews and playtime in Resolution Games Cook-Out: A Sandwich Tale for Oculus. 
 See what she has to say about this fun frenzy of a game.
Community Manager Jane reviews Cook-Out on Oculus Quest.