UNITY UI REMOTE INPUT

Written by Pierce McBride
Throughout many VR (virtual reality) games and experiences, it’s sometimes necessary to have the player interact with a UI (user interface). In Unity, these are commonly world-space canvases where the player usually has some type of laser pointer, or they can directly touch the UI with their virtual hands. Like me, you may have in the past wanted to implement a system and ran into the problem of how can we determine what UI elements the player is pointing at, and how can they interact with those elements? This article will be a bit technical and assumes some intermediate knowledge of C#. I’ll also say now that the code in this article is heavily based on the XR Interaction Toolkit provided by Unity. I’ll point out where I took code from that package as it comes up, but the intent is for this code to work entirely independently from any specific hardware. If you want to interact with world-space UI with a world-space pointer and you know a little C#, read on.
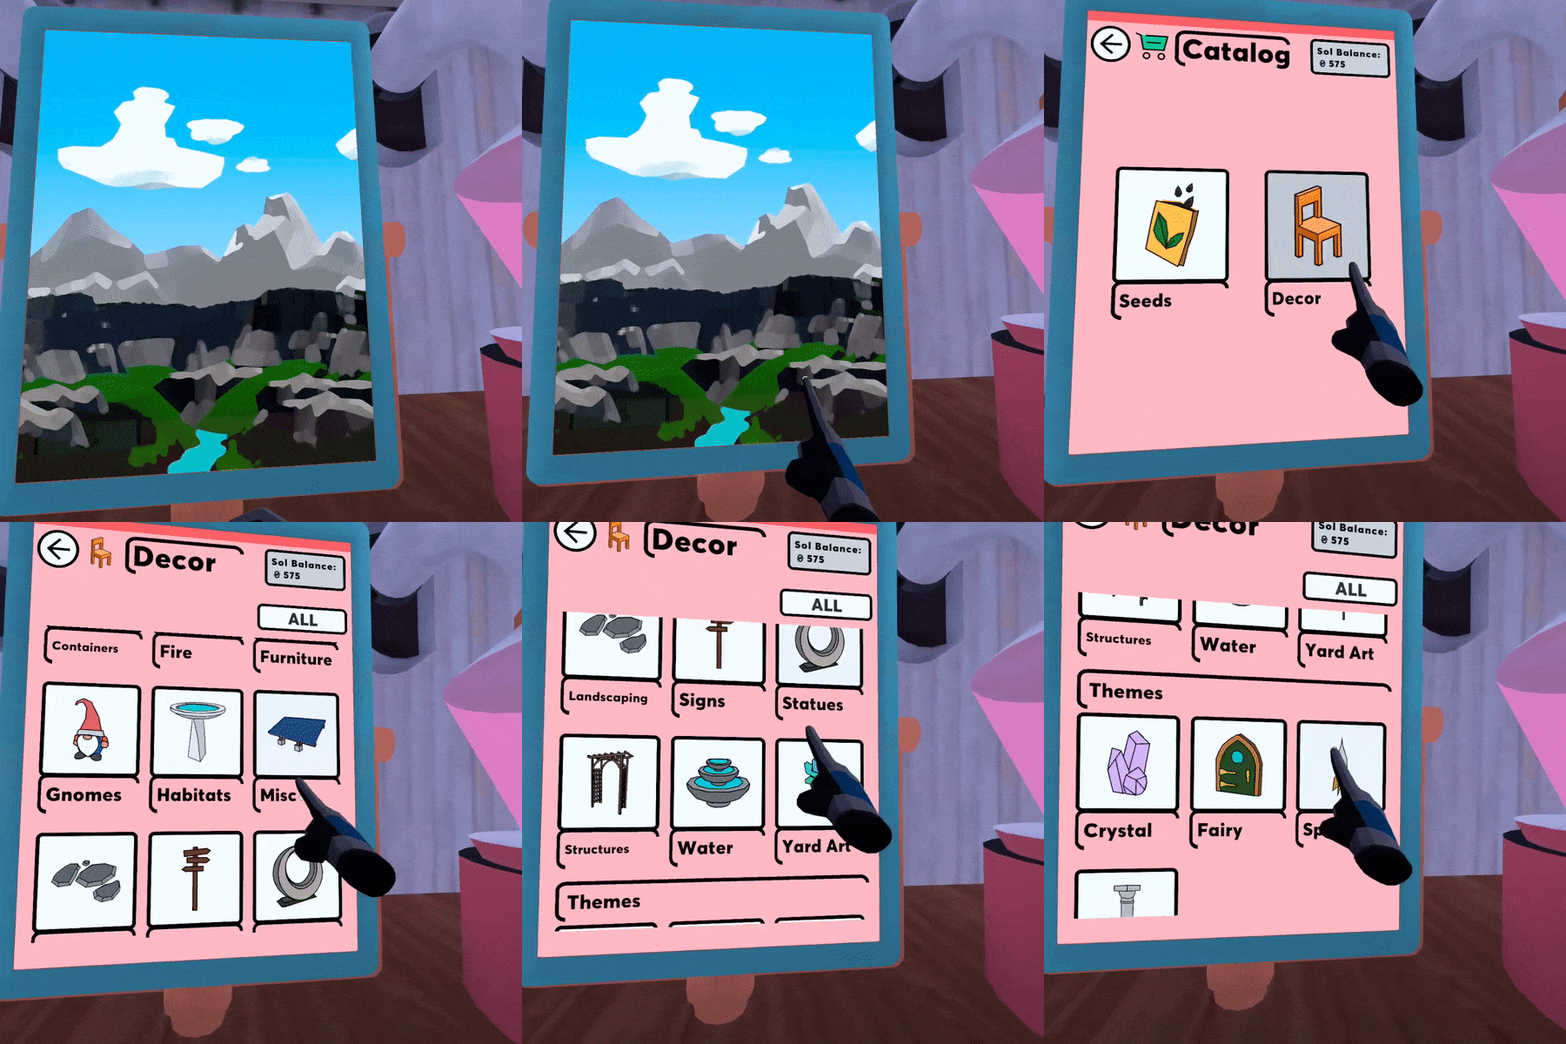
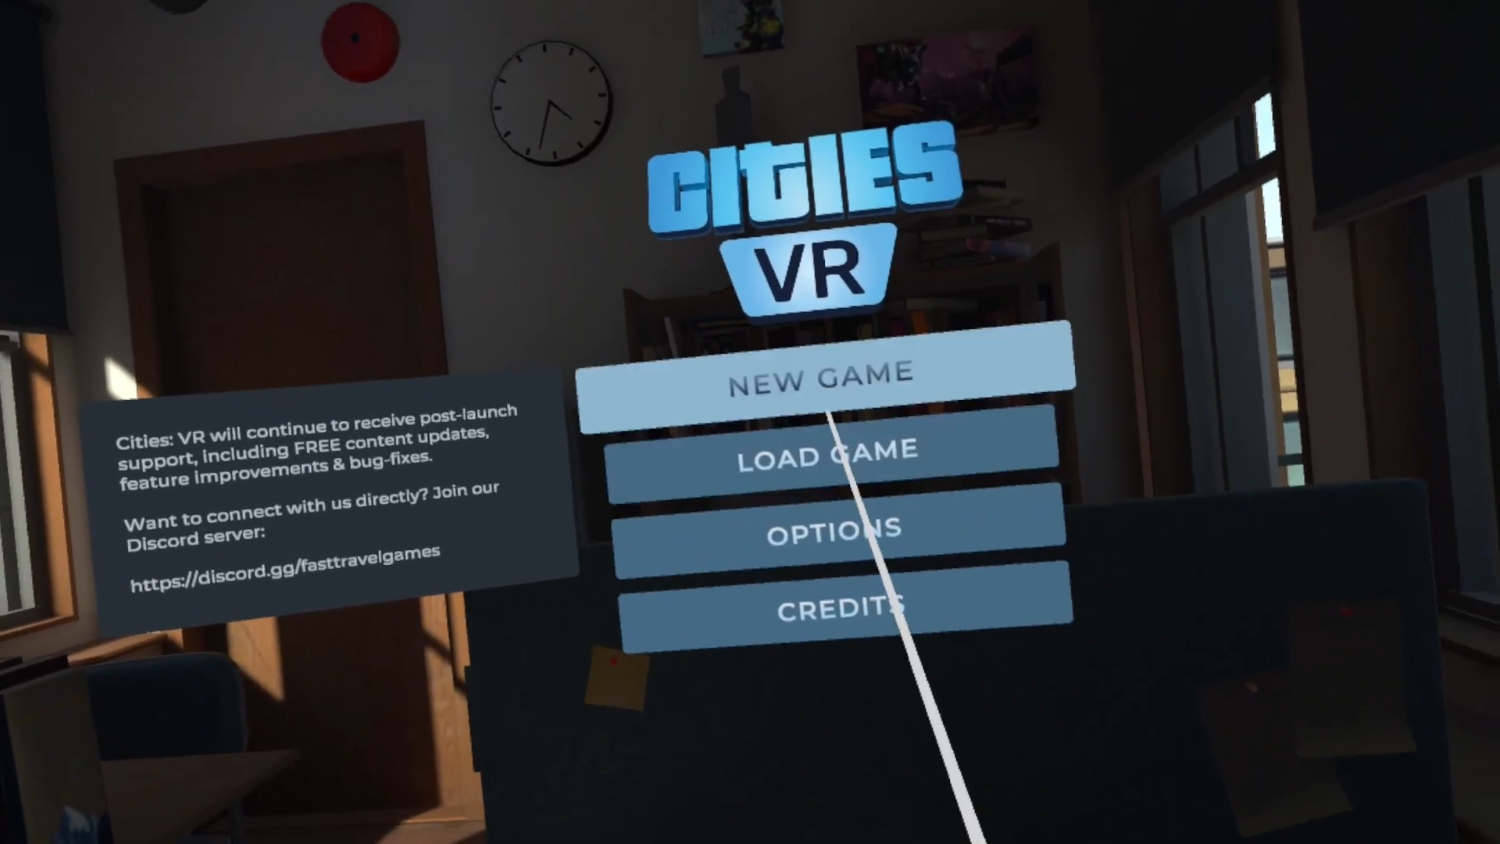
Figure 1 – Cities VR (Fast Travel Games, 2022)
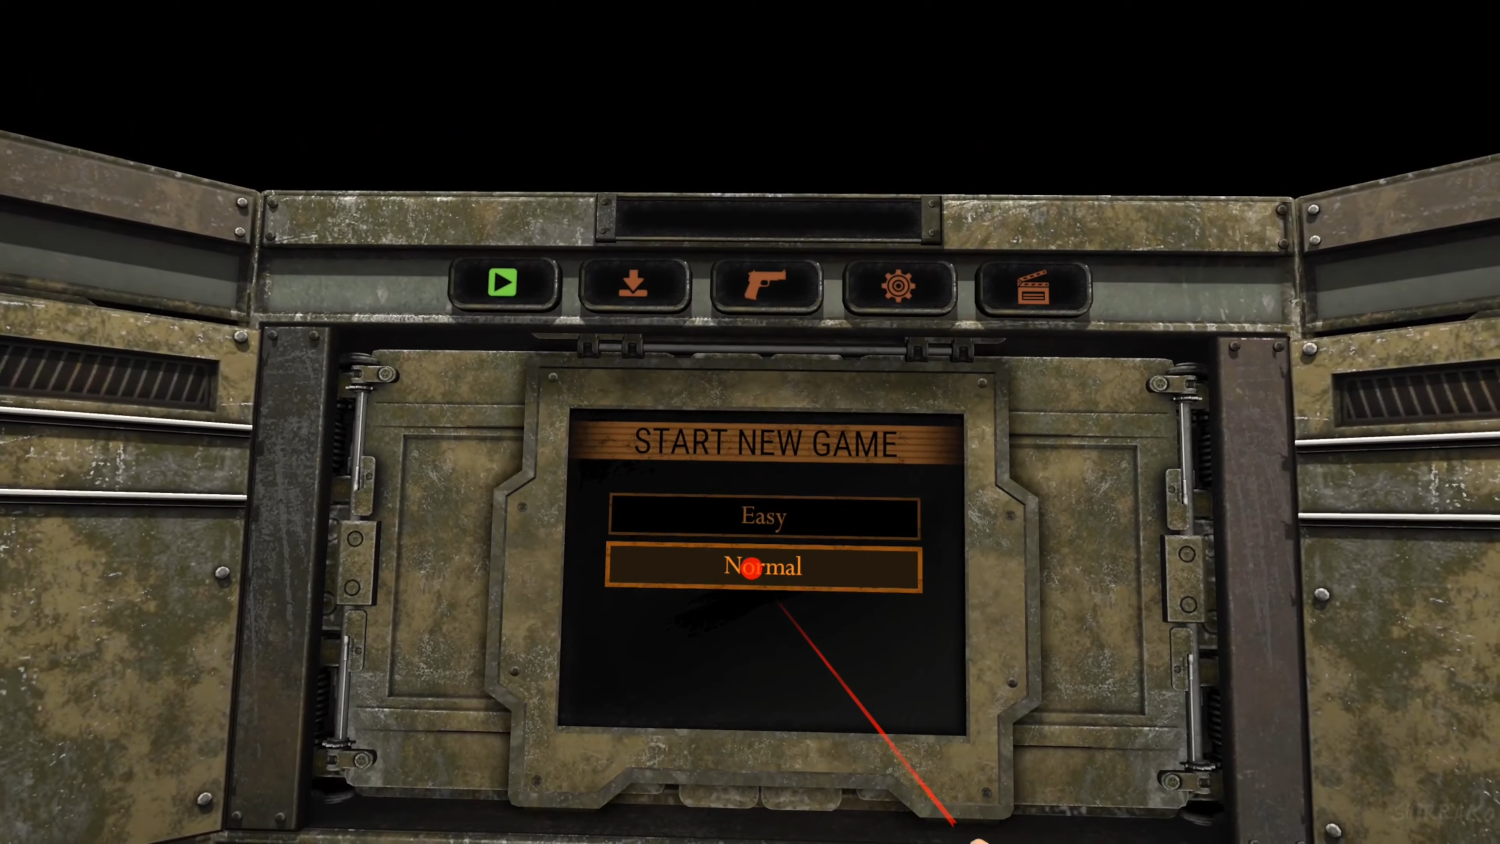
Figure 2 – Resident Evil 4 VR (Armature Studio, 2021)
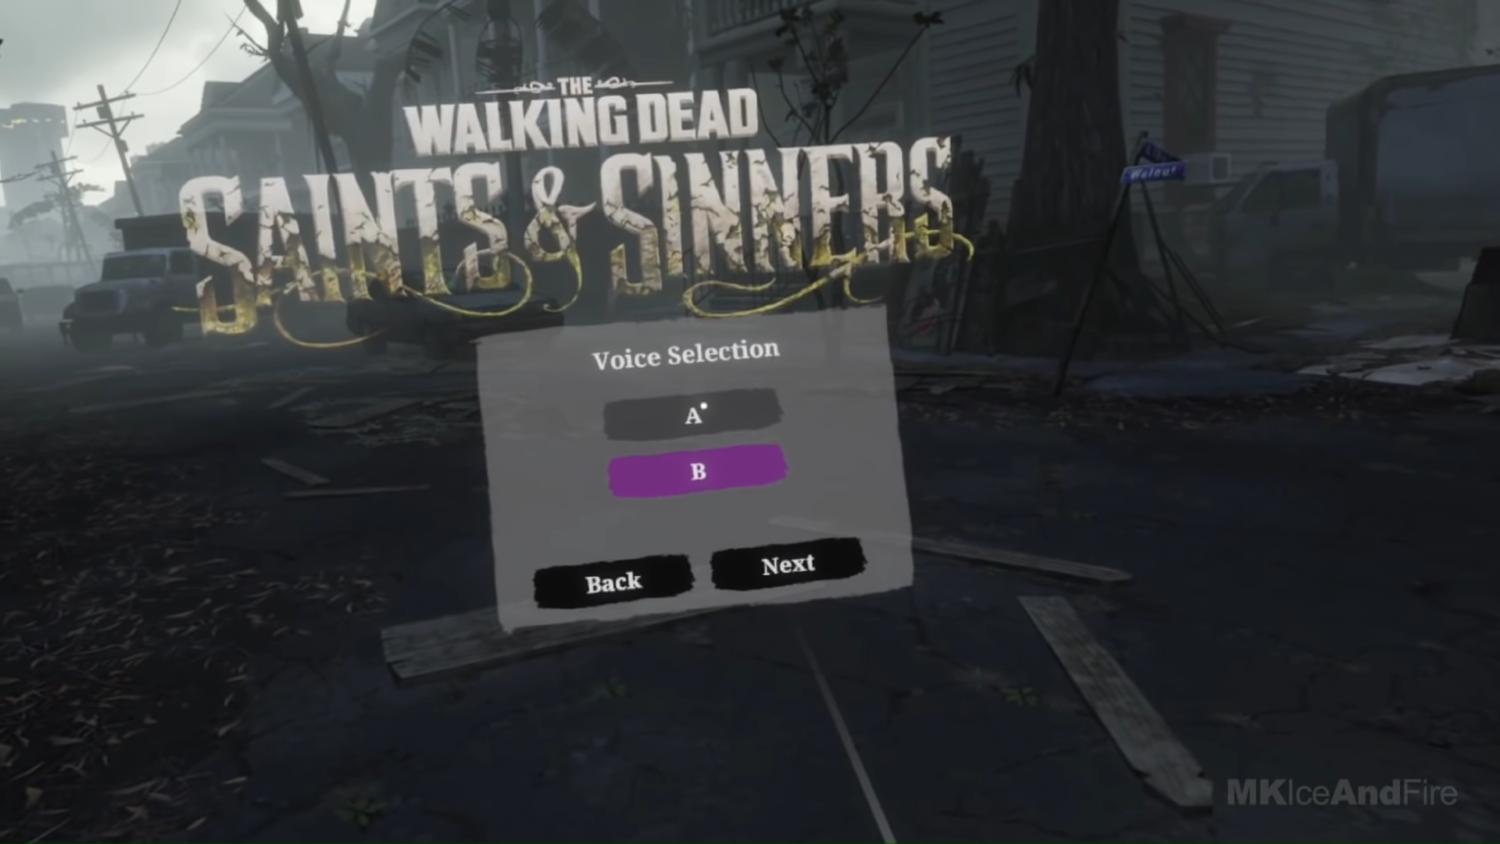
Figure 3 – The Walking Dead: Saints and Sinners (Skydance Interactive, 2020)
Physics.Raycast to find out what the player is pointing at,” and unfortunately, you would be wrong like I was. That’s a little glib, but in essence, there are two problems with that approach:
- Unity uses a combination of the EventSystem, GraphicsRaycasters, and screen positions to determine UI input, so by default,
Physics.Raycastswould entirely miss the UI with its default configuration.
- Even if you attach colliders and find the GameObject hit with a UI component, you’d need to replicate a lot of code that Unity provides for free. Pointers don’t just click whatever component they’re over; they can also drag and scroll.
In order to explain the former problem, it’s best to make sure we both understand how the existing EventSystem works. By default, when a player moves a pointer (like a mouse) around or presses some input that we have mapped to UI input, like select or move, Unity picks up this input from an InputModule component attached to the same GameObject as the EventSystem. This is, by default, either the Standalone Input Module or the Input System UI Input Module. Both work the same way, but they use different input APIs.
Each frame, the EventSystem calls a method in the input module named Process(). In the standard implementations, the input module gets a reference to all enabled BaseRaycaster components from a RaycasterManager static class. By default, these are GraphicsRaycastersfor most games. For each of those raycasters, the input module called Raycast(PointerEventData eventData, List<RaycastResult> resultAppendList) takes a PointerEventData object and a list to append new graphics to. The raycaster sorts all the graphic’s objects on its canvas by a hierarchy that lines up with a raycast from the pointer screen position to the canvas and appends those graphics objects to the list. The input module then takes that list and processes any events like selecting, dragging, etc.
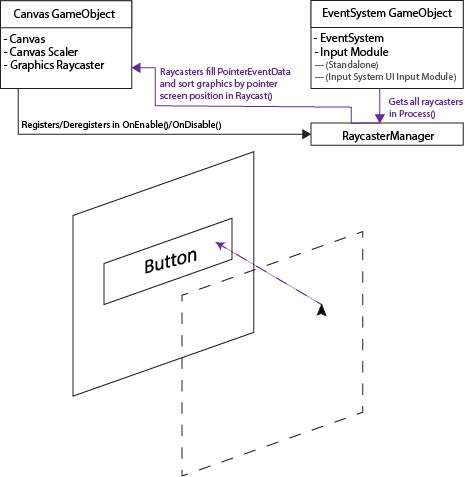
Figure 4 Event System Explanation Diagram
So how will these objects fit together? Instead of the process described above, we’ll replace the input module with a RemoteInputModule, each raycaster with a RemoteInputRaycaster, create a new kind of pointer data called RemoteInputPointerData, and finally make an interface for an IRemoteInputProvider. You’ll construct the interface yourself to fit the needs of your project, and its job will be to register itself with the input module, update a cached copy of RemoteInputPointerData each frame with its current transform position rotation, and set the Select state which we’ll use to actually select UI elements.
Each time the EventSystem calls Process() on our RemoteInputModule we’ll refer to a collection of registered IRemoteInputProvider and retrieve the corresponding RemoteInputEventData. InputProviderSet is a Hashset for fast lookup and no duplicate items. Lookup is a Dictionary so we can easily associate the providers with a cached event data. We cache event data so we can properly process UI interactions that take place over multiple frames, like drags. We also presume that each event data has already been updated with a new position, rotation, and selections state. Again, this is your job as a developer to define how that happens, but the RemoteInput package will come with one out of the box and a sample implementation that uses keyboard input that you can review.
Next, we need all the RemoteInputRaycaster. We could use Unity’s RaycastManager, iterate over it, and call Raycast() on all BaseRaycaster that we can cast to our inherited type, but to me, this sounds slightly less efficient than we want. We aren’t implementing any code that could support normal pointer events from a mouse or touch, so there’s not really any point in iterating over a list that could contain many elements we have to skip. Instead, I added a static HashSet to RemoteInputRaycaster that it registers to on Enable/Disable, just like the normal RaycastManager. But in this case, we can be sure each item is the right type, and we only iterate over items that we can use. We call Raycast(), which creates a new ray from the provider’s given position, rotation, and max length. It sorts all its canvas graphics components just like the regular raycaster.
Last, we take the list that all RemoteInputRaycaster have appended and process UI events. SelectDelta is more critical than SelectDown. Technically our input module only needs to know the delta state because most events are driven when select is pressed or released only. In fact, RemoteInputModule will set the value of SelectDelta to NoChange after it’s processed each event data. That way, it’s only ever pressed or released for exactly one provider.
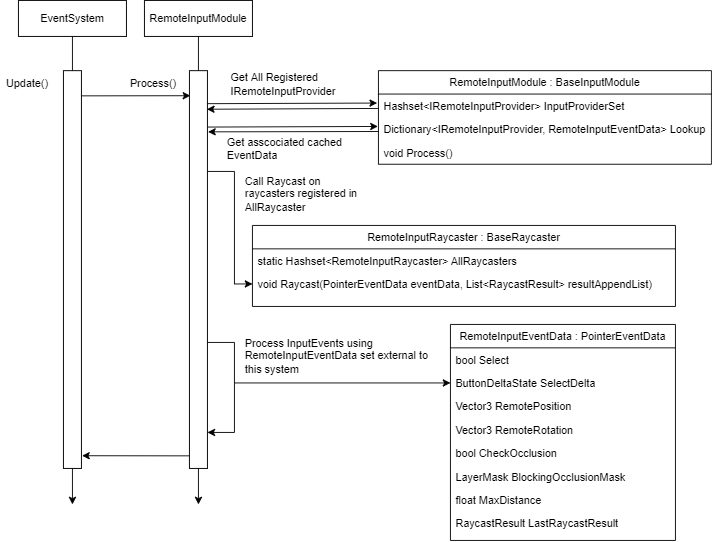
Figure 5 Remote Input Process Event Diagram
For you, the most important code to review would be our RemoteInputSender because you should only need to replace your input module and all GraphicsRaycasters for this to work. Thankfully, beyond implementing the required properties on the interface, the minimum setup is quite simple.
void OnEnable()
{
    ValidateProvider();
    ValidatePresentation();
}
void OnDisable()
{
     _cachedRemoteInputModule?.Deregister(this);
}
void Update()
{
     if (!ValidateProvider())
         return;
     _cachedEventData = _cachedRemoteInputModule.GetRemoteInputEventData(this);
     UpdateLine(_cachedEventData.LastRaycastResult);
     _cachedEventData.UpdateFromRemote();
     SelectDelta = ButtonDeltaState.NoChange;
     if (ValidatePresentation())
        UpdatePresentation();
}RemoteInputModule through the singleton reference EventSystem.current and registering ourselves with SetRegistration(this, true). Because we store registered providers in a Hashset, you can call this each time, and no duplicate entries will be added. Validating our presentation means updating the properties on our LineRenderer if it’s been set in the inspector.bool ValidatePresentation()
{
_lineRenderer = (_lineRenderer != null) ? _lineRenderer : GetComponent <linerenderer>();
if (_lineRenderer == null)
return false;
_lineRenderer.widthMultiplier = _lineWidth;
_lineRenderer.widthCurve = _widthCurve;
_lineRenderer.colorGradient = _gradient;
_lineRenderer.positionCount = _points.Length;
if (_cursorSprite != null &amp;&amp; _cursorMat == null)
{
_cursorMat = new Material(Shader.Find("Sprites/Default"));
_cursorMat.SetTexture("_MainTex", _cursorSprite.texture);
_cursorMat.renderQueue = 4000; // Set renderqueue so it renders above existing UI
// There's a known issue here where this cursor does NOT render above dropdown components.
// it's due to something in how dropdowns create a new canvas and manipulate its sorting order,
// and since we draw our cursor directly to the Graphics API we can't use CPU-based sorting layers
// if you have this issue, I recommend drawing the cursor as an unlit mesh instead
if (_cursorMesh == null)
_cursorMesh = Resources.GetBuiltinResource&lt;Mesh&gt;("Quad.fbx");
}
return true;
}RemoteInputSender will still work if no LineRenderer is added, but if you add one it’ll update it via the properties on the sender each frame. As an extra treat, I also added a simple “cursor” implementation that creates a cached quad, assigns a sprite material to it that uses a provided sprite and aligns it per-frame to the endpoint of the remote input ray. Take note of Resources.GetBuiltinResource("Quad.fbx") . This line gets the same file that’s used if you hit Create -> 3D Object -> Quad and works at runtime because it’s a part of the Resources API. Refer to this link for more details and other strings you can use to find the other built-in resources.
The two most important lines in Update are _cachedEventdata.UpdateFromRemote() and SelectDelta = ButtonDeltaState.NoChange. The first line will automatically set all properties in the event data object based on the properties implemented from the provider interface. As long as you call this method per frame and you write your properties correctly the provider will work. The second resets the SelectDelta property, which is used to determine if the remote provider just pressed or released select. The UI is built around input down and up events, so we need to mimic that behavior and make sure if SelectDelta changes in a frame, it only remains pressed or released for exactly 1 frame.
void UpdateLine(RaycastResult result)
{
_hasHit = result.isValid;
if (result.isValid)
{
_endpoint = result.worldPosition;
// result.worldNormal doesn't work properly, seems to always have the normal face directly up
// instead, we calculate the normal via the inverse of the forward vector on what we hit. Unity UI elements
// by default face away from the user, so we use that assumption to find the true "normal"
// If you use a curved UI canvas this likely will not work
_endpointNormal = result.gameObject.transform.forward * -1;
}
else
{
_endpoint = transform.position + transform.forward * _maxLength;
_endpointNormal = (transform.position - _endpoint).normalized;
}
_points[0] = transform.position;
_points[_points.Length - 1] = _endpoint;
}
void UpdatePresentation()
{
_lineRenderer.enabled = ValidRaycastHit;
if (!ValidRaycastHit)
return;
_lineRenderer.SetPositions(_points);
if (_cursorMesh != null &amp;amp;&amp;amp; _cursorMat != null)
{
_cursorMat.color = _gradient.Evaluate(1);
var matrix = Matrix4x4.TRS(_points[1], Quaternion.Euler(_endpointNormal), Vector3.one * _cursorScale);
Graphics.DrawMesh(_cursorMesh, matrix, _cursorMat, 0);
}
} RemoteInputSender. Because the LastRaycastResult is cached in the event data, we can use it to update our presentation efficiently. In most cases we likely just want to render a line from the provider to the UI that’s being used, so we use an array of Vector3 that’s of length 2 and update the first and last position with the provider position and raycast endpoint that the raycaster updated. There’s an issue currently where the world normal isn’t set properly, and since we use it with the cursor, we set it ourselves with the start and end point instead. When we update presentation, we set the positions of the line renderer, and we draw the cursor if we can. The cursor is drawn directly using the Graphics API, so if there’s no hit, it won’t be drawn and has no additional GameObject or component overhead.
I would encourage you to read the implementation in the repo, but at a high level, the diagrams and explanations above should be enough to use the system I’ve put together. I acknowledge that portions of the code use methods written for Unity’s XR Interaction Toolkit, but I prefer this implementation because it is more flexible and has no additional dependencies. I would expect most developers who need to solve this problem are working in XR, but if you need to use world space UIs and remotes in a non-XR game, this implementation would work just as well.
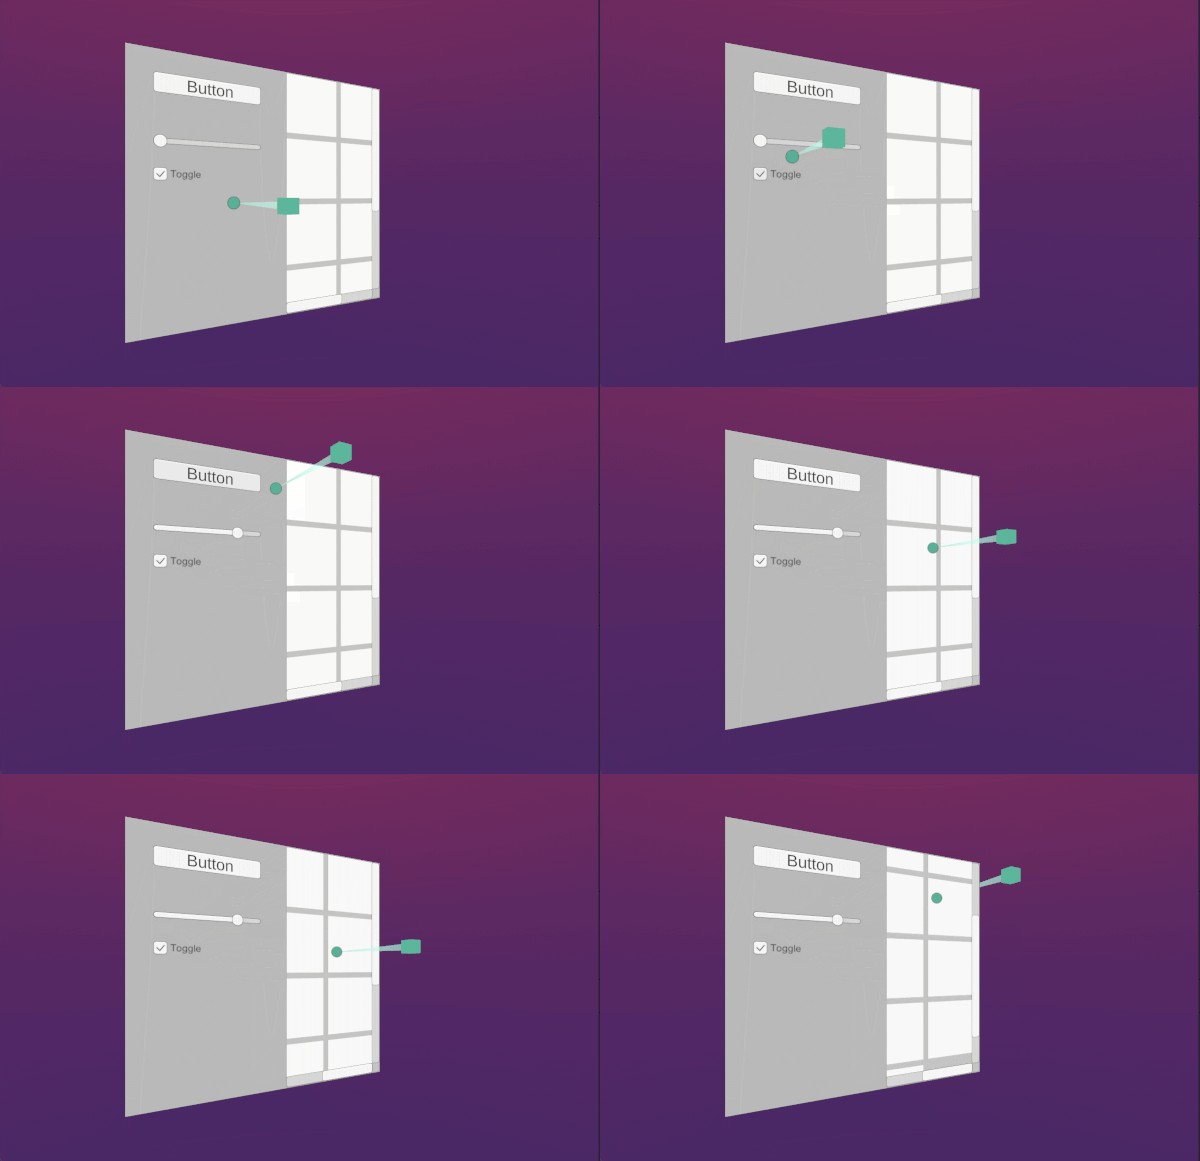
Figure 6 Non-VR Demo
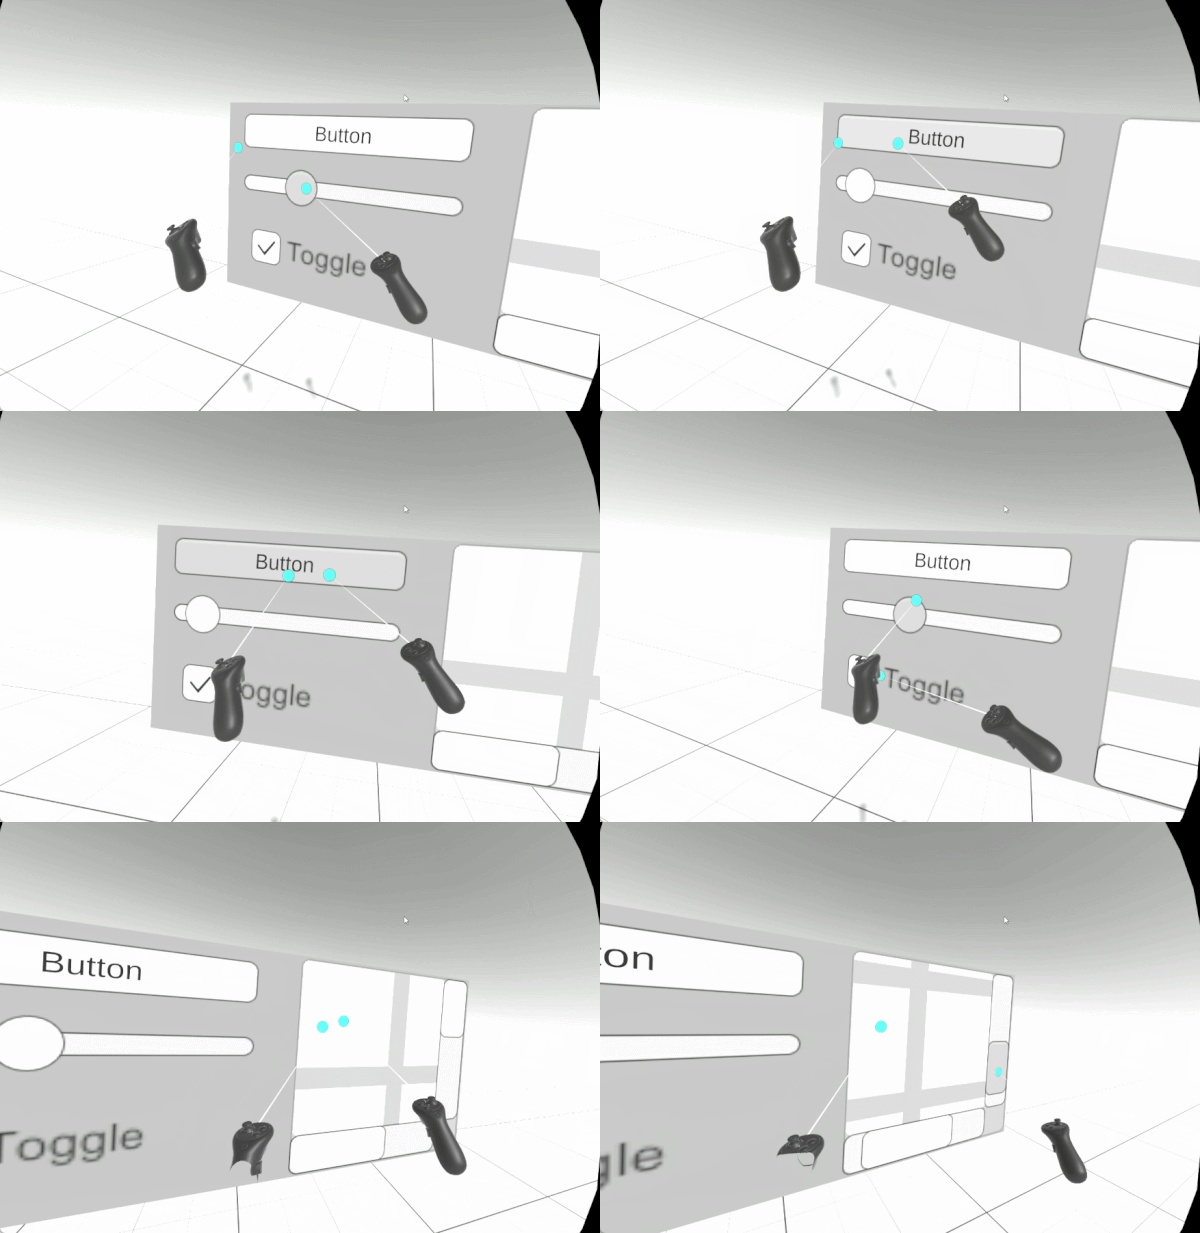
Figure 7 VR Demo
Cheers, and good luck building your game ✌️

Written by Pierce McBride
GDC 2022: DAY 2

Written by Nick Foster
Art Direction Summit: Building Night City
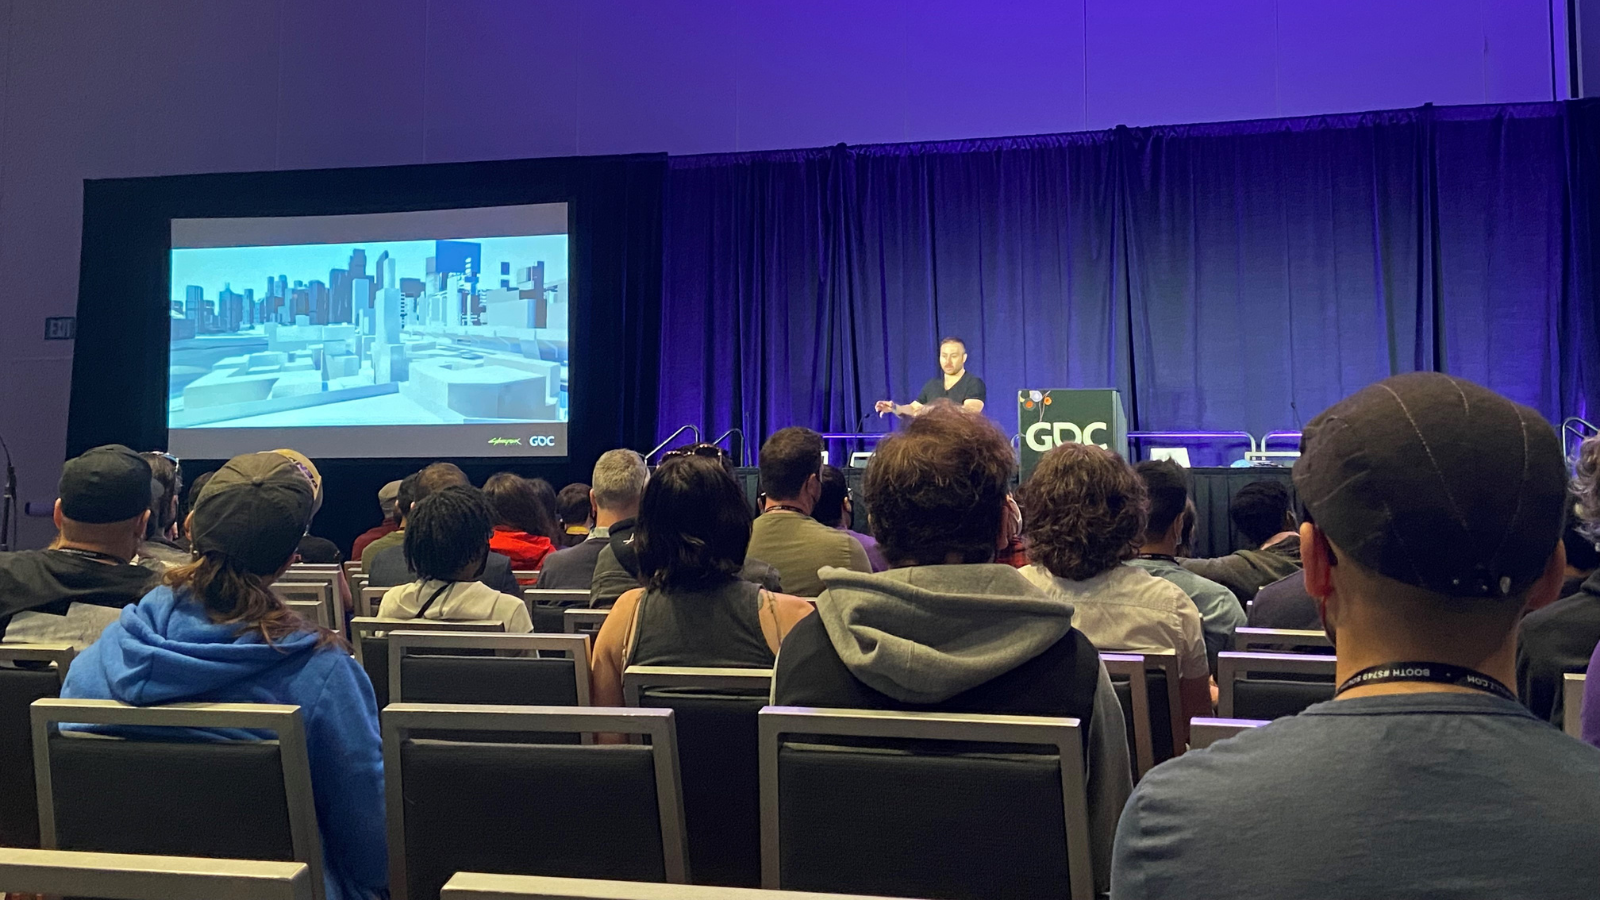
My favorite session of day two was presented by the lead environment artist at CD Projekt Red, Kacper Niepokólcyzcki; his talk was centered around the creation of Cyberpunk 2077‘s environments. My main takeaways were to think about how you can evoke emotions through the design of the environment from the very start.
Although it may lack color and feature very limited detail, the earliest stages of your environment design should still make you feel something. The following steps of the design process should continue to strengthen that feeling you want the player to experience while playing your game. If it doesn’t, then you will need to re-iterate until you hit upon an environment better aligned with your game’s core pillars. When you are making design decisions, you should always stop and ask yourself (or your team) “WHY?” If the answer is vague or unclear, then the concept needs to be worked on.
Future Realities Summit: How NOT to Build a VR Arcade Game

Michael Bridgman (Co-founder & CTO, MajorMega) shares development tips for mitigating user motion sickness in VR experiences.
On my second day of GDC, I went to an awesome panel covering VR arcade games: the dos, don’ts, trials, and tribulations. Michael Bridgman, the developer hosting the presentation, has made incredible VR experiences, and he discussed a few tricks to help mitigate major causes of motion sickness in virtual reality. While some of it isn’t applicable to the kind of development that we do at Amebous Labs, I think he shared many interesting things worth looking into.
Day two also presented me with a chance to use the HTC Flow and the HTC Focus. The XR industry often focuses on the Oculus Quest and to a lesser extent the Vive Index, so it was very lovely to use some alternative headsets. I want to give more attention to the HTC Flow which is a lightweight VR system that takes advantage of your phone’s processing power to reduce the overall size of the headset. Five minutes with it on and I was already trying to formulate ideas for how we might use it (and how I would convince Annie to buy it…)
Meeting HTC Vive’s Developer Community

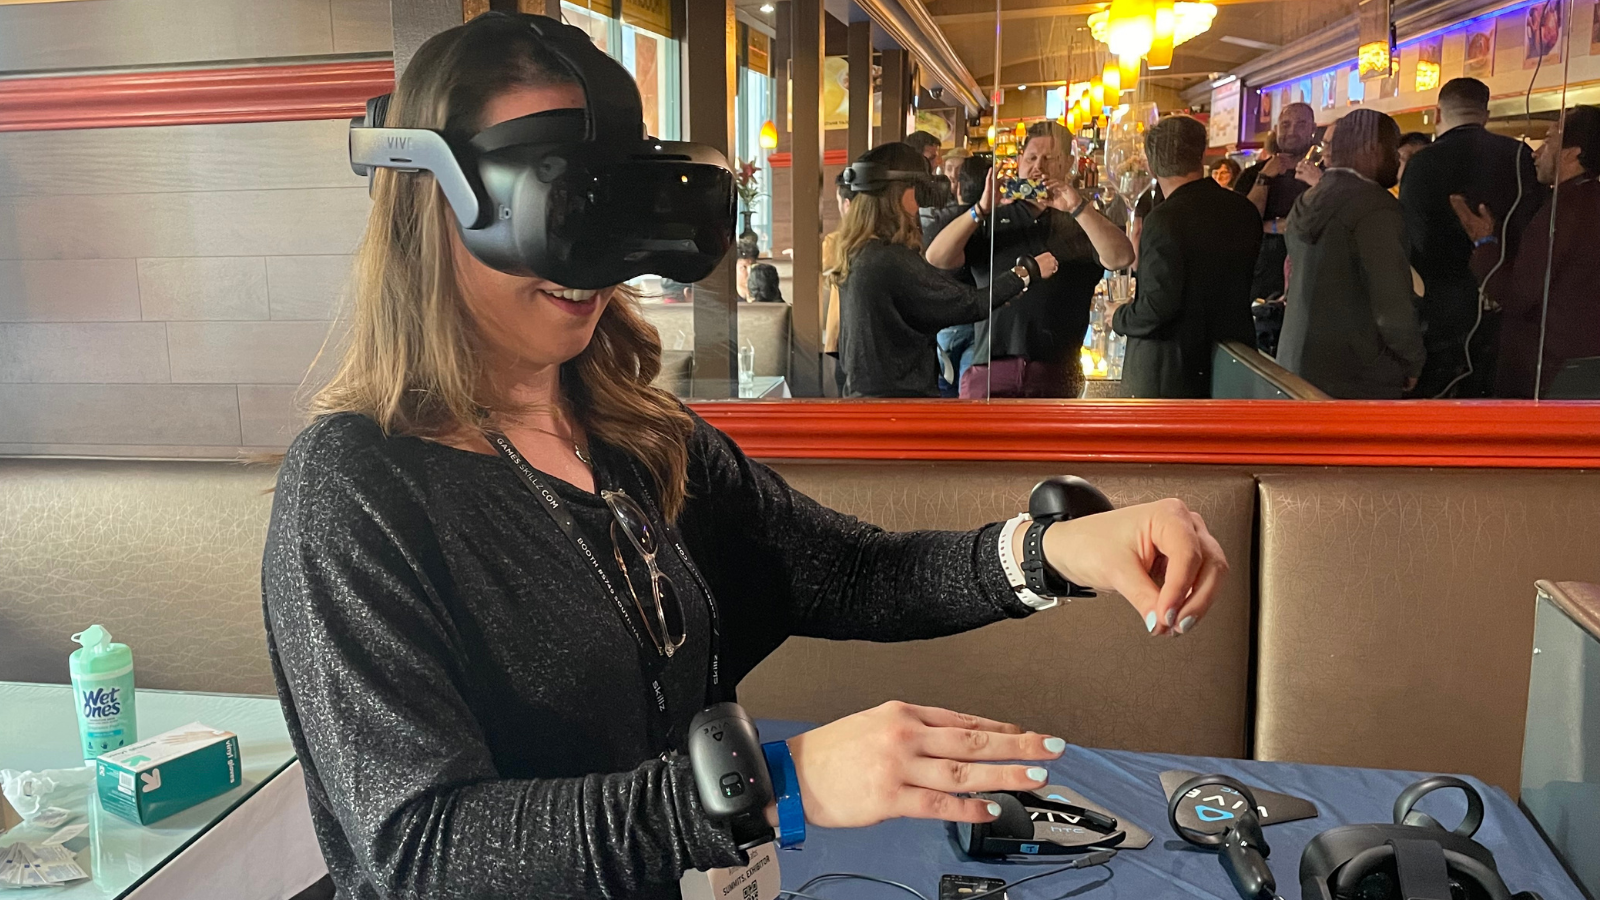
Annie tries out the HTC Focus 3’s new wrist trackers.
It was great to meet more people in the HTC Vive developer community! On day two, I got to see the new Wrist Tracker device for the Vive Focus 3. It was great to see how this hardware has enhanced hand tracking and reduced issues with occlusion.
Machine Learning Summit: Walk Lizzie, Walk! Emergent Physics-Based Animation through Reinforcement Learning
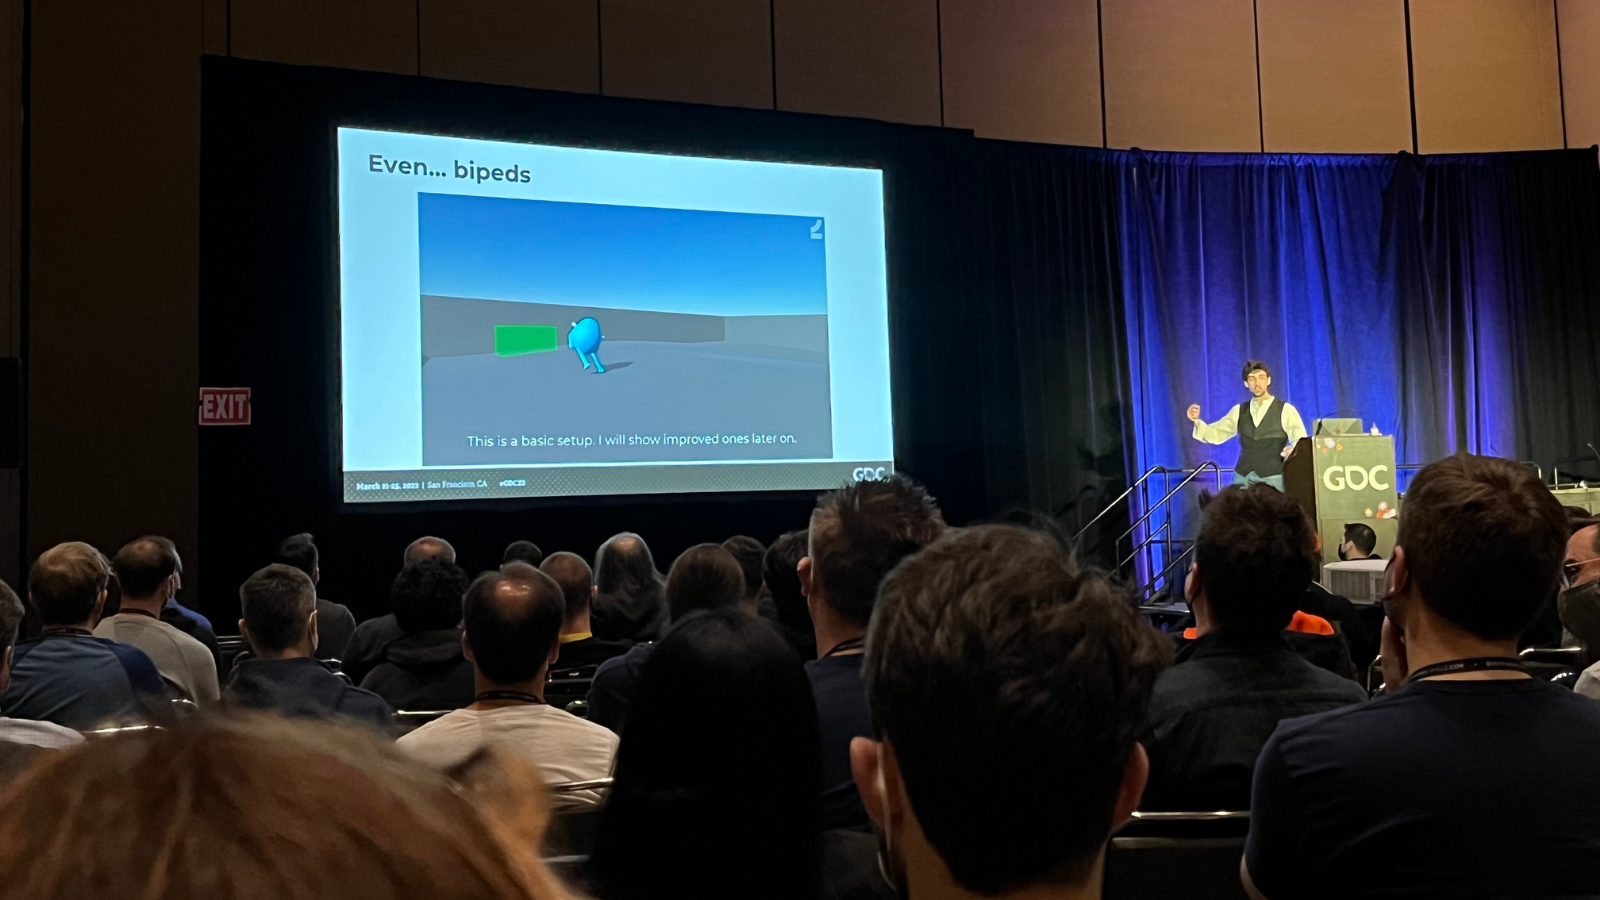
Jorge del Val Santos (Senior Research Engineer, Embark Studios) highlights a new method for animating digital assets—machine learning!
The traditional way of bringing digital assets to life consists of first rigging and then animating them, but machine learning agents (ML-Agents) present a new, physics-based option. Using a reinforcement learning approach to automatic animation, developers can bring life to creatures and critters with the click of a button — no animators involved. With that said, a fair few challenges accompany the benefits of this technique, so it may not always be the best fit for your game.
One of the greatest challenges to this technique is reward structure; because ML-Agents will be rewarded no matter how they move, they might end up learning to walk in unintended ways. For example, mixups in reward structures can cause a creature to walk using an arm and a leg because there was nothing in place disfavoring that. Another weakness of this physics-based model of animation is authorship or, in other words, your ability to bring character to your creations. At the moment, there’s no clear way of training your monsters to be scary or move intimidatingly.


Written by Nick Foster
LOAM SANDBOX POST-LAUNCH ROADMAP

Written by Nick Foster
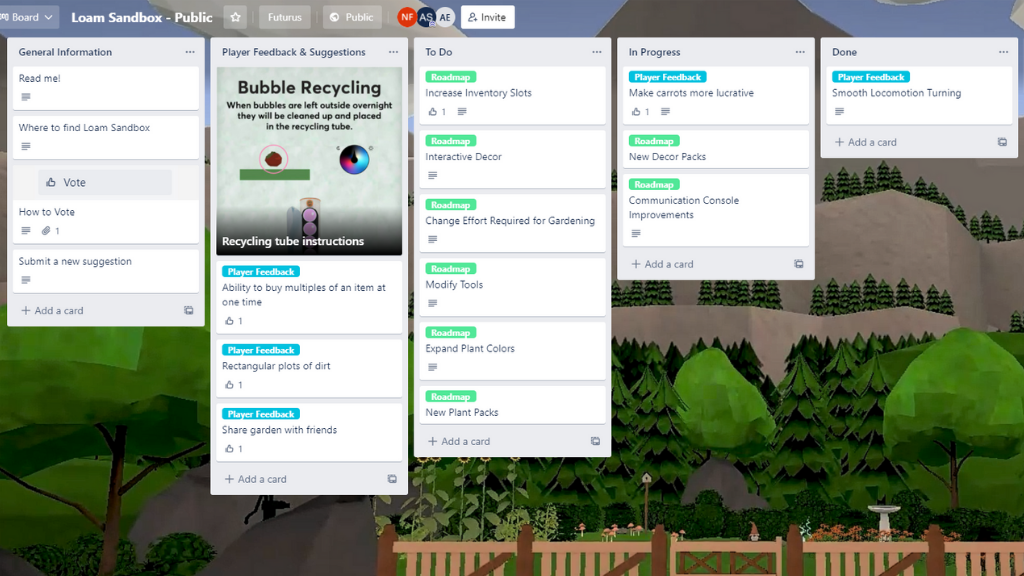


When you share your feedback, suggestions, and bugs with us in Discord, they’ll eventually make their way onto the board’s “Player Feedback & Suggestions” list in the form of a brand-new card. Depending on their priority, these cards will move to the “To Do” list, then to” In Progress,” before finally earning a spot on the board’s “Done” list. As we wrap things up and roll out Loam Sandbox updates, we’ll also share what has changed via our Discord’s #release-updates channel.
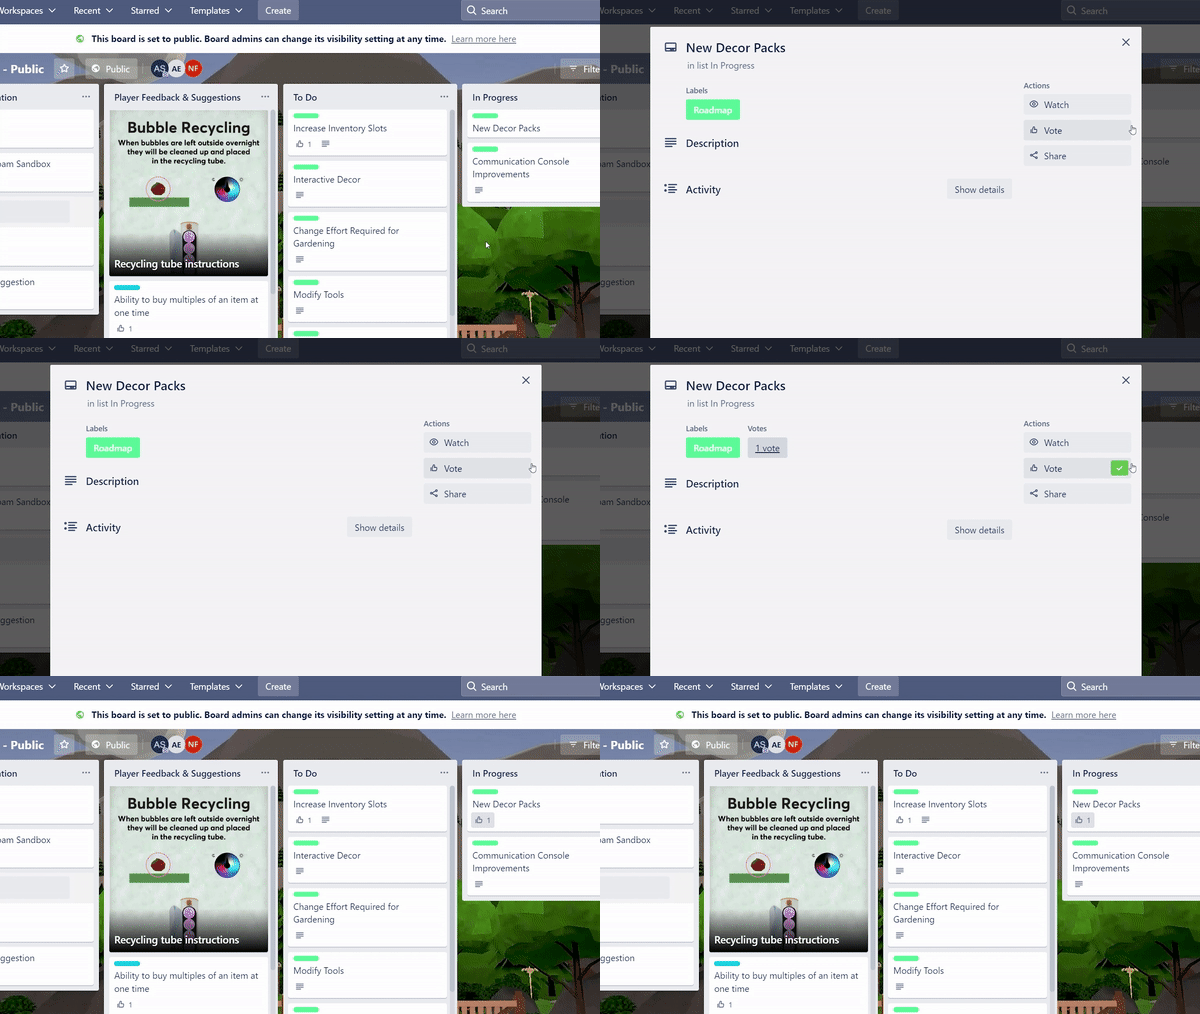
Click here to visit the Trello board and track Loam’s development in real-time.
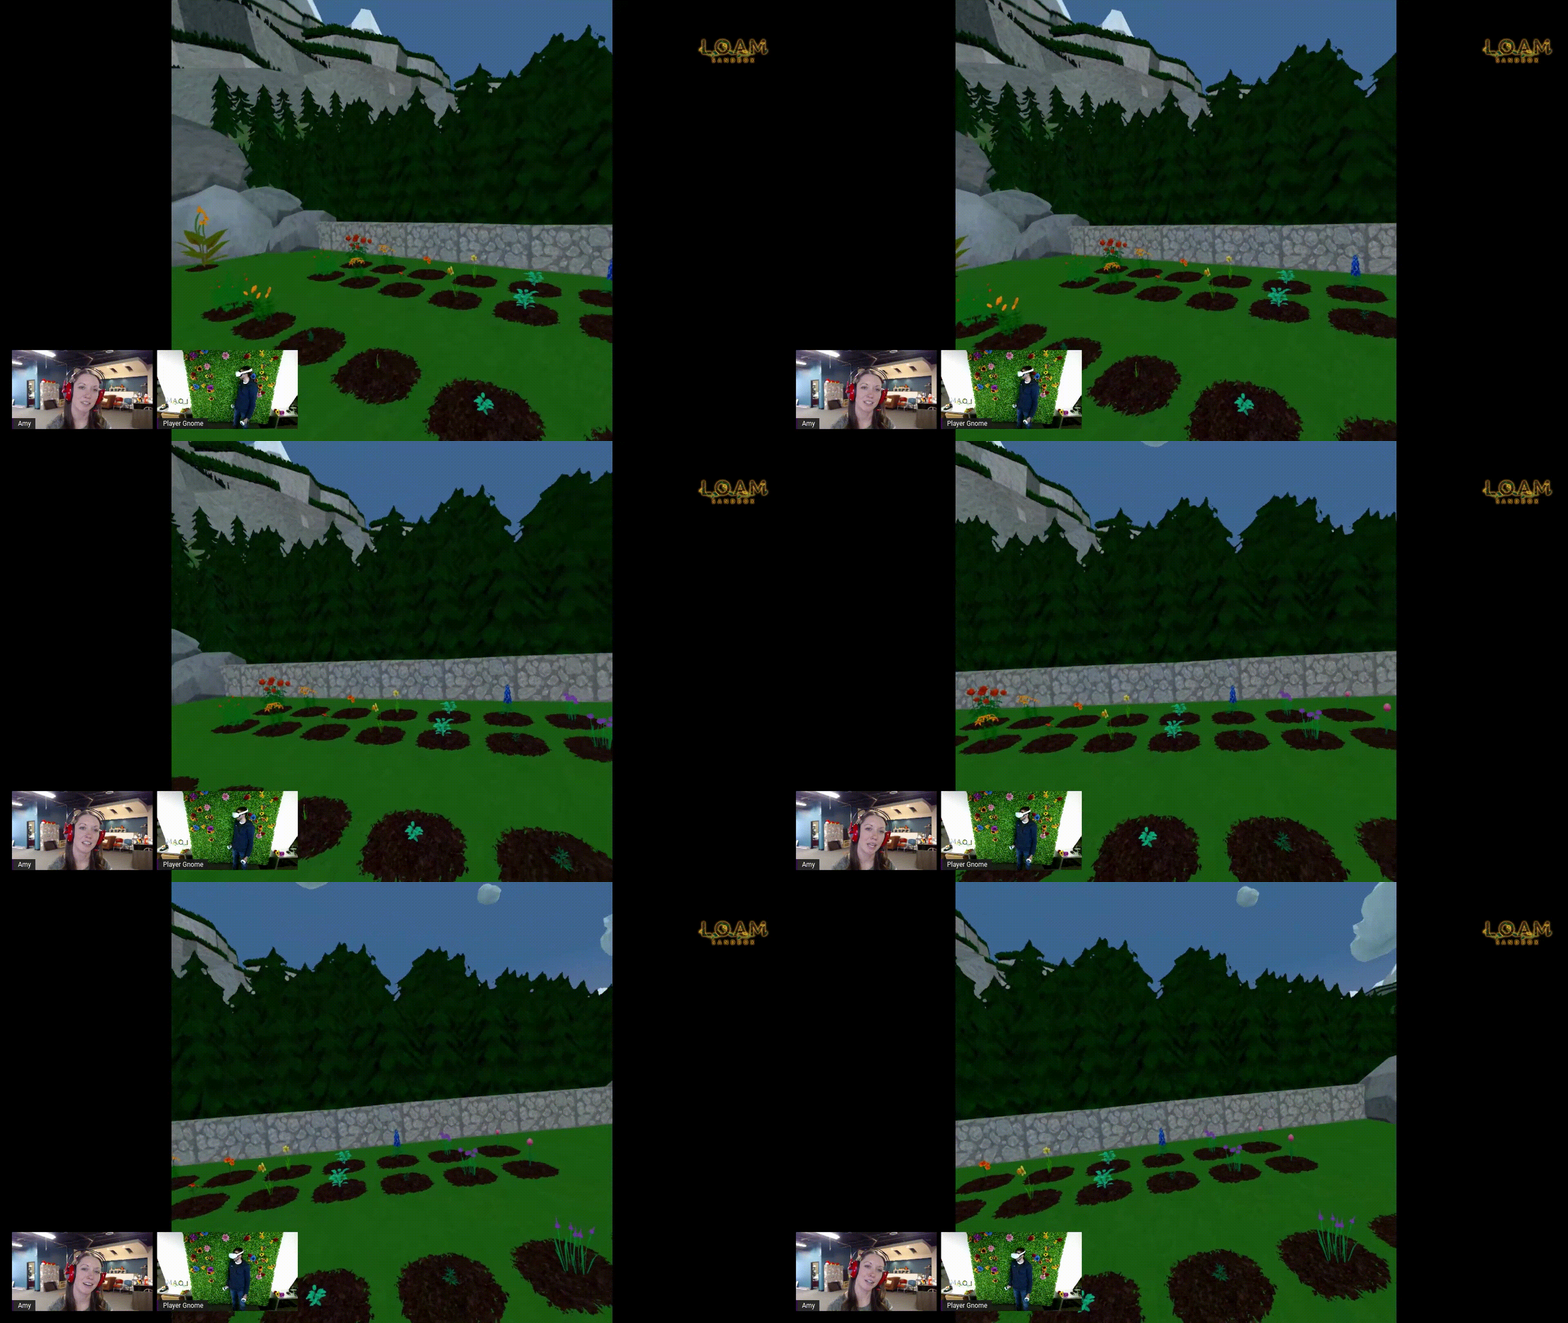

Written by Nick Foster
LOAM SANDBOX IS OUT NOW ON QUEST APP LAB

Written by Nick Foster
We are proud to officially announce the release of Amebous Labs’ debut title, Loam Sandbox! Our early access garden sim game aims to provide players with a comforting, creative virtual reality experience.
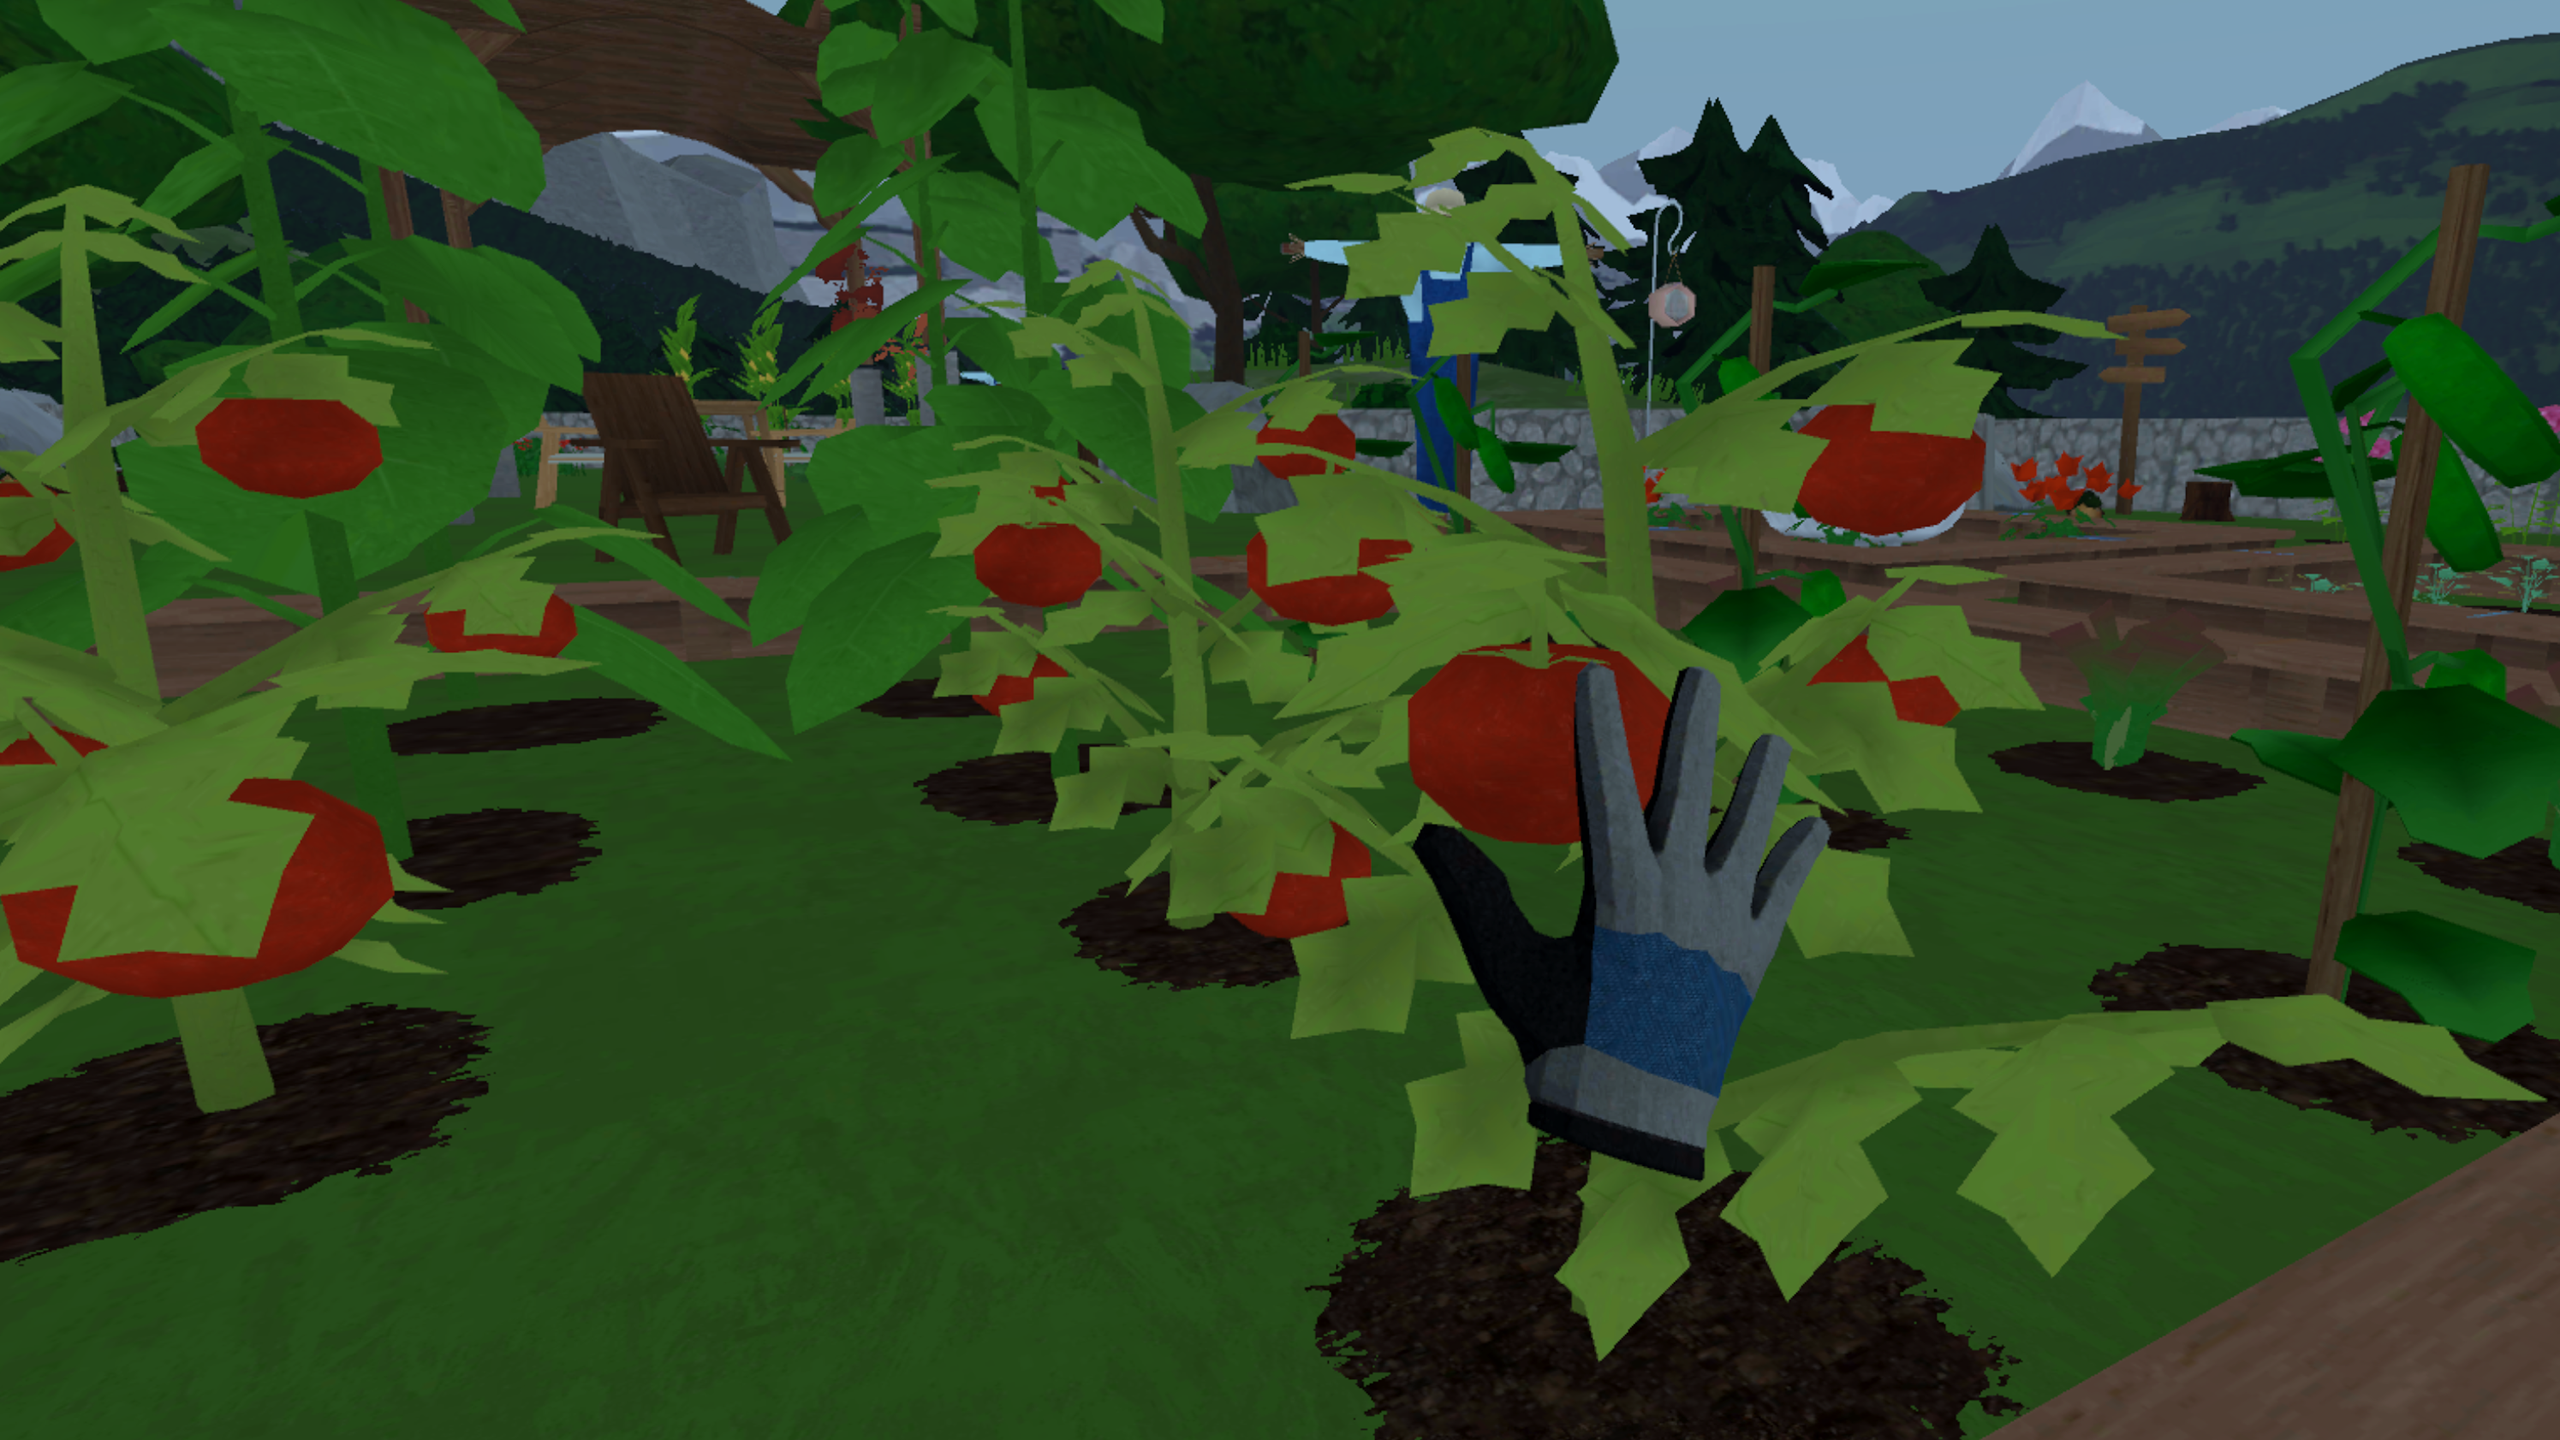

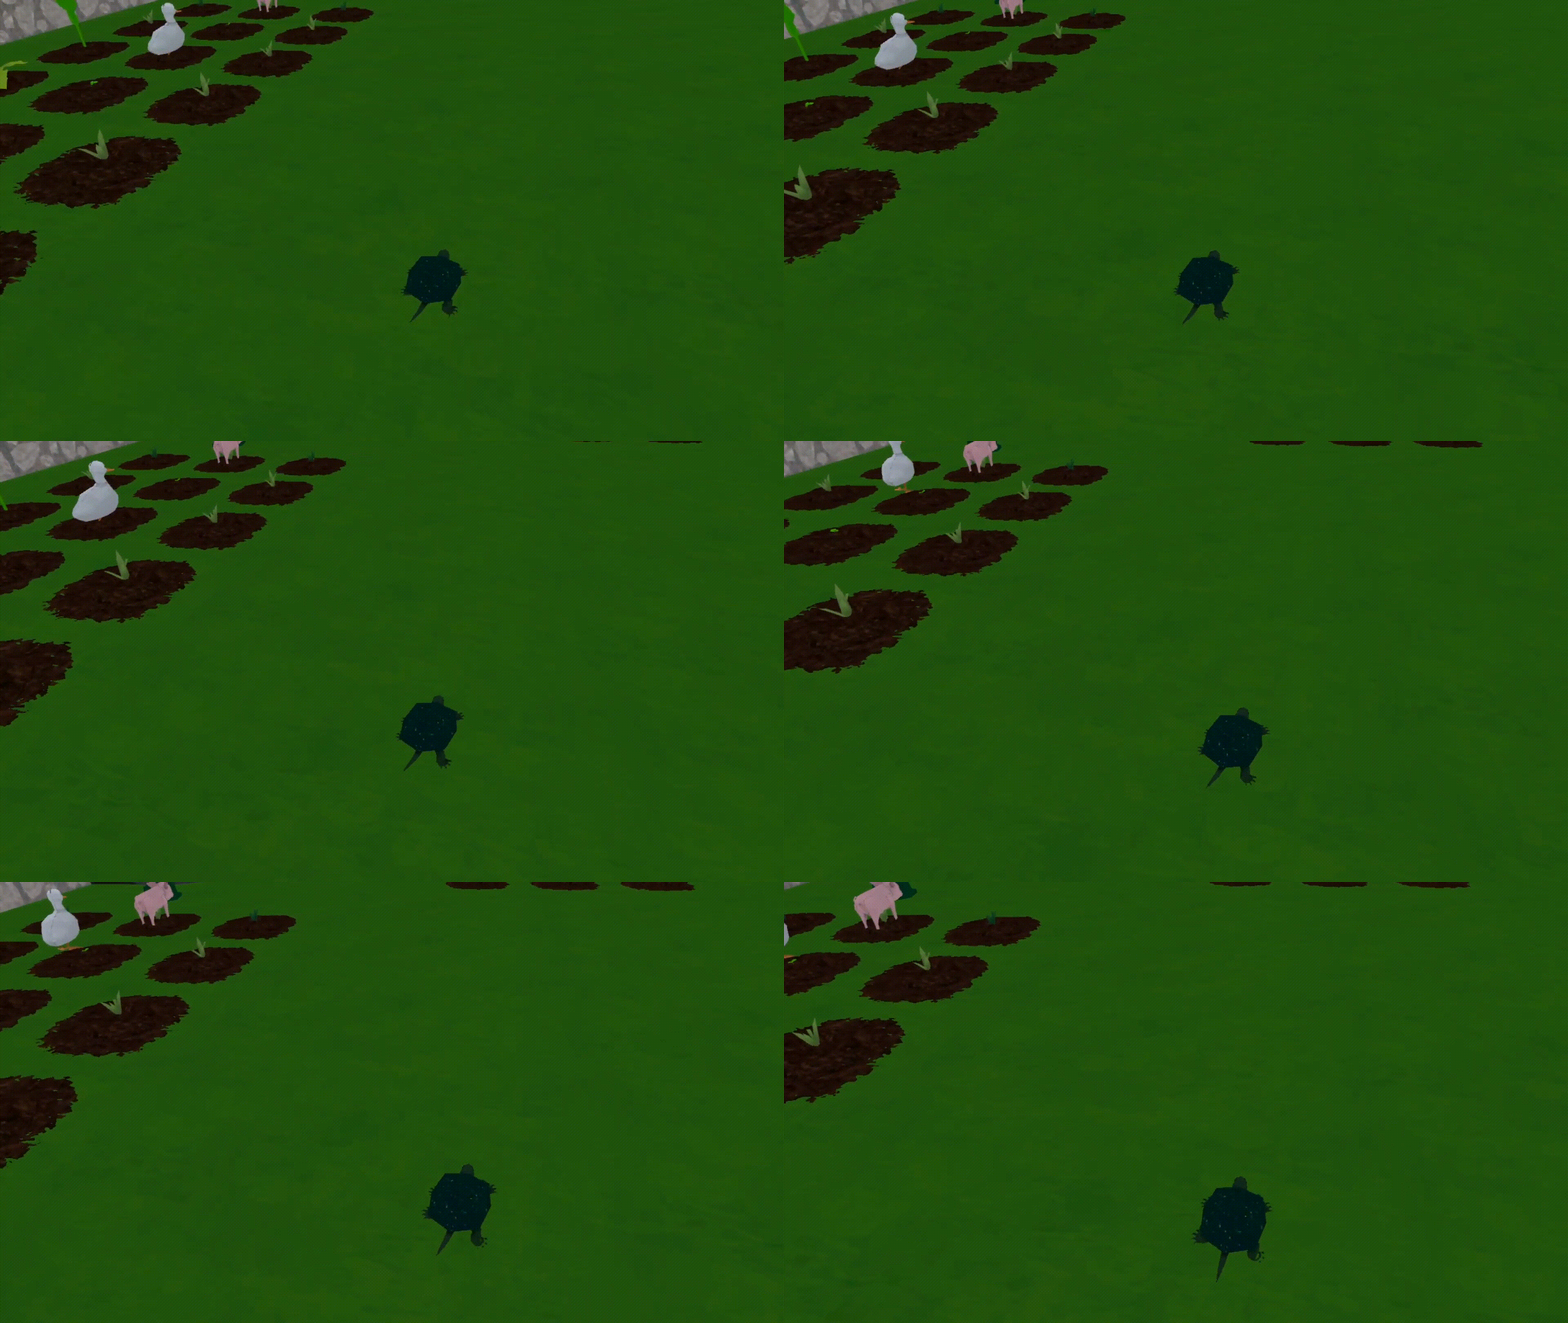
From the start of development in early 2020, Loam’s goal has been to give players the ability to enter a comforting world where they can relax and express their creativity. However, just like the seeds available within the game, Loam is constantly growing; Amebous Labs is requesting player feedback to ensure that all future updates and downloadable content are as positive as possible. Let us know what you want to see more of by commenting in the #feedback channel of our Discord server. And check out our public roadmap to see what features we are working toward adding to Loam Sandbox next.
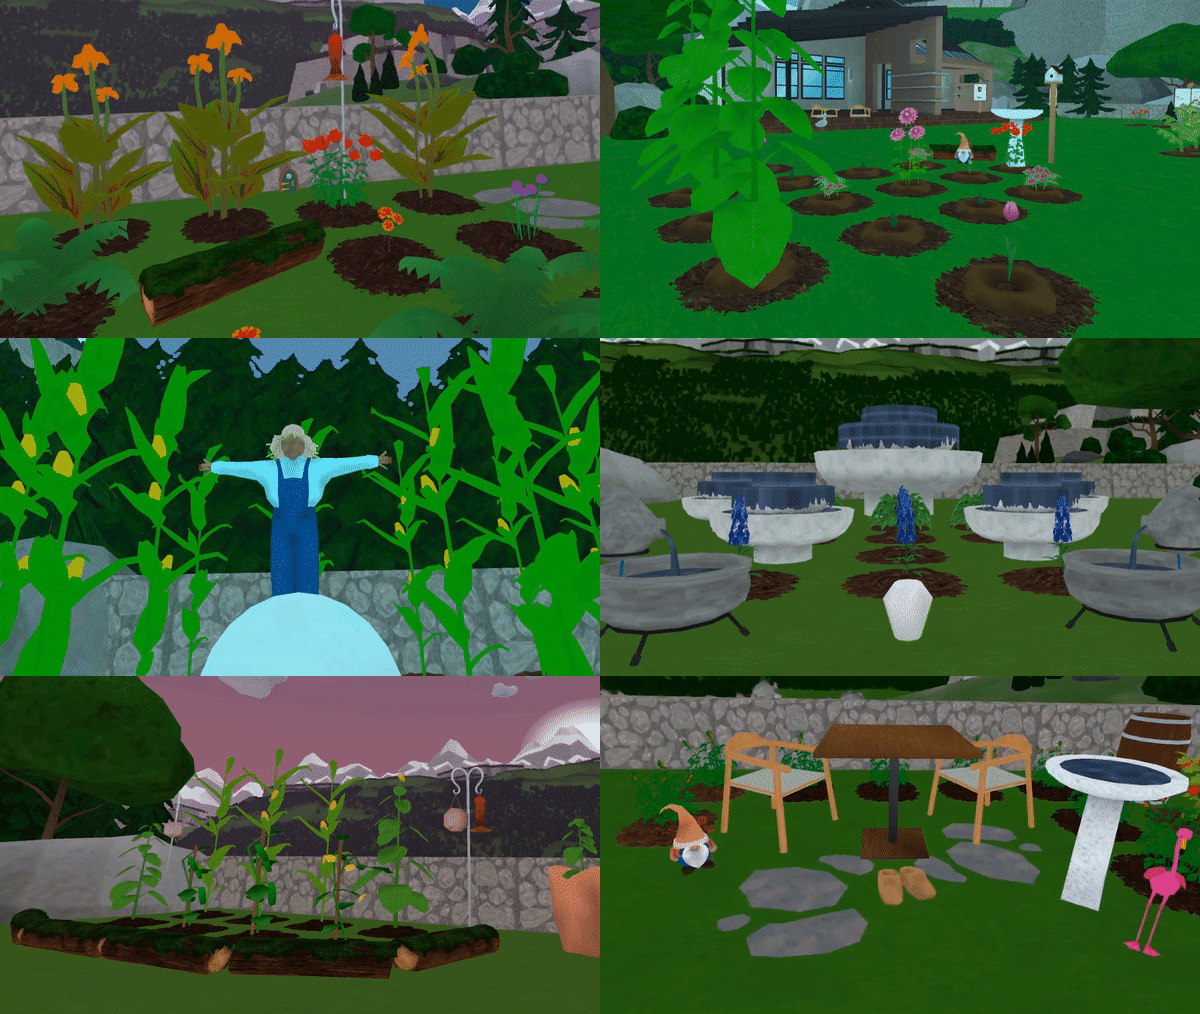
It’s time to dust off your gardening gloves—Loam Sandbox is available now exclusively on the Meta Quest platform for $14.99. Download Loam Sandbox for your Meta Quest or Meta Quest 2 headset!

Written by Nick Foster
FINALIZATION OPTIMIZATION: PUBLISHING QUEST VR APPS AND GAMES

Written by Nick Foster
We’re closer than ever to Loam Sandbox’s early access release via App Lab. For nearly two years, our team has been working tirelessly to bring the vision of a relaxing virtual reality garden sim game to life. Much of this time was spent designing the game, but a surprising amount went toward optimizing Loam to adhere to App Lab’s standards and requirements. Developing and optimizing a VR game has provided an invaluable opportunity for us to familiarize ourselves with the Quest Virtual Reality Check (VRC) guidelines, an official list of app requirements and recommendations set forth by Oculus (soon to be officially rebranded as Meta). Throughout this blog, we will share the tricks we’ve learned in the hopes that they will help you get your games and apps running on Oculus Quest headsets.
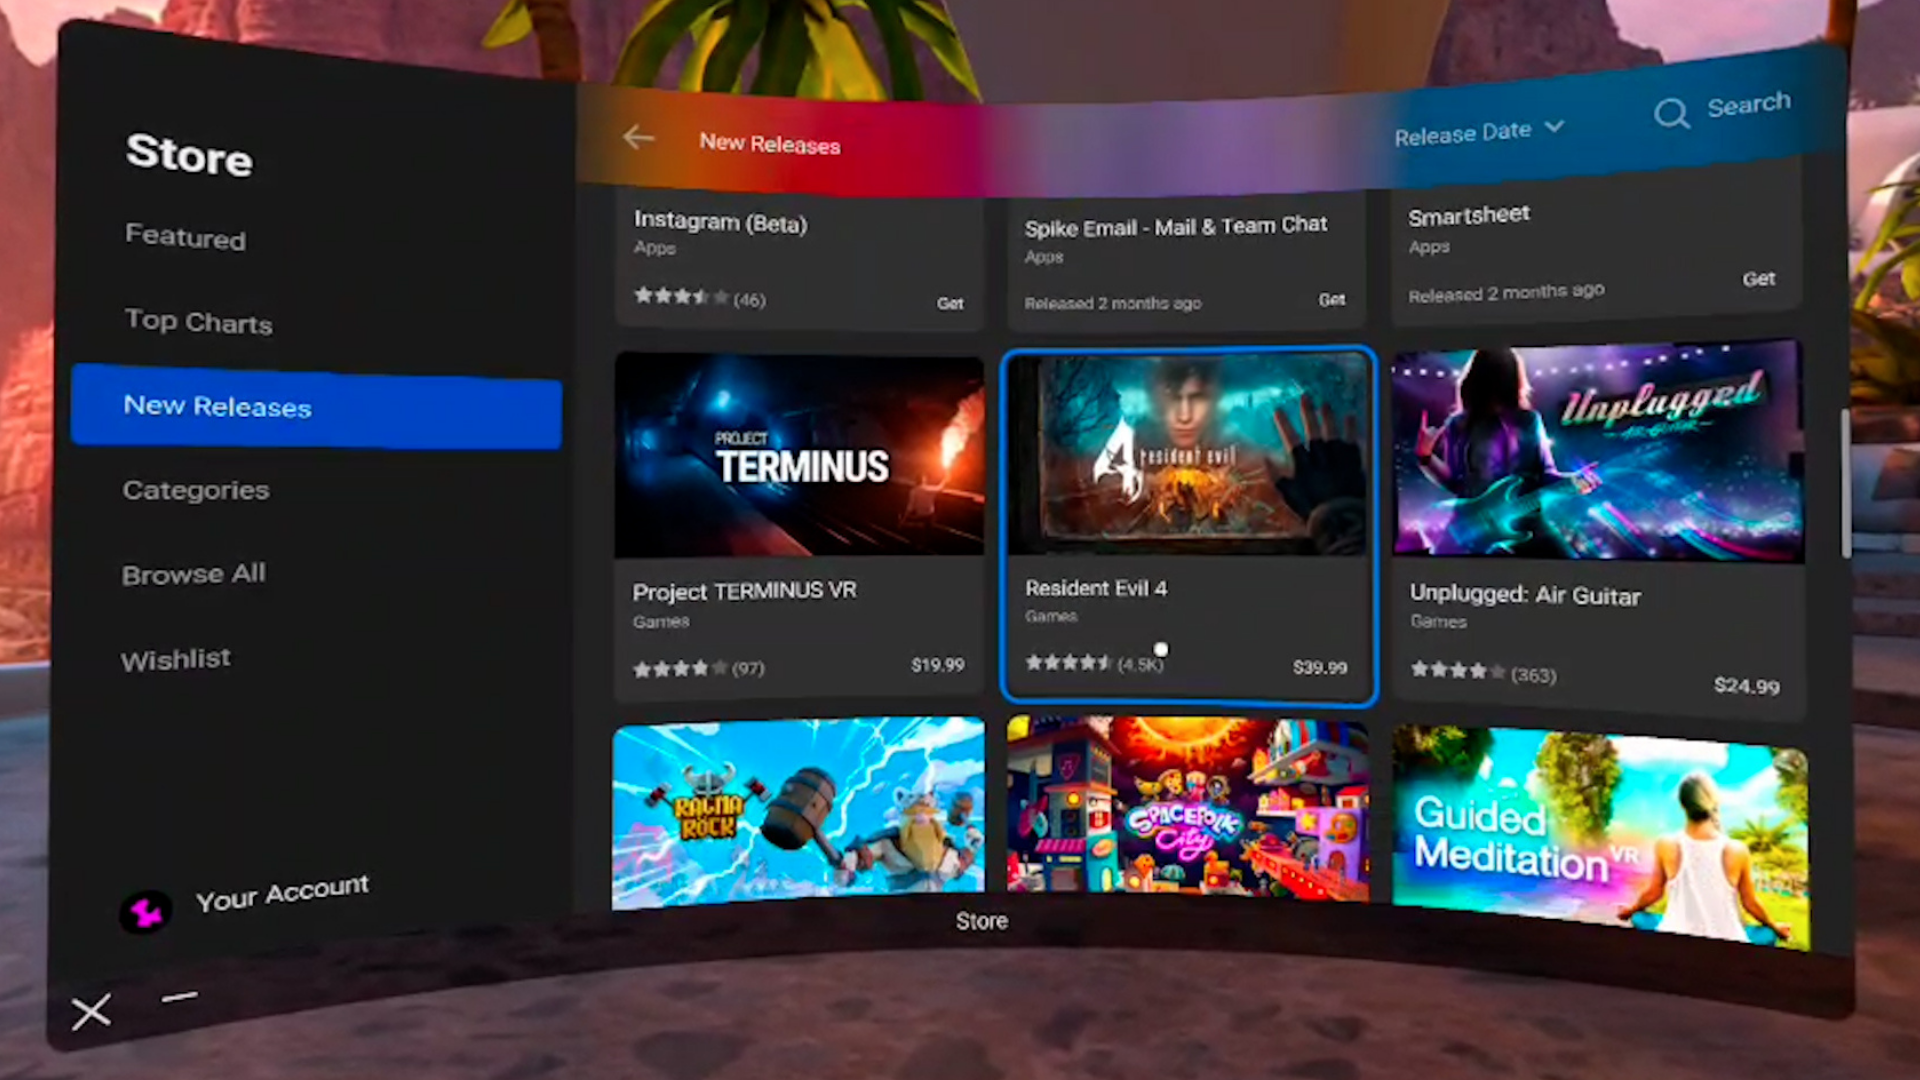

Developers should determine their app’s ideal distribution channel as early as possible.
As you prepare your work for release, the distribution channel you will use to house your game is a significant decision you’ll need to consider as early as possible. Your decision will directly determine how much time and effort you’ll need to spend optimizing your game to run in accordance with various VRCs. Developers tasked with getting their work published and accessible via Quest headsets are presented with the following three different distribution options, with each offering unique advantages and disadvantages for your apps release: the Quest Store, App Lab, and SideQuest.

The Quest Store is the only native marketplace for games and apps.
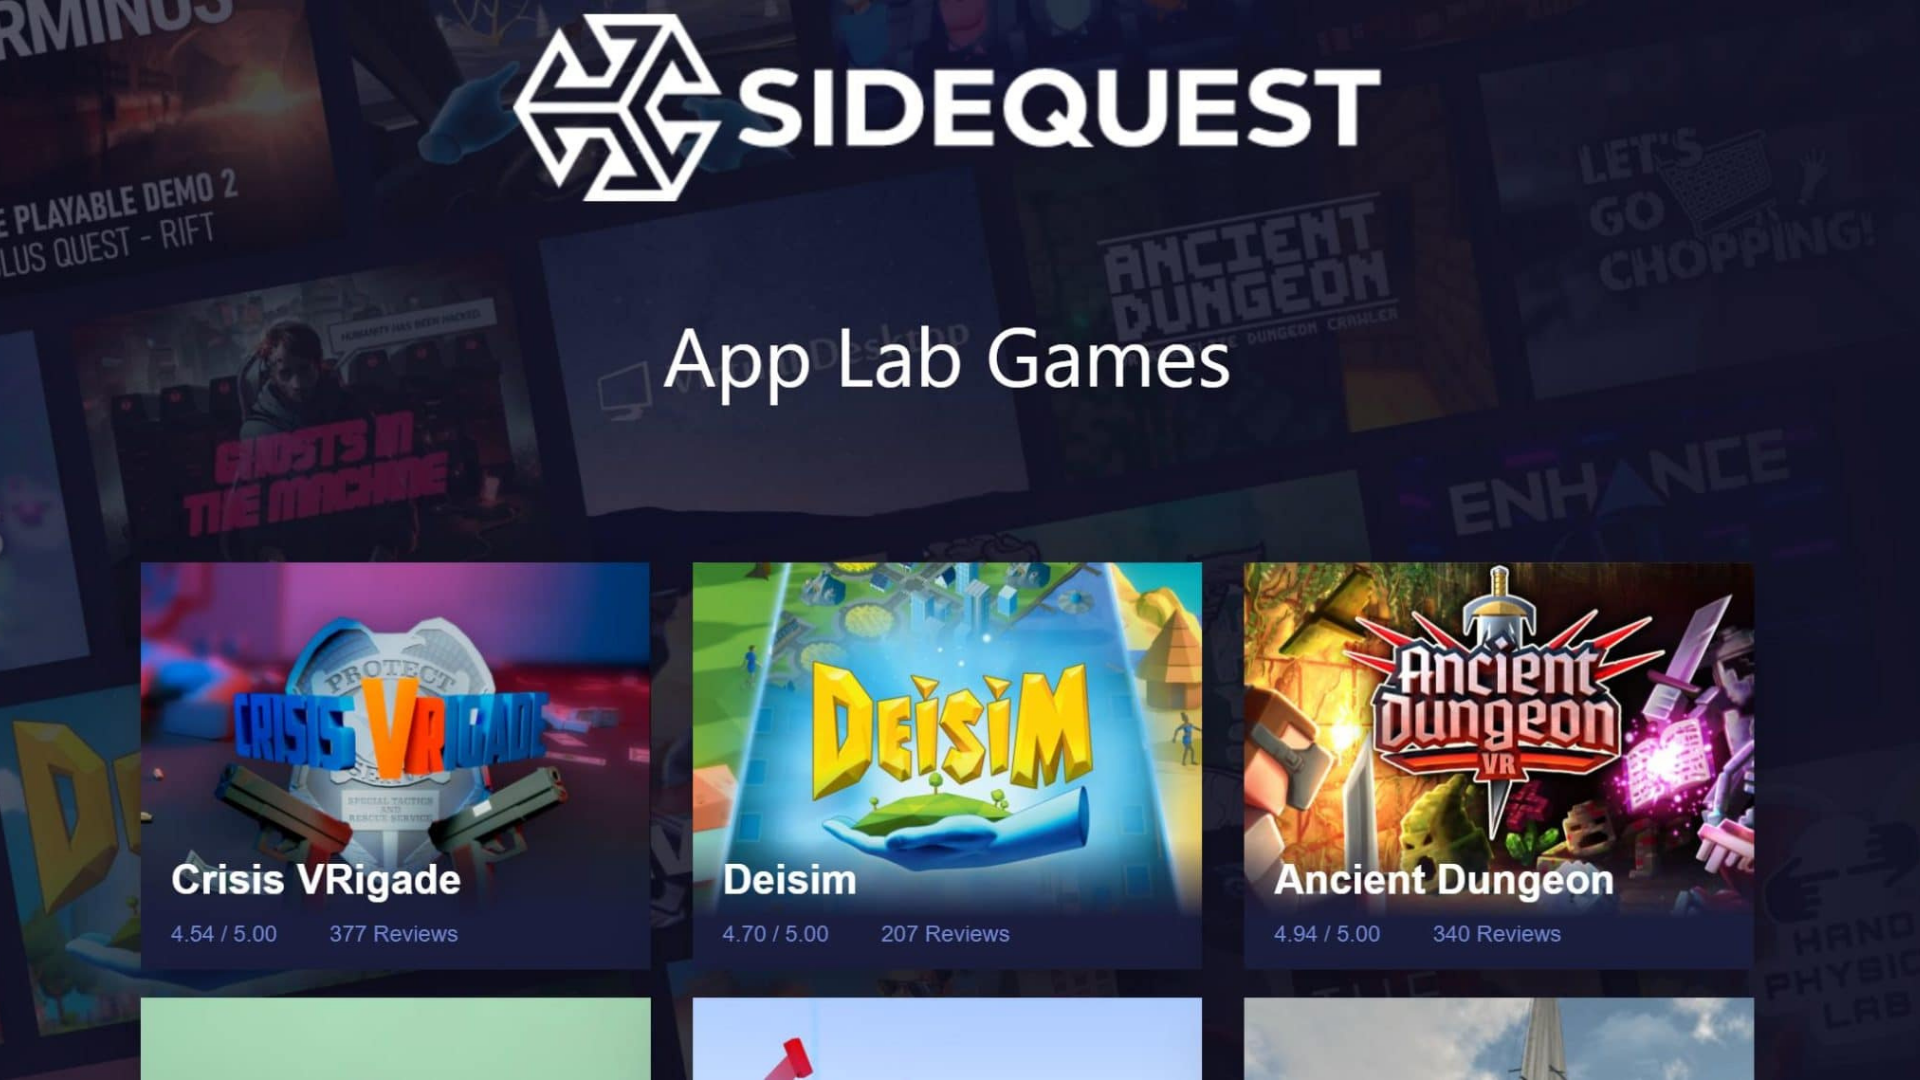
App Lab games can be found in the Quest Store and on SideQuest.
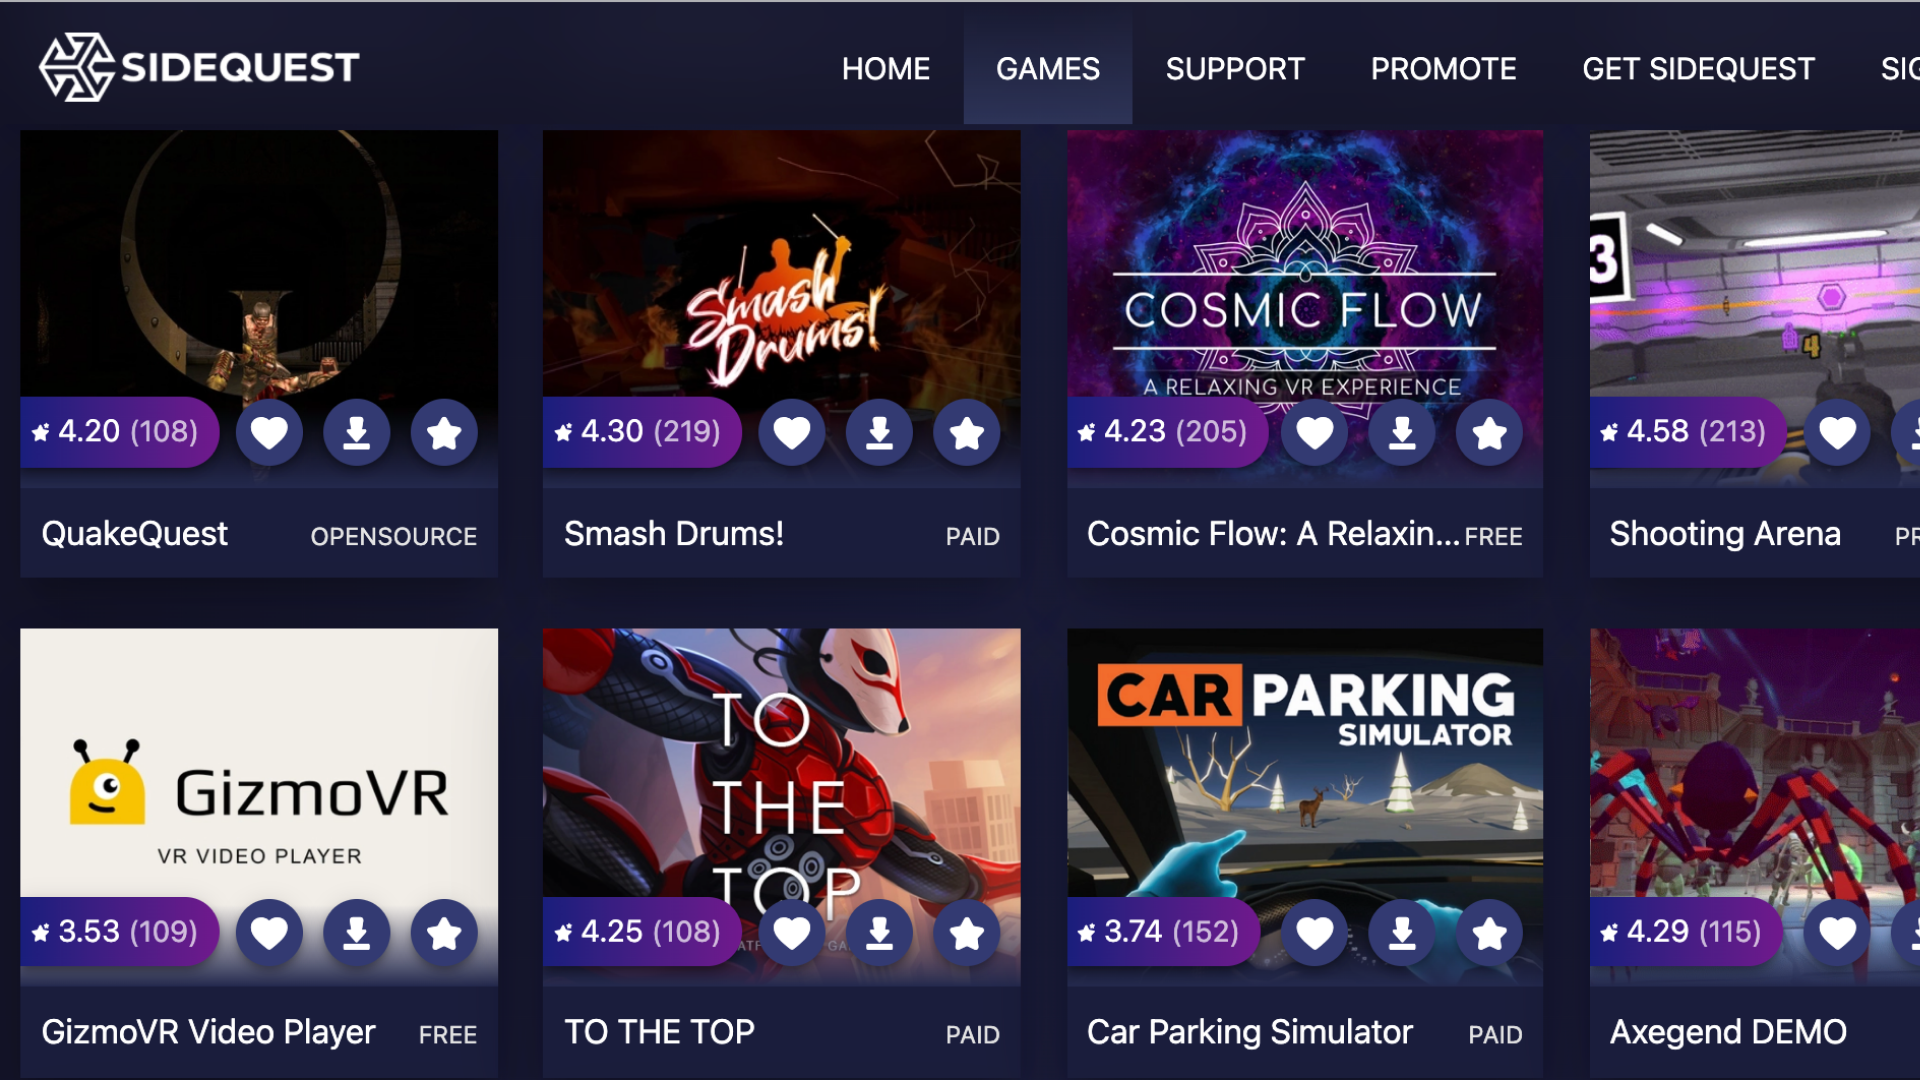
SideQuest enables users to sideload your apps to their headsets.
Please note, there are other distribution avenues for your VR games, but this blog will focus solely on platforms accessible by Oculus Quest headsets. Other platforms will offer different distribution options with different submission processes.
The Quest Store
Of the three available, the Quest Store features the most rigid and demanding set of requirements that your app must meet in order to be published. Despite that, we recommend this route for developers publishing finished games they feel confident in; the Store offers unique and valuable advantages that will help your game find greater success such as excellent accessibility, little competition, and opportunities for organic discovery. These advantages, however, come at the cost of spending a significant amount of time optimizing your game to earn Oculus’ direct approval.
As far as app submissions are concerned, the Quest Store is characterized by its stringency. Apps distributed via the Store must comply with a whole host of requirements set forth by Oculus that ensure everything listed on the Store is of consistently high quality. Although several checks are merely recommendations, these checks span eleven different categories ranging from performance and functionality to security and accessibility.
The Quest Store’s quality-first mentality makes for a strict submission process, but it also reduces the potential competition your app will face should it earn Oculus’ approval. As of writing, there are only about 300 games listed on the Quest Store—less than half the amount available on App Lab, meaning Quest users browsing the Store are far more likely to organically find your app than users browsing App Lab’s library via SideQuest. The Quest Store is deeply integrated within Quest’s user-interface, so this channel also provides the easiest option for users looking to download and play games.
The Store reviews app submissions on a first-come, first-serve basis and has varying review times dependent upon the number of submissions at that time. A solid estimate is four to six weeks, but it’s worth noting there have been instances of developers waiting as long as three months or as little as two weeks.
App Lab
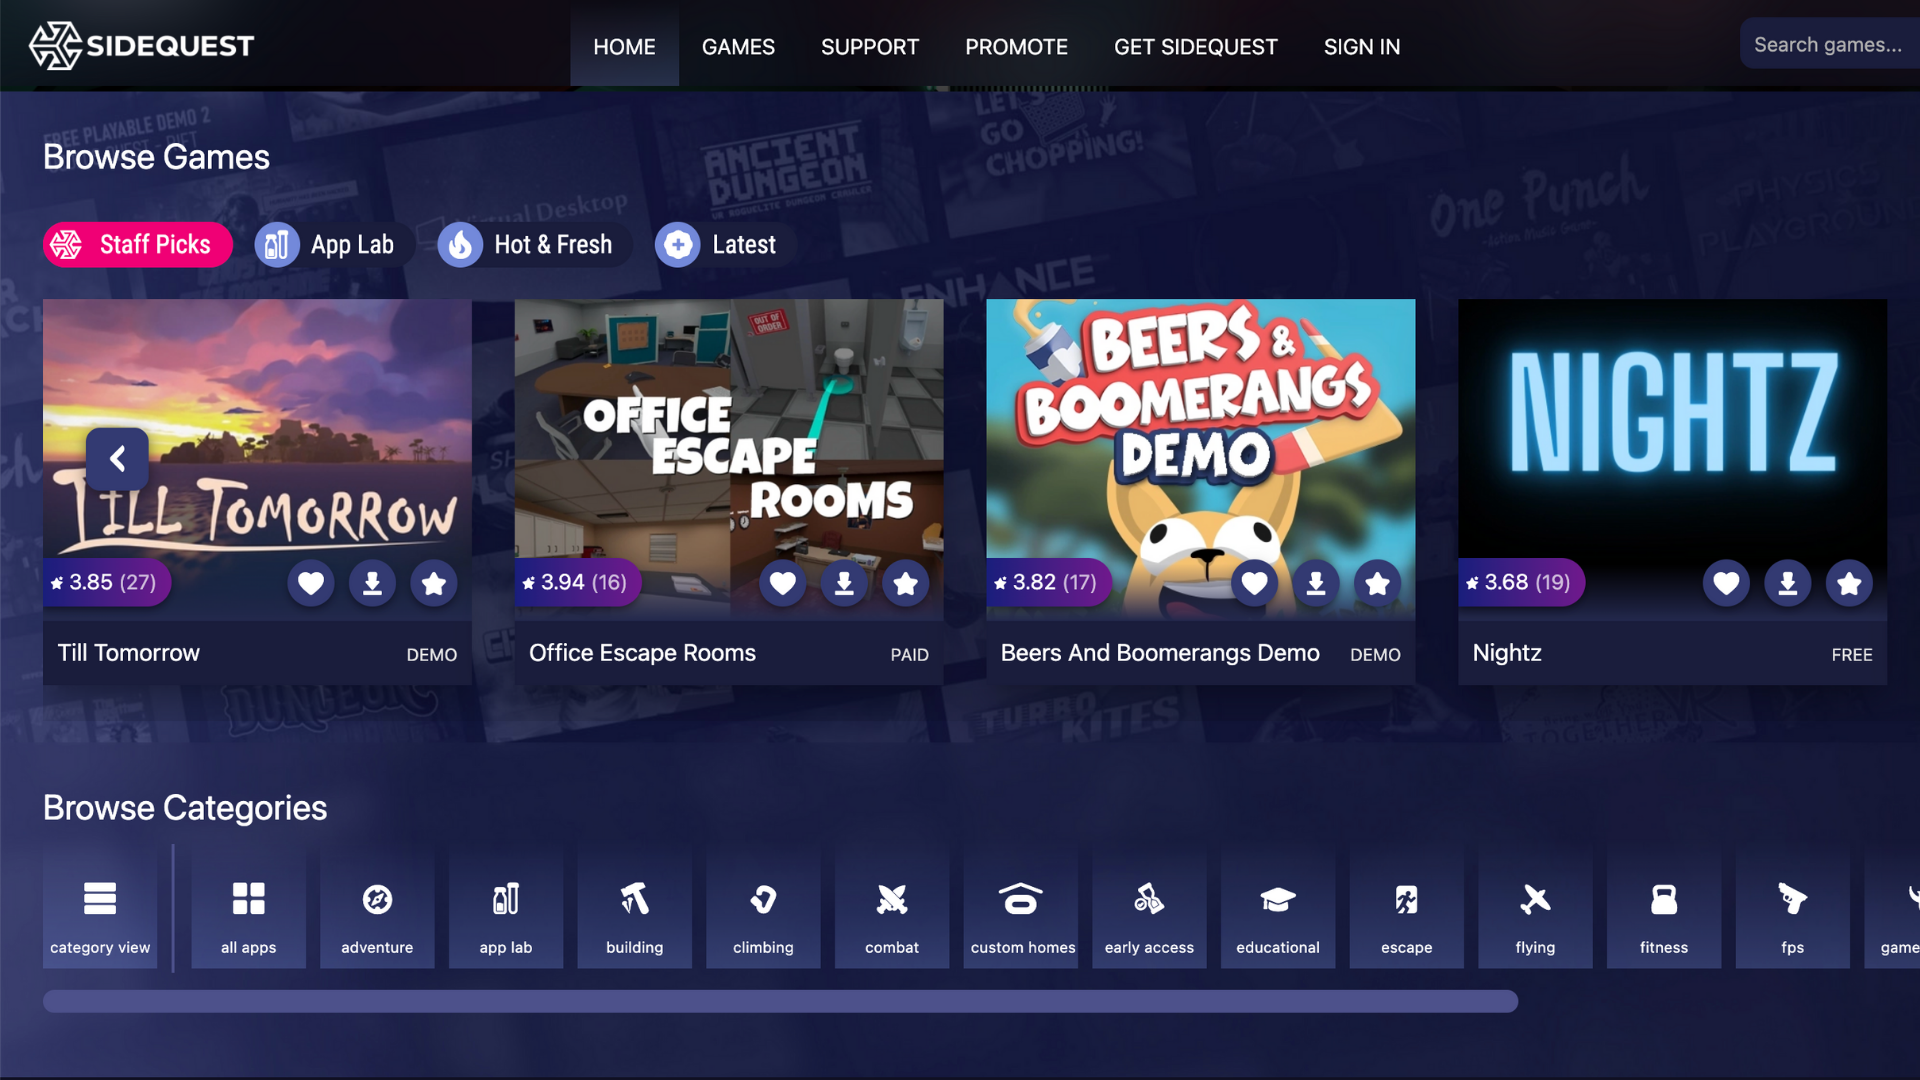
Games and apps published through App Lab are searchable in both the Quest Store and SideQuest. Think of this distribution channel as a happy medium between the Quest Store’s strict approval process and SideQuest’s comparatively lackadaisical approach to reviewing app submissions. That said, App Lab faces its own set of drawbacks; while this distribution avenue offers a more accessible means of entry, it also faces increased competition and minimal organic discovery.
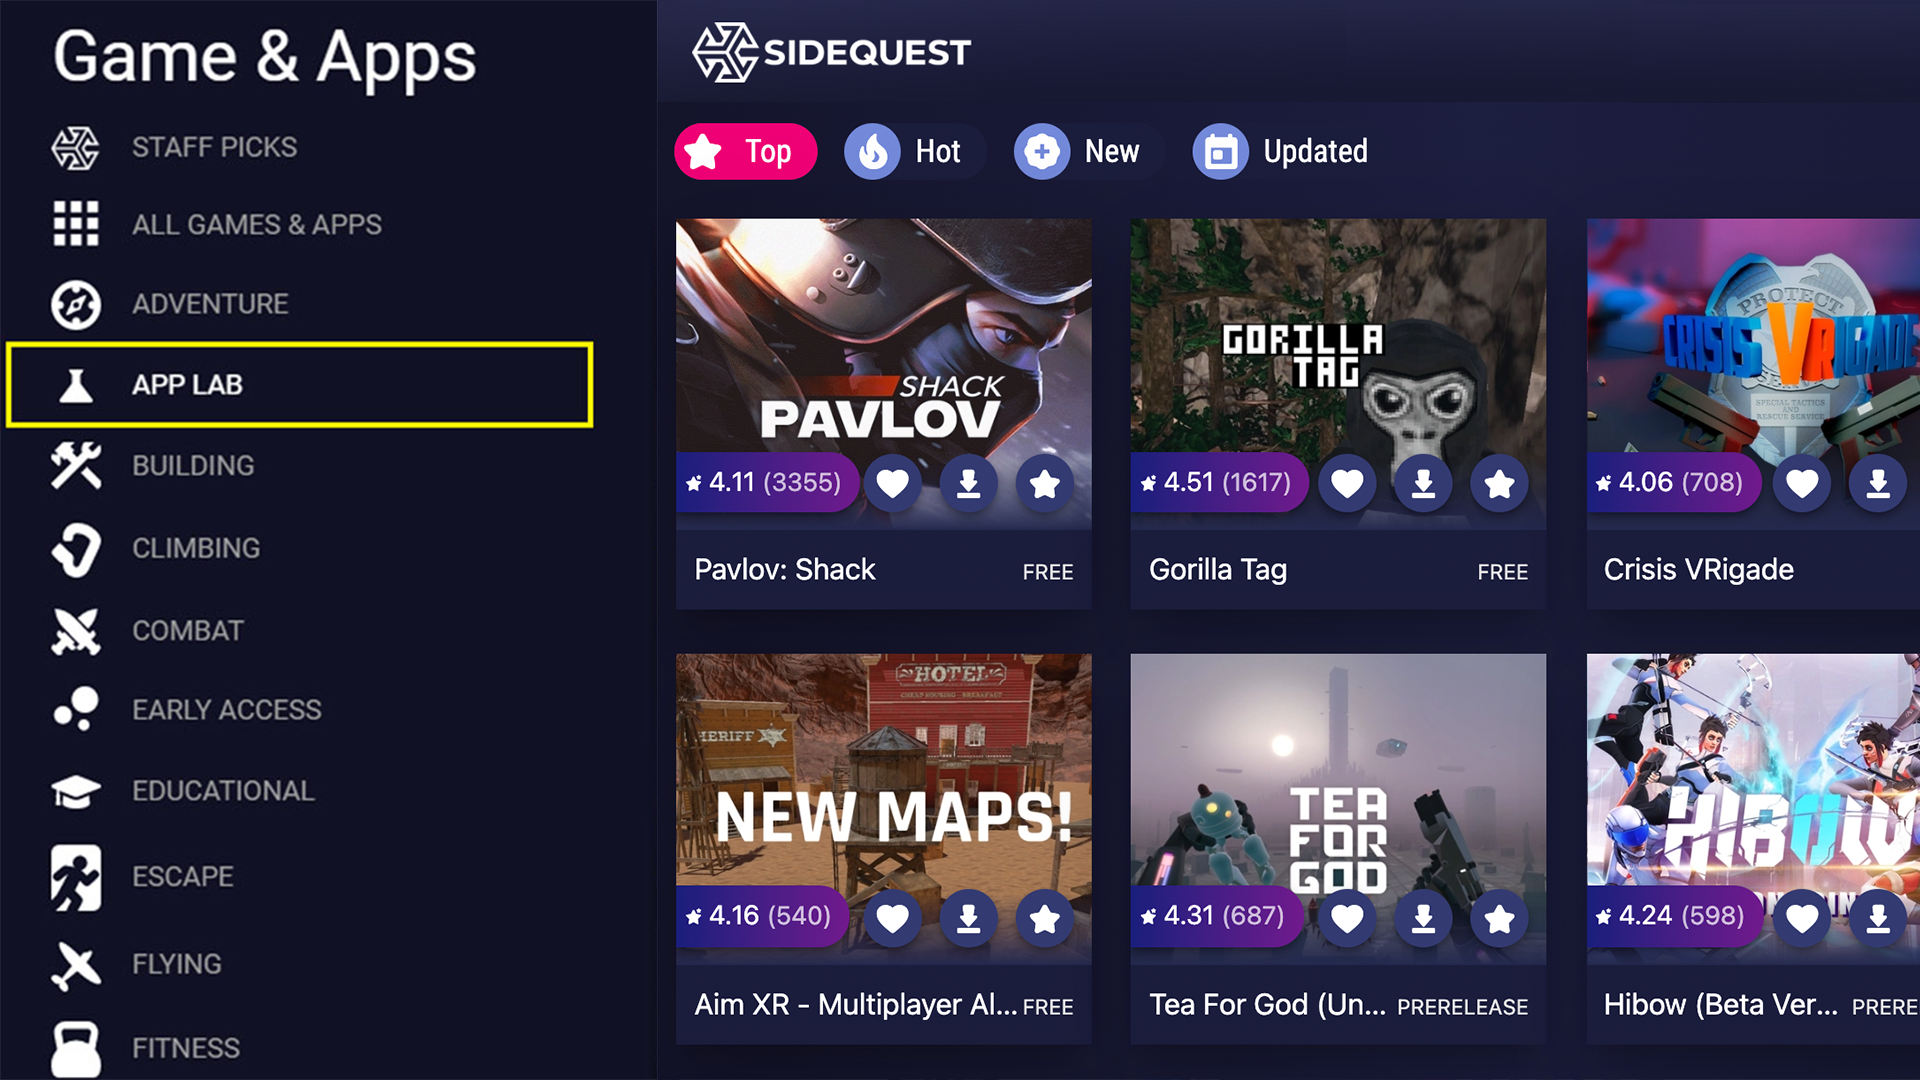
App Lab titles are browsable via SideQuest, but these apps can only be found within the Quest Store by searching their full title exactly.
While App Lab submissions must abide by Oculus’ VRCs, several checks have been relegated from requirements to recommendations, making App Lab far more likely to approve your app than the Quest Store is. App Lab submissions are also reviewed on a first-come, first-serve basis and, although review times will vary, these windows are generally quicker than those of the Quest Store.
App Lab’s more straightforward approval process means that its library is growing far quicker than that of the Quest Store. With a current catalog comprising over 500 games and new ones being added every day, apps distributed via App Lab without any congruent marketing plan run the risk of sinking in this vast sea of options. Although SideQuest allows users to browse through the entire App Lab library freely, the Quest Store will only show these titles if you search their entire names precisely as listed. For example, searching Pavlov Shack through the Quest Store will not yield any results, but searching Pavlov Shack Beta will. Because so few people will naturally stumble across your App Lab game, you bear the responsibility of making sure your app gets seen.
SideQuest
SideQuest is essentially a giant, third-party store for Oculus Quest. It enables you to sideload games and apps onto your headset, provided you have access to a computer or mobile device. This distribution channel is the least accessible of the three as it also requires users to have their headsets in developer mode. However, unlike the Quest Store and App Lab, SideQuest submissions do not need to be approved by Oculus directly. Instead, these games and apps undergo a simpler, quicker administrative process that does not require your game to comply with any VRCs. SideQuest provides the quickest route for developers to share new builds with team members, playtesters, or friends.
Virtual Reality Checks to Keep in Mind
Getting an app approved by Oculus is easier said than done. Therefore, developers should be mindful of key VRCs as early as possible in order to ensure that major game design decisions are made with Oculus’ high standards in mind. After having undergone much of the optimization required to ready Loam Sandbox for official release, let’s briefly explore each of the eleven categories listed within the Virtual Reality Check guideline. This high-level overview of the requirements and recommendations will only apply to prospective Quest Store and App Lab games and apps.
1. Packaging
Packaging VRCs exist to ensure that every app available in the Quest Store and App Lab adheres to Oculus’ app packaging and formatting standards. There are six different required checks within this category regardless of whether you are submitting to App Lab or the Quest Store. One requirement, VRC.Quest.Packaging.5, requires that every submission be formatted as an APK file and smaller than 1 GB in size.
For a detailed look at the requirements that your app’s APK file must conform to, visit here.
2. Audio
The only Virtual Reality Check within this category is VRC.Quest.Audio.1, an optional recommendation for your app to support 3D audio spatialization features. Though not a requirement, incorporating audio spatialization within your game will mean that your app’s audio output will change as the user’s positioning does. We recommend that you consider implementing 3D audio within your games because doing so will add an immersive gameplay element, positively impacting player experiences.
3. Performance
Performance VRCs exist to ensure that the gameplay provided by titles available for Quest is of consistently high quality. This category comprises two App Lab requirements or three Quest Store requirements that concern your app’s refresh rate, runtime, and responsiveness.
Adhering to these checks can be difficult, thankfully there are several tools, such as the Developer Hub, that will enable you to accurately track the performance and overall functionality of your Quest apps. VRC.Quest.Performance.1 requires all App Lab and Quest Store listings to run at specified refresh rate minimums of 60 Hz and 72 Hz, respectively. You’ll want to keep this VRC in the back of your mind as you develop your game because its performance will benefit greatly from finding alternatives to CPU-intensive design choices.
We suggest using transparencies sparingly; whenever we made too many of Loam’s colors or textures see-through, we would experience drastic dips in frame rate. We also noticed that rigging critter skeletons within Unity would create a similar effect. To hear art optimization insights directly from our team, visit here.
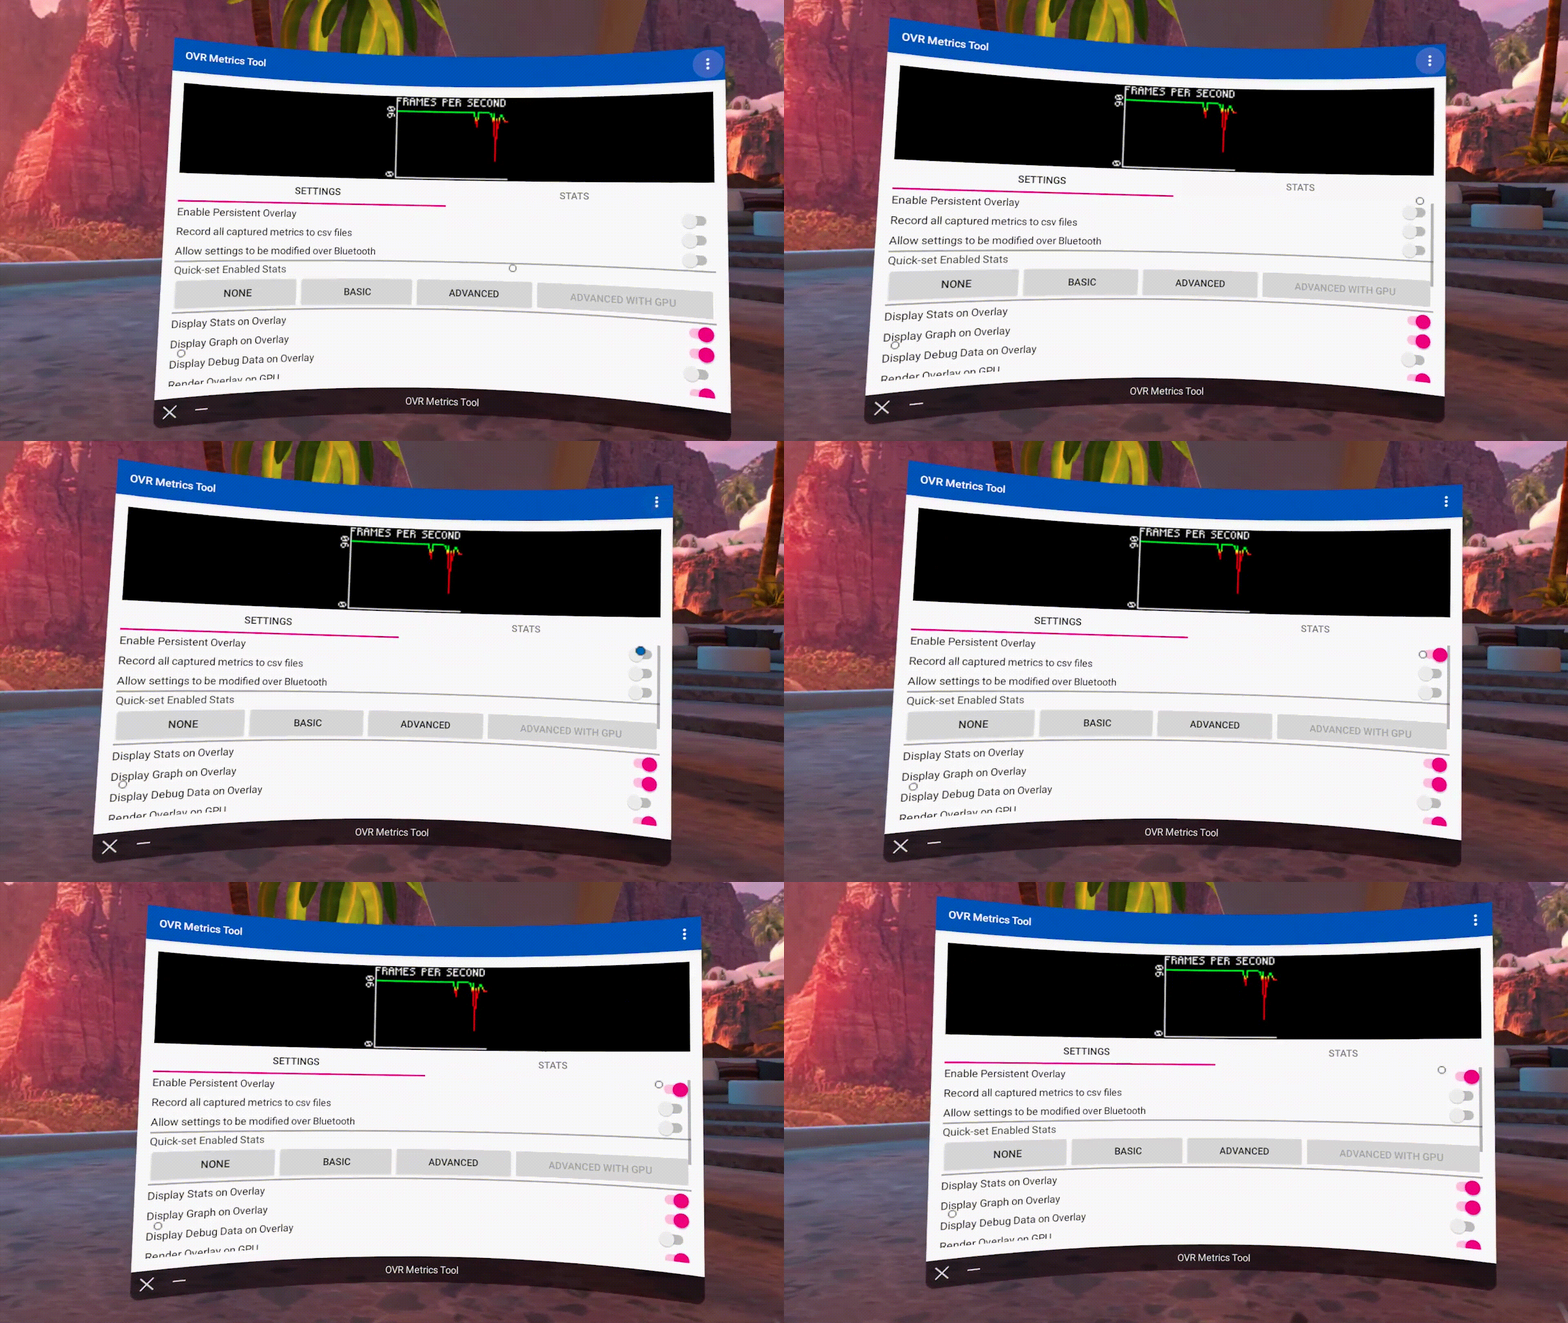
We recommend sideloading OVR Metrics onto your headset and toggling on its persistent overlay setting. This will provide a real-time display of your app’s frame rate as you test its performance.
4. Functional
Oculus has created thirteen functional VRCs to ensure that all apps listed on App Lab and Quest Store run smoothly. Together, they prevent crashes, freezes, extended unresponsive states, and other game-breaking errors. Four of these checks are recommendations for App Lab submissions, while only one check is a recommendation for the Quest Store.
Developers seeking a spot in the Quest Store should keep VRC.Quest.Functional.1 in mind as they produce their games and apps. Because it requires you to be able to play through content for at least 45 minutes without any major errors, crashes, or freezing, this check could potentially impact your game’s design. VRC.Quest.Functional.1 is merely a recommendation for App Lab submissions, making that that ideal distribution avenue for early access games and demos not yet long enough for the Quest Store.
Visit here for a complete list of functional VRCs.
5. Security
Two security VRCs ensure that every Quest app respects and protects the privacy and integrity of customer data. Made up of one recommendation and a requirement, this is among the more straightforward categories. VRC.Quest.Security.2 is the only security check that developers must abide by; it requires your app to request no more than the minimum number of permissions needed for it properly function.
For more details, visit here.
6. Tracking
The tracking category of VRCs consists of one mandatory check for both Quest Store and App Lab submissions. To comply with VRC.Quest.Tracking.1, your app’s metadata must meet Oculus’ requirements for sitting, standing, and roomscale play modes. You can take in-depth look at this Virtual Reality Check here.
7. Input
Seven input VRCs relate to your app’s controls scheme and commands. This category is comprised of four and five requirements for App Lab and Quest Store, respectively; they function to maintain consistent interactivity from one Quest app to the next. For example, VRC.Quest.Input.4 makes sure that, when the user pulls up Quest’s Universal Menu, every Quest app continues to render in the background but hides the user’s hands.
If you plan on implementing hand tracking within your app, you’ll need to pay particular attention to this category. View all seven VRCs within the input category here.
8. Assets
Each of the eight VRCs included within this category is required of Quest Store submissions, but only half are needed for App Lab titles. These checks refer to the assets that will accompany your game within each distribution channel, ensuring that your app’s logos, screenshots, description, and trailer meet Oculus’ expectations. Though you may not be required to abide by every check if you’re looking to submit to App Lab, it’s important that you consider every check as you plan and create the marketing materials that will help your game stand out.
Clear cover art, for example, is only a requirement for the Quest Store, but this is an asset that will undoubtedly help your game stand out on App Lab too. Keep in mind that you will need multiple cover art images of different sizes and dimensions in order for your graphics to look their best in different areas of these distribution platforms.
As you plan your game’s trailer, you should keep VRC.Quest.Asset.7 in mind—a required check limiting your trailer’s length to two minutes or less. While recording, take advantage of SideQuest’s ability to run ADB commands on your headset and alter the dimensions and bitrate settings of your Quest’s native screen-record feature. Also remember that, due to VRC.Quest.Asset.6, no asset accompanying your game can feature another VR platform’s headset or controllers.
9. Accessibility
Although none of these checks are requirements for either distribution channel, the accessibility category spans nine recommendations, making it among the largest sections in throughout the Quest Virtual Reality Check guideline. Failing to incorporate any of these suggestions won’t invalidate your submission, but we recommend developers implement these checks as well because they make sure that your game accommodates a variety of users.
Making adding subtitles, making text clear and legible, and incorporating color blindness options within your app’s settings are invaluable ways of making sure that it is accessible to the broadest audience possible. For ever suggestion within this category, visit here.
10. Streaming
Streaming VRCs exist to guarantee all Quest apps are capable of providing smooth streaming experiences. VRC.Quest.Streaming.2 is the only required streaming check, making streaming among the simpler categories to comply with. You’ll just need to make sure that your app can only stream VR content to local PCs that the user has physical access to.
11. Privacy
Five required privacy checks ensure that all games comply with Oculus’ Privacy Policy requirements. Your app’s Privacy Policy must clearly explain what data is being collected, what it is being used for, and how users may request that their stored data be deleted. All five checks included within this category are requirements for titles on either the Quest Store or App Lab.
Click here for more information regarding Oculus’ Privacy Policy Requirements.
Have you submitted an app through the Quest Store, App Lab, or SideQuest? Are you planning to do so? Let us know what your submission process was like by leaving a comment below or tagging us on Twitter: @AmebousLabs

Written by Nick Foster
GAME ART DESIGN FOR VR: FORM AND FUNCTION

Written by Nick Foster
Designing art for virtual reality games is to wrestle form with function. All things naturally have a form or shape–an outward appearance that differentiates one item from the next. Similarly, all art has a purpose or function, whether expressive, utilitarian, or persuasive in nature. Louis Sullivan, an influential architect from the late 19th century, believed that “form follows function.” Of course, he did not create his philosophy with VR game design in mind, but his ideas continue to be altered, debated, and applied to all forms of art today.
As we near the release of Loam Sandbox, we can begin to reflect upon the lessons learned while designing the VR gardening game’s art and consider how Sullivan’s guiding tenet influenced the choices, sacrifices, and concessions we had to make to get Loam looking and functioning how we wanted it to.
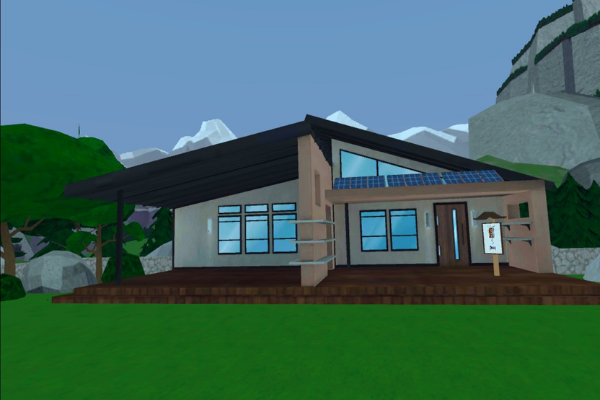

Sullivan pioneered the American skyscraper; he believed that each skyscraper’s external “shell” should reflect its internal functions.
Loam began with a purpose; we wanted to make a relaxing gardening simulation game in virtual reality. With that in mind, we started researching environments that would take advantage of the immersion provided by Oculus Quest headsets without inhibiting the game’s overall goal.
From the very start, Loam’s form followed its function. We ultimately decided that Loam’s setting would be a mountain valley region because the setting facilitates realistic gardening while providing a vast landscape that shines when showcased in virtual reality. Even when developing non-VR games, it is essential to consider how your game’s setting interrelates with its core gameplay.
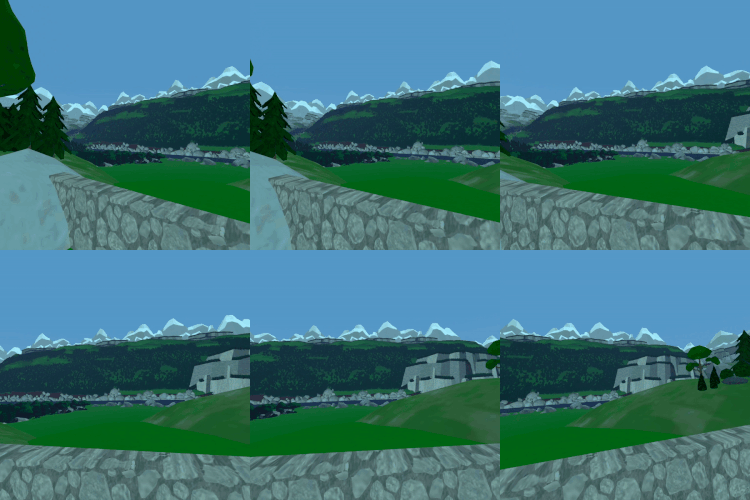
Now, with a basic understanding of Loam’s setting, we continued to research mountain valley regions and their associated cultures. Knowing that we wanted this game to be a relaxing respite for players, we used this research to hone in on the tone and feel of the game.

Hygge is a popular theme across Scandinavian cultures but is especially prominent in Denmark and Norway. Because this idea of comfort and the feelings of well-being that accompany it aligned so heavily with the function of Loam, it inevitably had a significant impact on the visual form of everything we see in Loam, from its architecture to the game’s textures and assets.
As we grappled Loam’s comforting visuals with its gardening gameplay, we also had to consider the game’s functionality as a whole in terms of its ability to run smoothly on both Oculus Quest and Quest 2 headsets. Before either the Oculus Quest Store or App Lab can distribute a game or app, it must meet the stringent Virtual Reality Check (VRC) guidelines set forth by Oculus.
These VRCs are yet another example of the role Loam’s functionality played in determining its visual form. These guidelines exist to ensure that all games on the platform are of a consistently high standard; unfortunately, meeting these guidelines often requires the alteration or removal of certain elements and assets.
Your game’s performance is a common reason you might retroactively modify your game’s form to align with its function, but another critical aspect to consider is the player’s experience, especially when developing virtual reality games.
Playtesting is an invaluable opportunity to ensure your game is not off-putting to players. Feedback from players will help you better align your game’s form with its function. By playing your game vicariously through a playtester’s fresh eyes, you’ll discover aspects of your game that should be improved, removed, or implemented.
Join our discord to keep up to date with every change we make to the world of Loam leading up to the release of Loam Sandbox.

Written by Nick Foster
KICKSTART YOUR CAREER IN GAME DEVELOPMENT

Written by Nick Foster
Let’s face it, we all want to make games. Game development offers a uniquely rewarding career that allows you to celebrate your work in unusual ways. In what other industry are you afforded the luxury of being able to literally play with your work? Luckily, every great game needs a team behind it—people who can design gameplay, implement sounds, write code, create assets, and playtest each build. Because game production blends technical abilities and logic with artistic expression and creativity, there’s a role for everyone regardless of your skillset or interests. Take our team, for example:

With so many accessible, often free online resources at your disposal, there’s never been a better time to enter the gaming industry. However, just like any other significant undertaking, figuring out where to begin is the hardest part. Whether you want to make game development your new career or your next hobby, our team of developers and artists will share within this article their go-to tools and resources, plus their suggestions for professionals looking to break into the industry.

With so many resources at your disposal, there’s never been a better time to enter the gaming industry.
Our team’s best advice for an aspiring game artist or developer would be to start small and think big. If you’re interested in forging a career in game development, then you should be prepared to spend time developing your abilities and familiarizing yourself with the software and languages you anticipate using the most. With that said, the best place for you to start your journey might actually be away from the computer.
You can’t start designing games until you start thinking like a game designer! Creating your own board game is an incredibly effective introduction to the world of game production. When you look at the steps involved, producing a board game is surprisingly similar to video game production. Regardless of their medium, every game needs a working set of rules designed with players in mind, then they eventually need playtesters to highlight potential improvements for the next iteration or build.
At the moment, many aspiring 3D artists and developers are denied the hardware needed to develop satisfying video games simply because it is too expensive to acquire. This is another reason board games are a great place to start, but if you’re truly ready to take the next step, we suggest taking advantage of the local opportunities unique to your area. By participating in meetup groups and organizations like the International Game Developer’s Association (IDGA), you may find regular access to the expensive hardware you’re seeking.
To craft the magical world of Loam, our team uses the game engine Unity, which you can download and start learning for free. As you familiarize yourself with Unity (or your engine of choice) and start producing your game, you will inevitably encounter obstacles. Bringing questions to your local meetup group is a great way to gain new insights, but this is not always possible. Thankfully, there are a plethora of free and accessible resources online!
Meeting others with similar interests, skills, and goals is perhaps the most exciting aspect of pursuing any passion. While attending college facilitates limitless networking opportunities, it is not the only path for aspiring developers or artists. Above all else (including degrees), you should value your portfolio, your previous work experience, and your connections in the industry. With so many possible ways to enter the industry, here is how our team managed to do so:
Aspiring game artists and developers should be prepared to spend lots of time refining their trade. Again, start small and think big; with consistent practice, you’ll start to master your software, understand programming languages, improve your artistic vision, and perfect your creative abilities.

Written by Nick Foster
PRE-PRODUCTION: WHY IT’S UNDERRATED

Written by Amy Stout
There is much more to game development than meets the eye. Even simple games with straightforward concepts underwent massive amounts of research, ideation, theorizing, testing, prototyping, iterating, and programming before eventually becoming what you recognize them as today. Looking back at what we’ve done thus far in developing Loam, there is one noticeably underrated step of game development that stands out: pre-production.

This is the point where you place the North Star that guides your game.
Pre-production is the first stage in a game’s development process. Characterized by endless questions and infinite possibilities, this is the point in the production lifecycle where you place the North Star that guides your game toward your vision. Pre-production may be daunting initially, but it becomes more manageable when you work through it one step at a time. This article outlines the critical steps of the pre-production phase in no particular order. Please feel free to jump around and iterate as needed—you may realize that a once brilliant idea may no longer fit the overarching theme of the game when you start filling in more detail.
Land on a Central Theme
Whether a team is small and independent or large and well-funded, establishing a central theme to build the game upon is a crucial step of pre-production. Taking into consideration that everyone has a distinct creative process, our team at Amebous Labs went about this step in multiple ways:
- We met collectively to throw out ideas and complete prompts that tested our imaginations, forcing us to think outside the box.
- We also had solo brainstorming sessions and shared our concepts with the team via two-minute pitch presentations. With so many great ideas to work with, we picked two of our favorites and split into teams to get started on the details. After a week of fleshing out these concepts, both groups presented their pitches. Together, we discussed what would work for VR and identified potential threats to the development process.
- We sought out and incorporated outside perspectives to land on our idea for Loam.
While this process will not be ideal for every team, it proved to be an uncomplicated way for us to consider everyone’s ideas. No matter how you decide to determine your theme, be sure to look at the whole picture by asking questions like: What artistic or development challenges do you anticipate encountering? Can you overcome these challenges with the resources available to you? What does the competitive landscape look like? How can I monetize the game? Is there a gap in the market for a game like this one?
No other phase of game development allows for as much creative freedom as pre-production does. Fully formed ideas are not required at this point because there are still so many unknowns. So rather than focusing on the details, have fun brainstorming some themes, see which interests you the most, and then pick a viable option.
Define Your Target Audience
You cannot please everyone. I learned early on that everyone has a different set of preferences in what they look for from gaming experiences. What one person finds enjoyable, others find unenjoyable. Even within our team, each member has varying interests and preferences. This means there is no right or wrong answer to game design. Instead, define your target audience and design your game with them in mind.
With that said, a game’s playerbase is not limited to its user personas. Someone who does not identify with your outlined user personas may play and enjoy your game just as much as someone who fits that demographic perfectly. Still, when we need to make decisions, we must first think about our target audience and ask ourselves if it aligns with their desires and motivations.
Check out this recent Under the Microscope article to discover how we created user personas for Loam.
Do Your Research!
Play games—lots of them. And as you play them, replace your mindset and biases with those of your target audience. What about this game resonates most with its superfans? Analyze every element that comprises the gameplay and consider which details attracted its devoted players.
Loam’s pre-production phase took place during a time when the team was working 100% remotely. Using Discord, we played a new game together each week in a series of aptly named “Game of the Week” meetings. Different members of our team suggested titles like Stardew Valley, Animal Crossing, Minecraft, Among Us, and Cook-out. The member that chose each week’s game would become the leader for that week’s play session, identifying their favorite parts of the game plus any potentially useful mechanics to keep in mind when making our own game. Not every game we played was within the same genre as ours, but we focused on specific aspects that we could use as prompts to start a conversation.
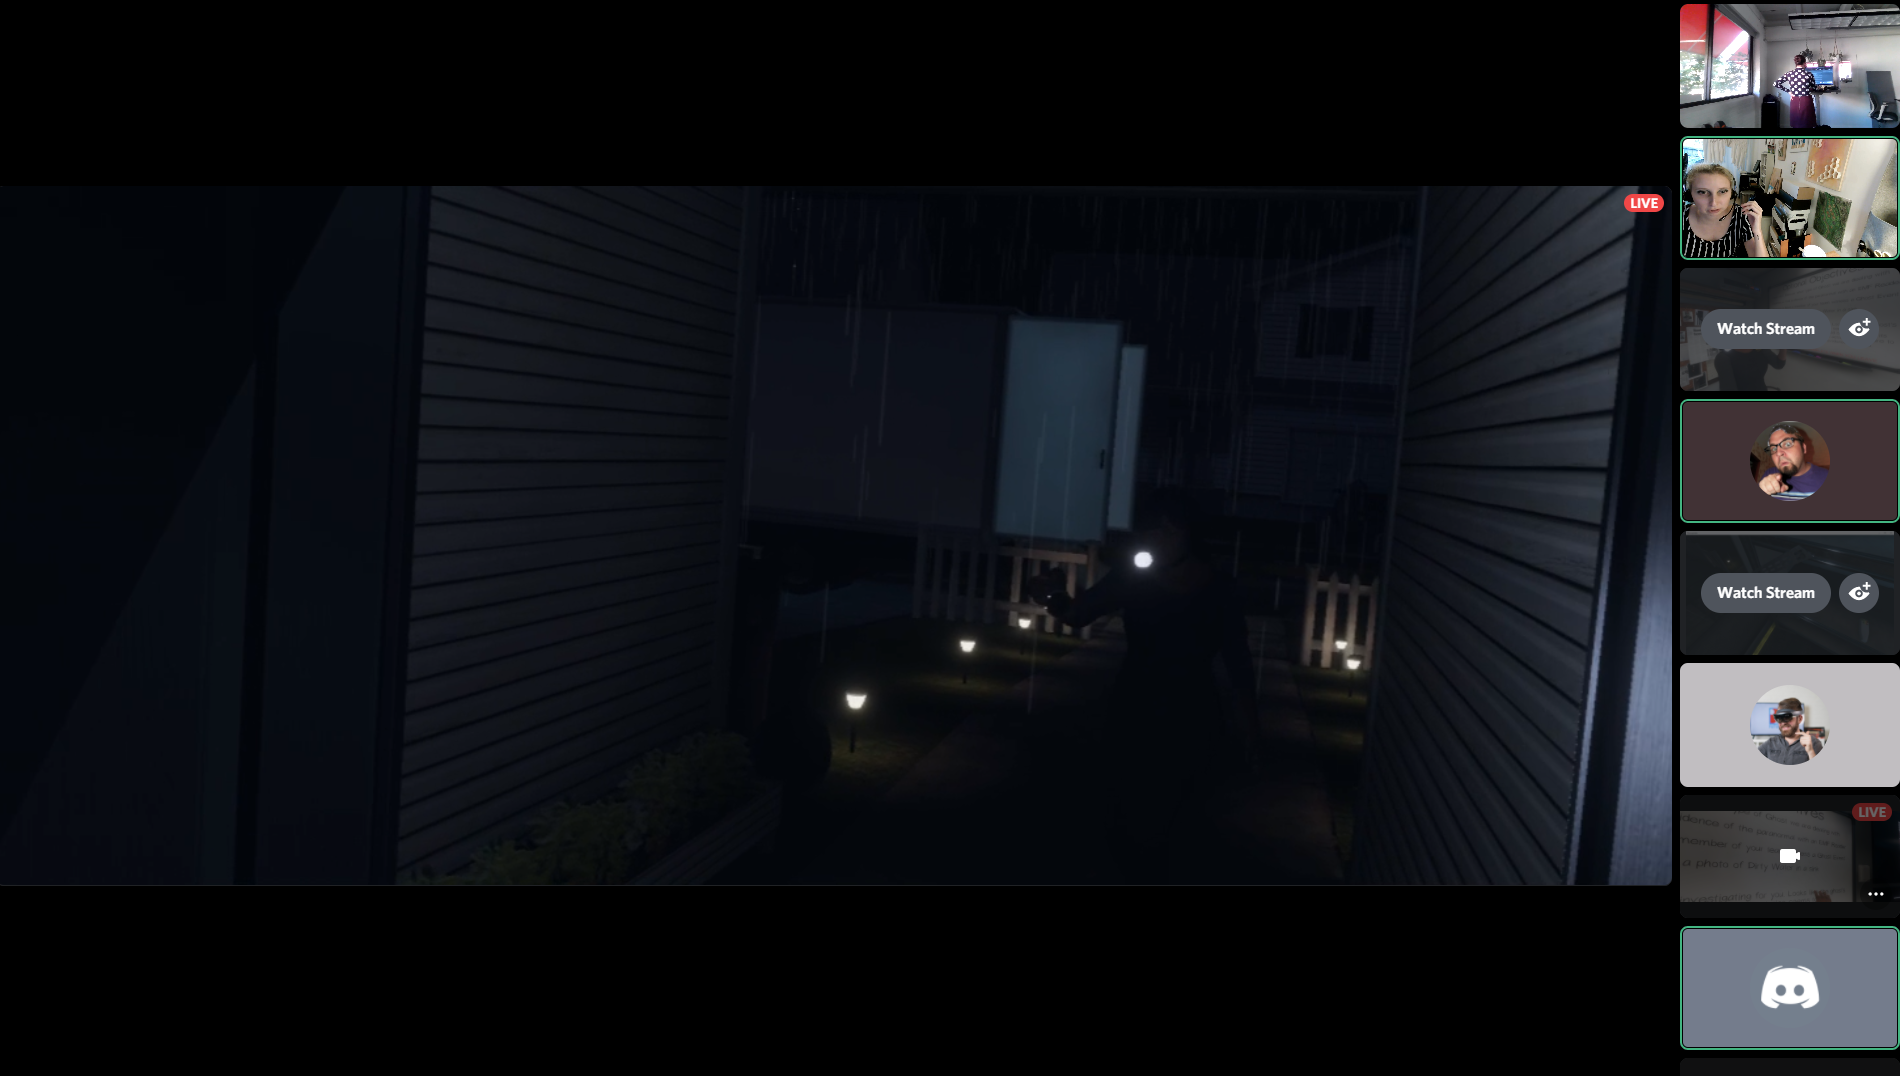
The team playing Phasmophobia during a special Halloween edition of Game of the Week.
If you are limited in resources or do not have access to certain games, then you’ll need to get creative. Find people on Twitch that stream relevant games and listen to what they have to say. Here, you will learn about your target audience’s motivations and where their frustrations lie within the current gaming landscape. If for no other reason, pre-production is underrated because its methods of data collection are so fun!
Figure Out How You Can Do It Better
Finding inspiration by observing how other games handle certain situations will save you time and frustration during development but avoid doing things the same way! Figure out how you can adapt and customize your findings to fit your game. Countless games are hitting the market each year, so yours needs to stand out. To do this, you must determine what your unique selling proposition will be. There must be something that makes your game more appealing to your target audience than the other games available today.
By no means should you have all the answers during pre-production, but you should start thinking about what you can do to make your game different. We accomplished most of our theorizing about Loam’s in-game mechanics and features during this stage of the development process. I suggest you consider prototyping these theories as needed and consider using temporary assets to speed up the process. We relied on our imagination and used cubes and cylinders as objects to determine whether or not the movements in VR felt natural and enjoyable.
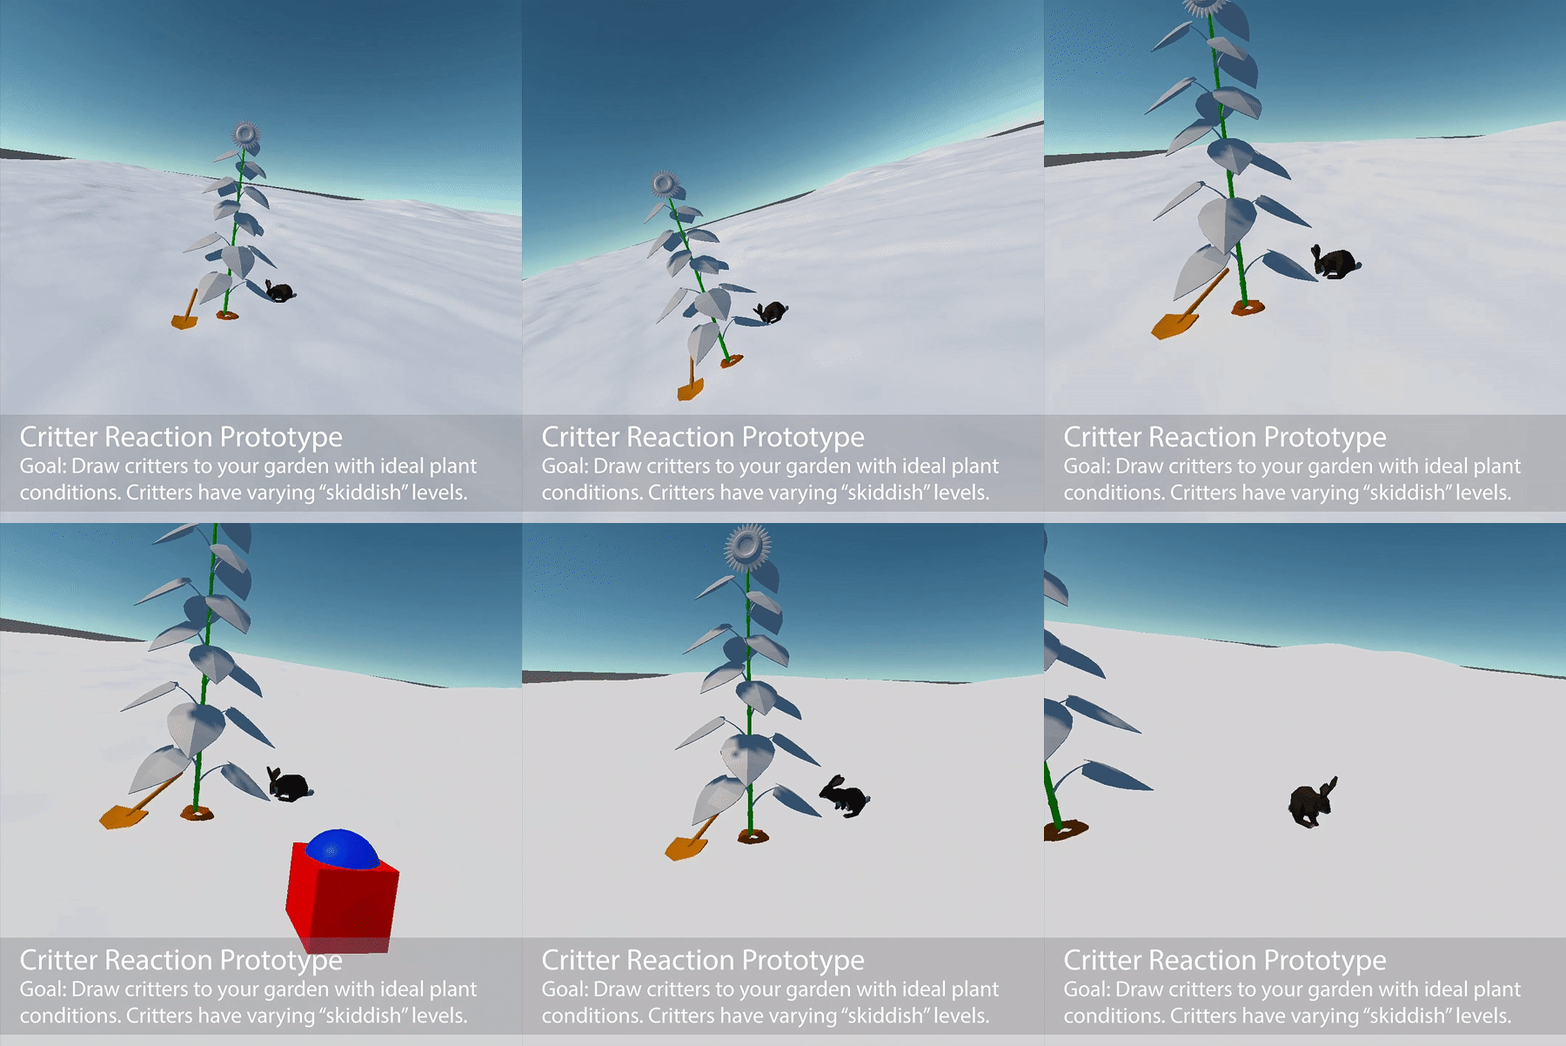
Early game footage featuring temporary assets.
Bring the Vision Together
The Game Design Document (GDD) and concept art complement each other well to help your team fully realize their vision. From this point on, any game elements you have decided upon belong in the GDD. Our team uses Confluence to document EVERYTHING in our game. It is a living, constantly changing document that we use as our source of truth. Any team member can log into Confluence and easily find Loam’s latest updates, notes, and decisions, but keeping it organized is a team effort. Here, pre-production planning comes in clutch. Create your hierarchy and organizational strategy during pre-production to ensure that everyone who touches the document keeps within those confides. It was intimidating to start the GDD, but it was easy to build upon once we had the framework.
We started our GDD as a shared Word doc. Ultimately, this did not satisfy our needs, so we moved it to Confluence. If you find out a process or software does not work well for your team, change it! Confluence’s features were well worth the time it took to migrate the information there from Word. Partway through the pre-production process, we also switched our project management software to Jira. It works in tandem with Confluence, making it super convenient to connect tasks and reference design documentation. Be open to reevaluating how you are staying organized as a team because what you needed at the beginning stages may not cut it a few months into development.
Concept art is the second major piece of the puzzle when creating the vision for the game. Concept art isn’t used in the game as is; instead, it guides a game’s style throughout development. Our Art Director, Shelby, drew maps and sketched out sample game objects that helped define what the world of Loam looks like today. We had visual inspiration to reference, but our goal was to create something unlike anything we have seen before.
Click here to dive deeper into how our art team created the look of Loam.
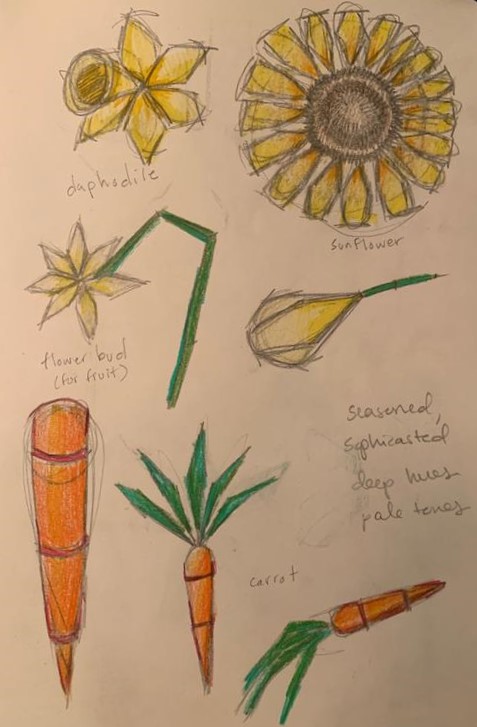
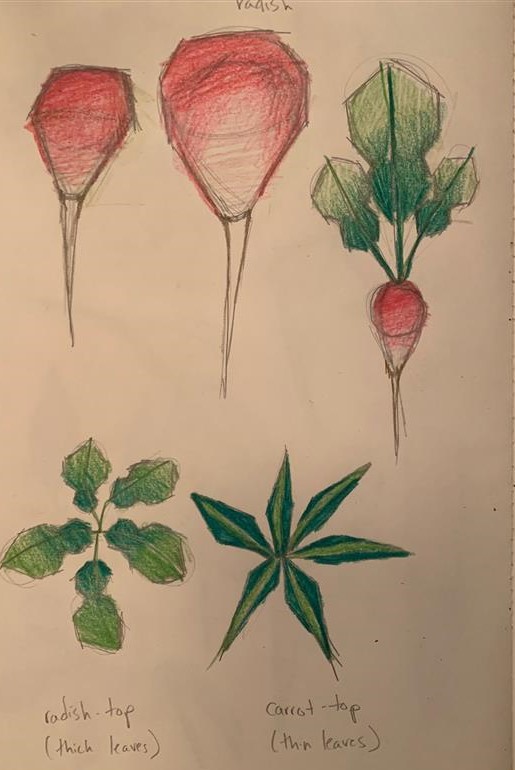
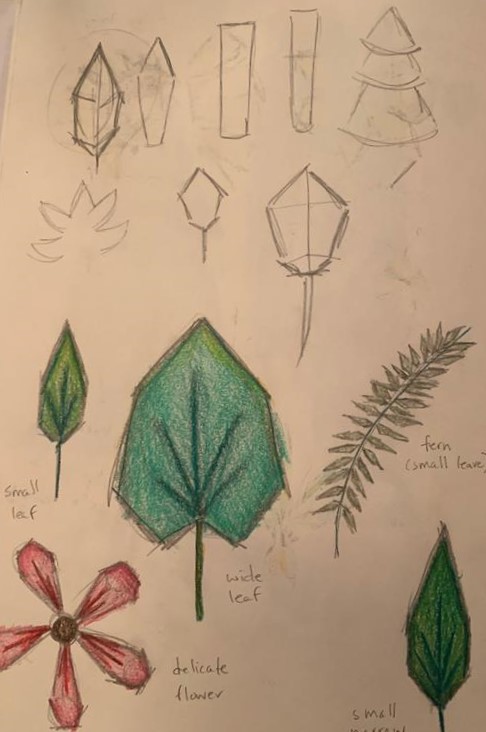
The concept art for Loam’s carrots, radishes, and leaves.
Logistics
The last part of pre-production that I’ll mention is logistics. By starting here, you may find your team better equipped to make decisions during other stages of pre-production. Whether or not you choose to begin pre-production with logistics, you should remember to consider the following points:
- Prioritize your must-haves. You will have to make compromises throughout the development process. Identify your non-negotiables early on to ensure you don’t lose focus.
- Plan your resources. If you are running a team, you should plan when people are available to work on the game.
- Budget your finances with your timeline in mind. Make sure you have enough funds to last through the duration of development with some left over to market the game. As fun as creating a game can be, you likely want people to play it. Keep that in mind when planning out your schedule and budget.
Regardless of the amount of planning you do, things will always change. We have learned an exorbitant amount about developing for the Oculus Quest platform over the past year as we try to push the boundaries of the headset’s capabilities. The platform is continuously evolving, forcing us to reevaluate possibilities at every turn.
Pre-production is underrated because it combines creative freedom and imaginative thinking with careful (but fun!) research and logistical planning. It provides a vital window for your team to hone in on the direction you’d like to take your game.

Written by Amy Stout
VR AS A TOOL FOR SOCIAL CHANGE

Written by Linda Zhang
Virtual reality is an amazing tool for creating immersive experiences. While traditional 2D media provides a window through which we can peek into a world that otherwise can’t be seen, a VR headset “puts” us there by supplying an entire suite of mesmerizing 3D visuals, audio, and haptic stimulation. Together, these attributes enable VR game designers to design breathtaking games and create life-like simulations. While big-budget games may garner all the attention, VR can be an indispensable tool for achieving positive social change. In this blog entry, I would like to share how virtual reality is being used or could be used for social good to inspire the production of meaningful VR experiences beyond just games and entertainment.


As a powerful tool for empathy, VR can be a valuable medium for compelling storytelling.
Developers can design virtual reality to create training scenarios that allow users to test or develop skills, such as public speaking, before applying them within physical space. For those who experience severe anxiety standing before a room full of people, we can create a tailored VR experience complete with virtual characters looking at the player or utilize a 360-degree video recording of actual people seated in a lecture hall. We could even program the audience to occasionally interrupt the user’s speech with questions to better prepare users for situations where they lose their trains of thought.
VR is also helpful in safely simulating stressful accidents or dangerous scenarios. Allowing users to adequately prepare for these situations reduces the likelihood of panic or chaos should these dangers ever arise in physical space. This ideology is commonplace within the field of VR training.
Some VR experiences function to help people overcome PTSD or various phobias. Psychological studies have shown that exposure therapy is the most effective treatment for phobias; VR can be a powerful tool throughout this process because of its ability to provide a safe environment where the fears can be slowly introduced.
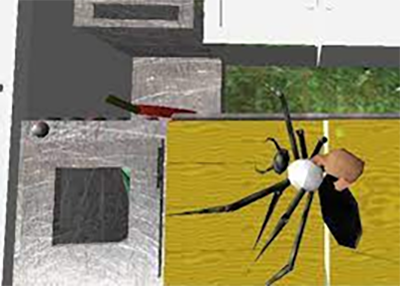

VR Therapy for Spider Phobia created by HITLab, University of Washington
A well-designed VR experience brings a state of presence to the user that can be leveraged as a powerful tool for users to empathize with communities that they may never meet or relate to in physical space.
In a VR demo created by the Georgia Tech School of Interactive Computing, the user operates a wheelchair to maneuver through a virtual space decorated with stairs and ramps. The demo enables players to empathize with wheelchair users and appreciate the accessibility services that ableists often take for granted. Ultimately, experiences like this may lead to greater advocation for accessibility services in physical spaces.
First Impressions is a VR experience that depicts how babies view the world throughout their first 6 months. Beginning with blurry, black and white vision that gradually grows into the colorful, lively world we recognize today as adults, this experience helps us to understand the limited sensory aptitude of babies. Maybe the next time you see a baby crying, you won’t be as annoyed!
Other VR experiences like Anne Frank House VR and Home After War, in which refugees return to their homes under Islamic State (IS) control. These experiences help users empathize with individuals who’ve experienced war at home by placing users in the shoes of real people to empathize with their situations.


As a powerful tool for empathy, VR can undoubtedly be a valuable medium for compelling storytelling. Development in Gardening (DIG), a non-profit organization devoted to improving the nutrition and livelihoods of vulnerable communities, created a 360-degree film entitled “Growing New Roots” that documented “nutritionally vulnerable communities throughout sub-Saharan Africa.” Produced by Dana Xavier Dojnik, the film’s use of 360-degree cameras provides an authentic view of their cultures and lifestyles. When I watched the movie, it felt like I was there, standing alongside the people in Uganda doing their daily activities.

Written by Linda Zhang
PLAYTESTING: WHAT TO EXPECT

Written by Paul Welch
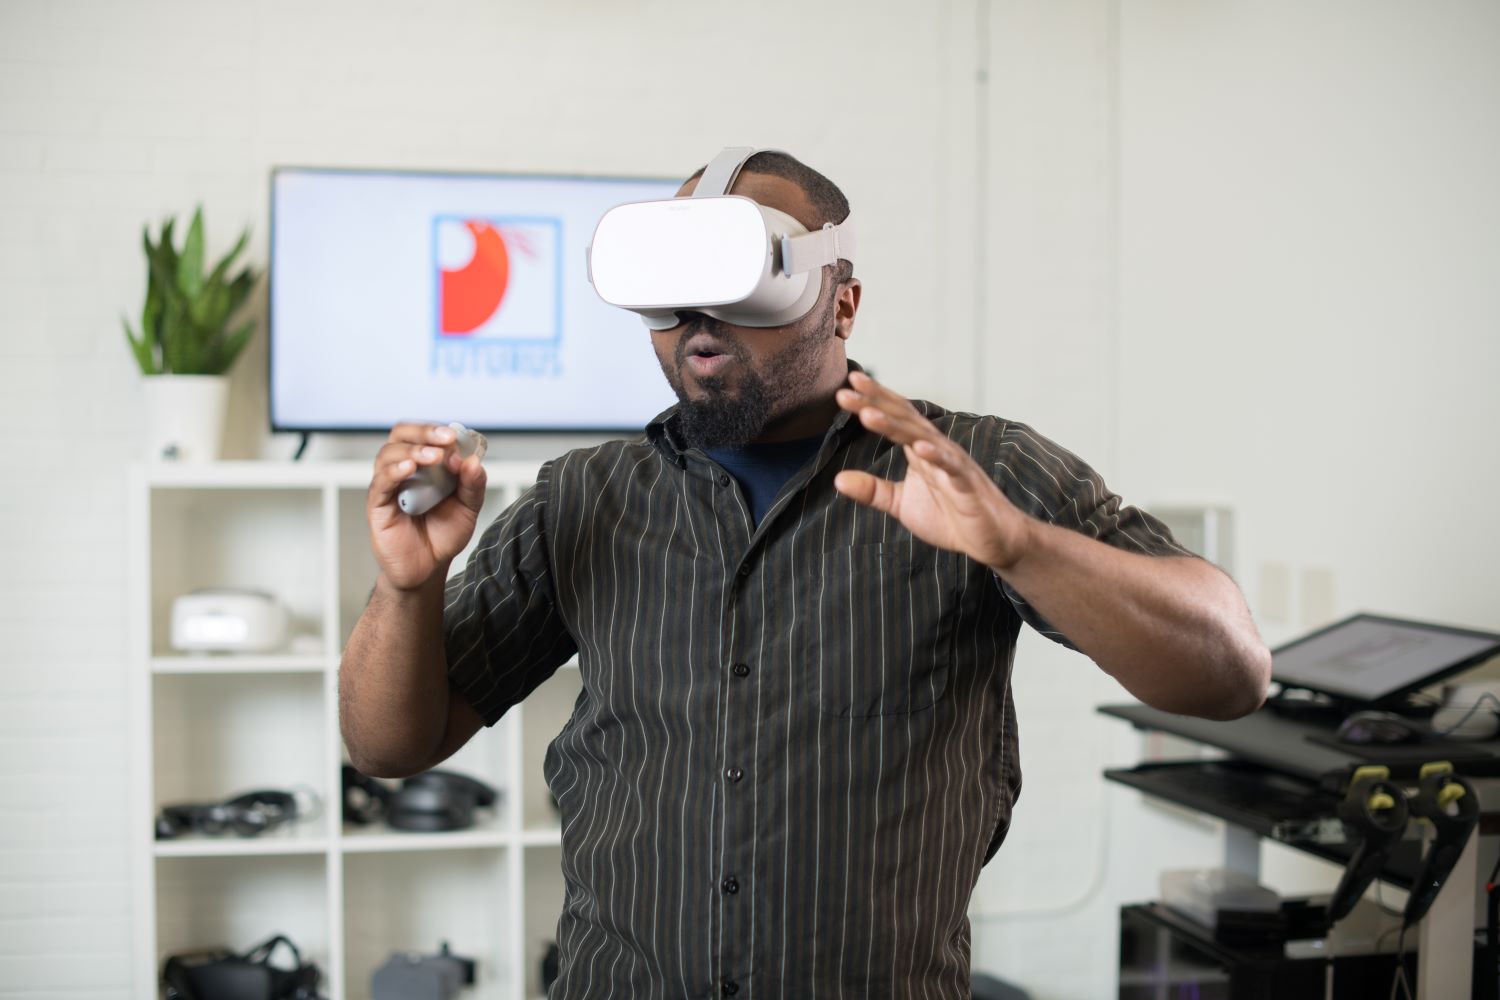

Playtesting can help you determine if you need to address any design issues.
What is the difference between QA (quality assurance) and playtesting?
Quality assurance is more of an internal system for finding bugs, verifying features and gameplay functionality. A lot of time is spent on QA to find, confirm, and reconfirm any errors in code or design. The QA team then documents how these issues and bugs can be recreated reliably, laying them out in a digestible manner for developers and designers to be addressed. Depending on the project, this can be a very time-consuming task.
Playtesting is a system where external players are brought in to play a game. During these sessions, we look for things like: How well does a feature match the intended design outcome when being used by a player? Does this feature meet the designers’ goal? How well does the UI (user interface) flow works? Does the player interact with the game world in the way we expected, or if not, what did they do and why?
Players are unpredictable in many cases, and we must design around what we want them to do and what they might do. We cannot always guess how players will use what we give them, so this process helps us find that out. These sessions are not meant for finding bugs since, hopefully, most were found during the QA process. Of course, sometimes they slip through, and we take note of those when they show up during sessions.
How did you get started in playtesting?
When I was in high school I participated in various in-person playtest sessions for larger game studios. These were pretty few and far between, though, maybe a couple a year at most. It was not until I was in college that I spent a lot more time doing it for a couple of companies that specialized in organizing these sessions online for developers. At the peak, I was clocking around 30 hours a week doing playtest sessions. I have more than five years of uninterrupted experience being on the player side of these sessions, and now I am on the development side with Amebous Labs.
How can others get involved in playtesting?
A lot of studios and platforms allow you to sign up for beta testing through their account settings. While these are not the same as a playtest session, occasionally, a studio may send out an email inviting people for a session who have signed up through these steps. There are also a handful of companies in the industry that specialize in organizing and running playtest sessions for studios; one notable is The Global Beta Test Network. Typically, you fill out a survey or questionnaire, and if you fit the demographic they are looking for, they will accept you for a session. If you don’t get accepted right away, do not be discouraged since every session has a different set of criteria for what they are looking for in the players they choose. Some of the things they look for might be interest in specific game genres or experience level with said genres. They may want an experienced player in one session but someone that is new to the genre in the next, so you never know.
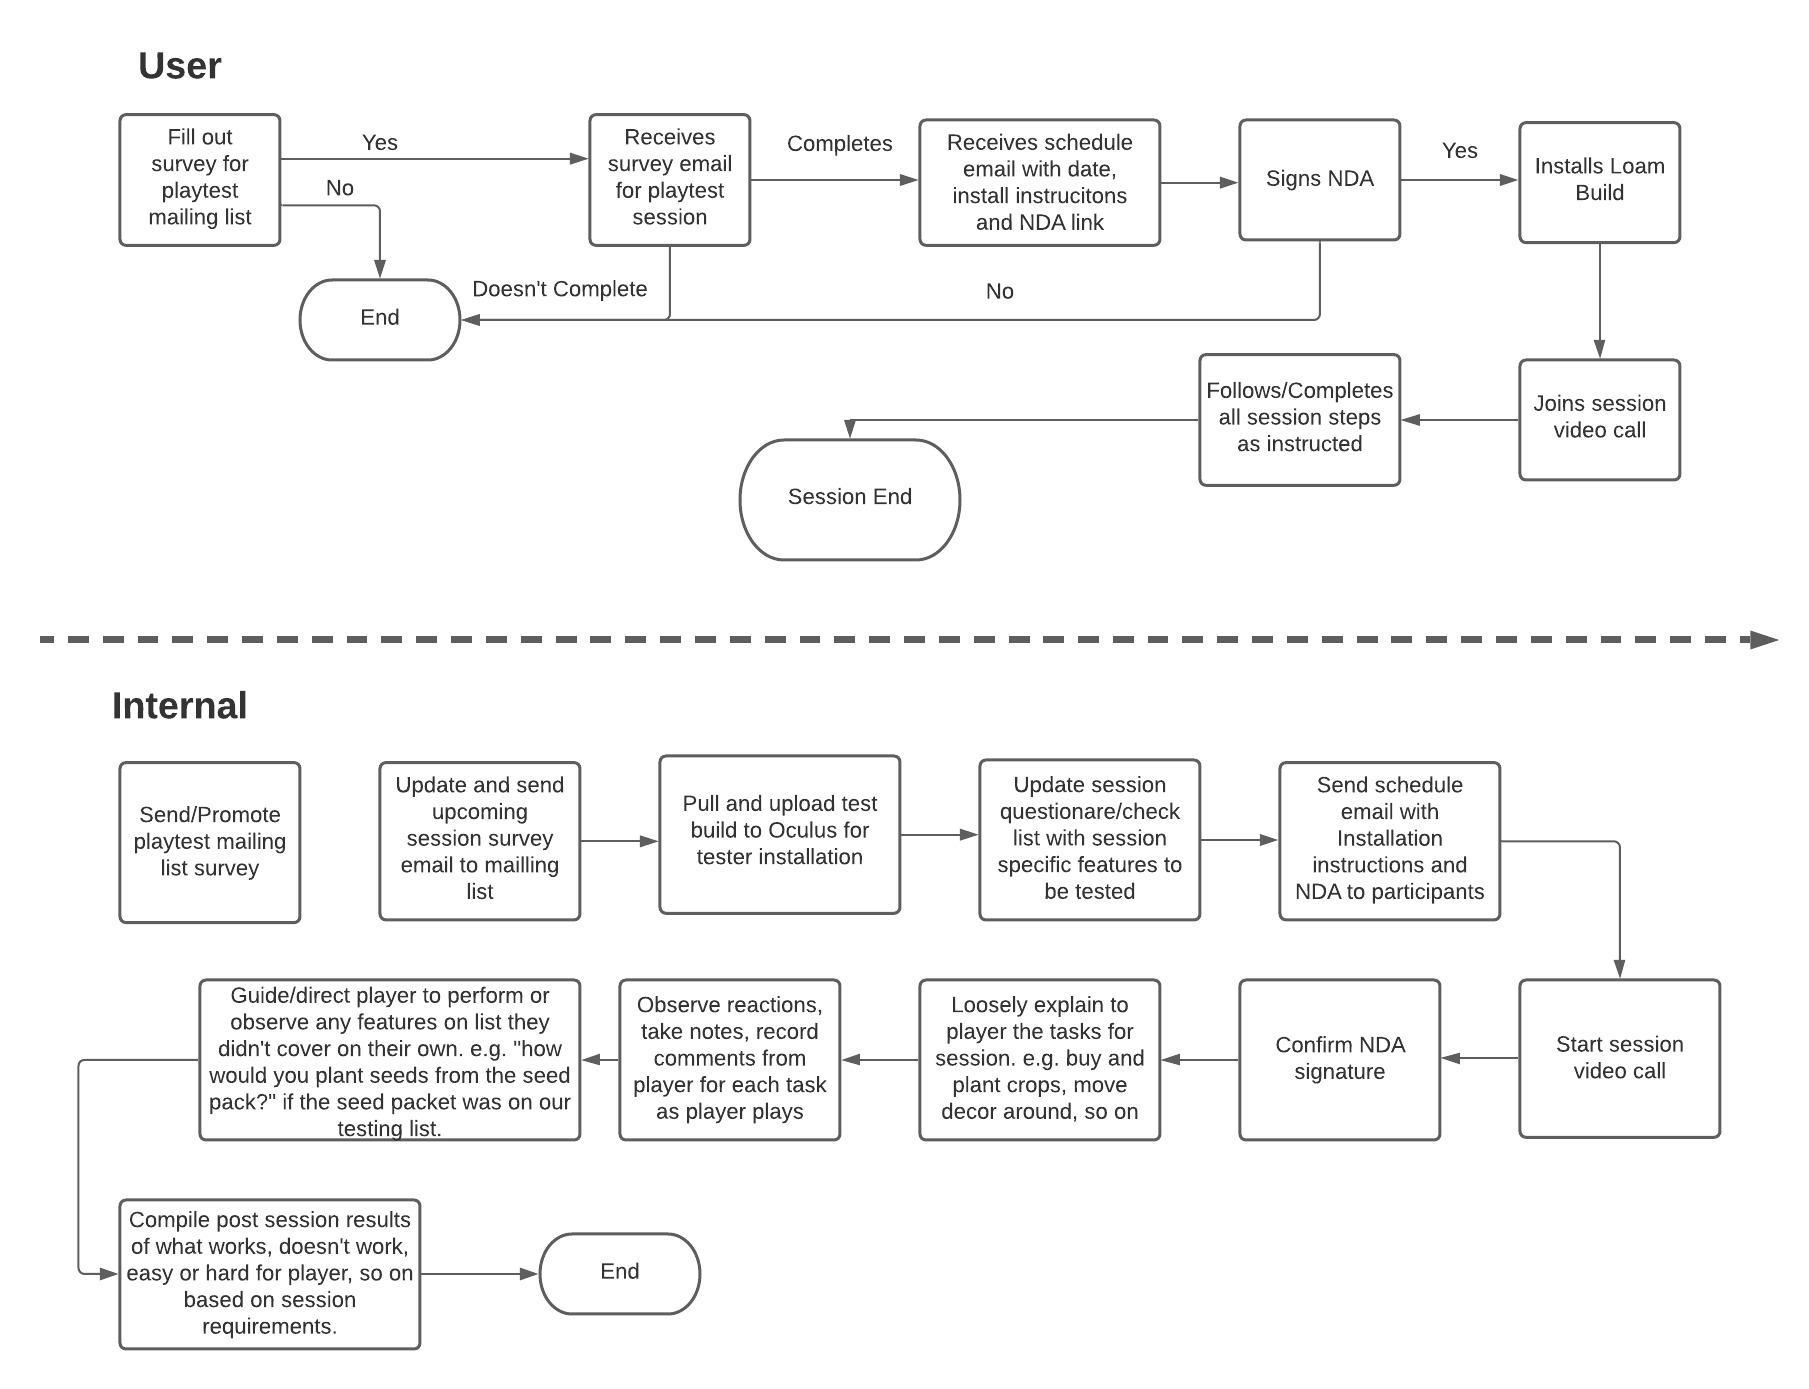
We have playtesting opportunities at Amebous Labs. Fill out this survey to get added to our session notification email list.
What does a playtesting session look like?
Sessions can take many forms, from UI layouts on printed paper to chopped up small sections of a game with specific goals to full game builds and play-throughs. Ultimately it comes down to what the developer is trying to learn from a session and how that data needs to be collected.
What happens in a session is determined by the specific goals of the session. For example, the developer might want to know to how players react to and interact with a specific event that happens during a particular level. Do they just follow the laid-out directions, or do they explore and try to do things outside the design scope? They need to run this test with maybe a dozen people so that they can see if certain outcomes are done by more than a single player or not. As a player, you might be told to go directly to a particular area and start a mission and play through it. We would then monitor to see if you did anything during the mission that was outside our design intentions, like to activate the mission, you have to enter a certain building, but you left the building right away since one of the tasks was easier to achieve outside even though the designers meant for you to stay inside the whole time.
What are the top 3 tips for running a successful playtest session?
For those who are on the development side, some tips for running a successful playtest include:
1. Pay attention to the player and their actions. Listening to what the player is saying out loud during a one-on-one session, as well as paying attention to their body language and in-game actions can tell you a lot about how they feel about something. It might take a player several tries to understand how to perform an action and, in the process, might get a little agitated even if they do not realize it. They might say something they were doing was not hard after figuring it out, but you could tell they got a little upset while trying to learn how to do it through their body language and actions. This can help you determine if you need to address a design issue to help guide players better. It might or might not be bad that the action they were performing was challenging to learn, that is your decision as a developer, but now you have some data points to consider.
2. Do not take comments personally, and do not get defensive with the player. This is not a judgment on how you or the developers are doing. They are simply commenting on what they see right in front of them and stating how they feel about it. Take note of the comments and see if you can use them to help guide development in a better direction if they form a common theme amongst all the players that participated. No matter how good an idea sounds on paper, it does not always work out in action, and that is why we are testing with people outside the development team to get honest opinions. At the same time, always be understanding, and do not get annoyed with a player’s performance or actions in games. We are not trying to judge how good or bad the player is, but rather our own work. If a player does not understand a feature, then simply explain it to them if it is an action they need to take to move forward or guide them to skip it. Not everyone is going to have the same experience or skills in the game that you are testing.
3. Have a clear goal for each session. Layout what areas of your game you need tested and clearly defining what you are looking for before the session. This will help you guide the tester through the session and accomplish your goals. Even though some sessions might be more of a stress test of sorts, there will still be some main focal points or actions you need a player to focus on, and be able to guide them to these quickly will help.
We’ve started our playtest sessions for Loam and would love your help. Not to worry if you don’t have to have an Oculus Quest; we made sure to have multiple options for everyone to give their input. We also made it easy for you to sign up to playtest; click here to answer a few questions. We look forward to showing you a sneak peek into Loam.
